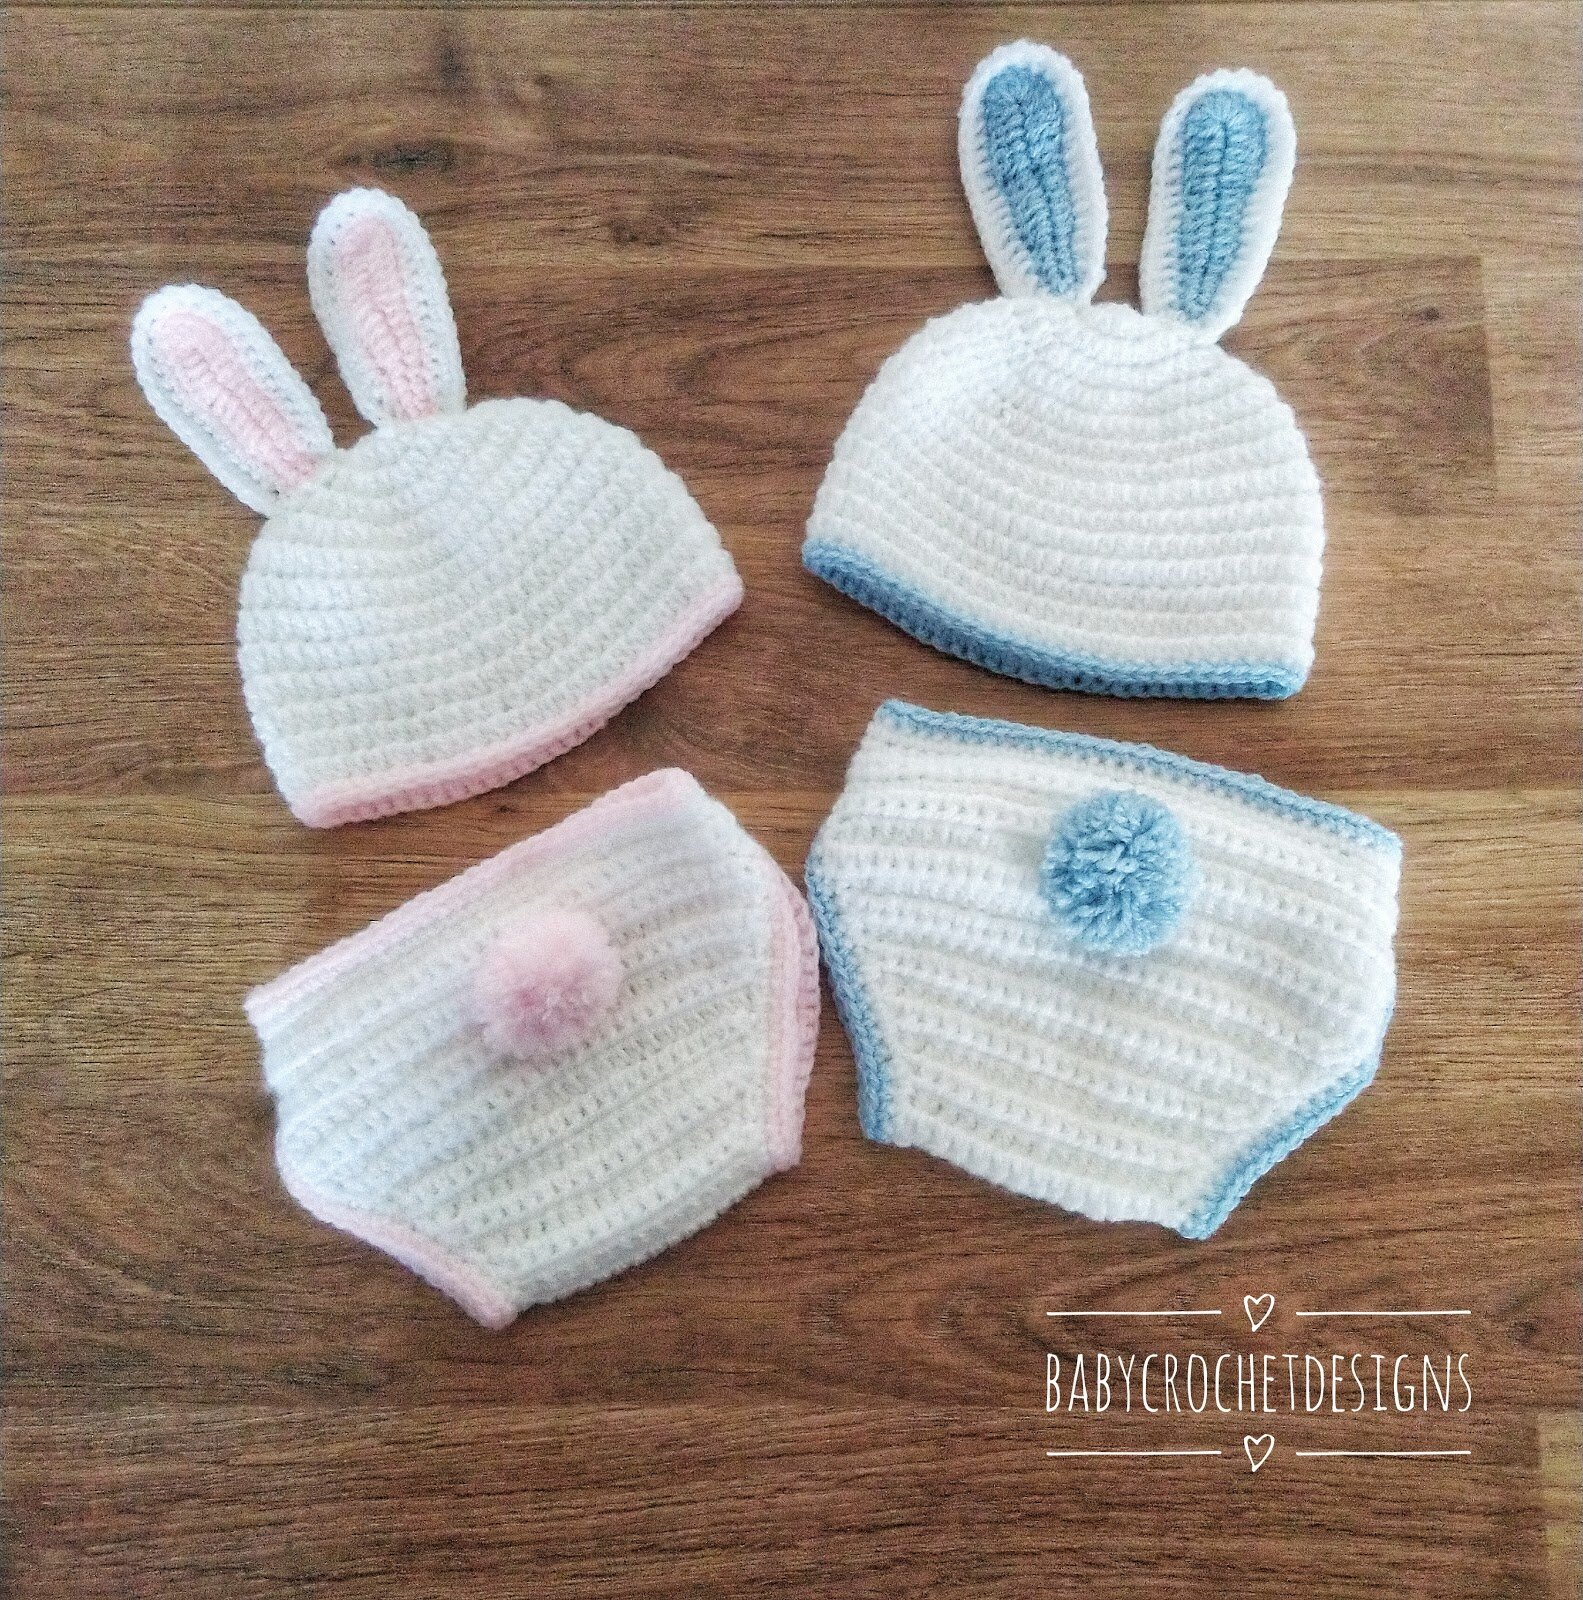

Bunny Diaper / Nappy Cover & Hat set Free Crochet Pattern
This cute bunny hat and diaper cover is quick to work up and will make a perfect gift for a cute photo shoot.
The add free pattern in sizes newborn to 1 year can be purchased as a PDF download here for £2.50
Written in English US terms with abbreviations for UK
sc=single crochet (double crochet in UK)
hdc=half double crochet (half treble crochet UK)
dc=double crochet (treble crochet UK)
ch=chain
inc=increase (by crocheting two stitches into stitch)
dec=decrease (by crocheting two stitches together)
ws=wrong side
rs=right side
rpt=repeat
slst=slip stitch
Materials
4 mm hook I use this set from Amazon*
Approx 100g Paintbox yarns dk LoveCrafts Paper white and candyfloss pink or duck egg blue
2 x 15 mm buttons for diaper cover.
Gauge square
With 4mm hook
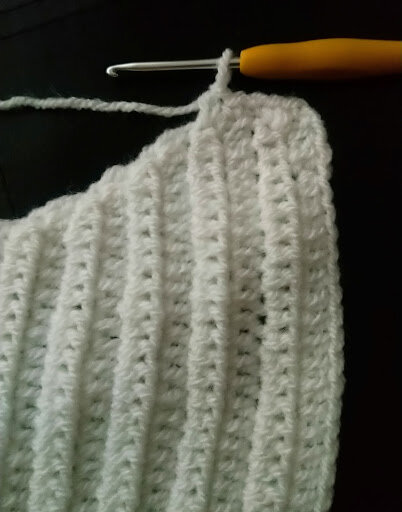
Row1 Ch12, hdc in 3rd ch from hook and each chain across. (9) Turn
Row2-5 ch1, hdc in base of ch1, hdc 8. (9) Turn
Square should measure 5cm x 5cm.
If you're out with a 4mm hook try a 3.5 or 4.5mm hook.
If you have problems hitting the length but the width is ok, try dc instead of hdc.
* Working in first stitch ch1 does not count as a stitch so always ch1 and hdc in the first stitch, unless stated*
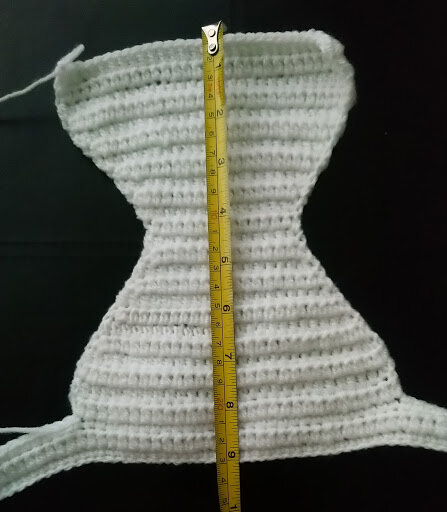
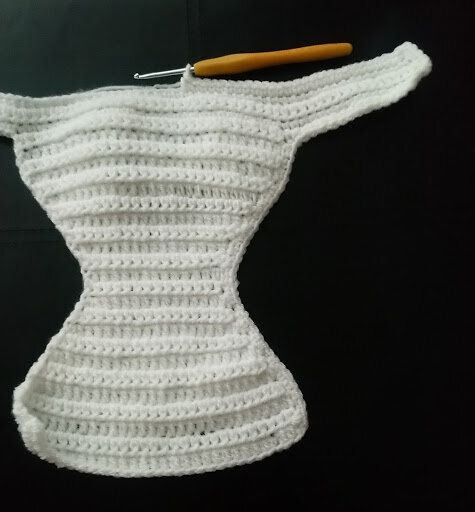
Diaper Cover Newborn
Ch61
Row1 sc in second ch from hook and each ch across. (60) Turn
Row2 ch1, dc in same, dc in each to end. (60) Turn (This round will be used to fasten button)
Row3 ch1, sc in base of ch1, sc in each to end. (60) Turn
Work should measure approximately 14 inches wide.
Fasten off.
Row4 skip 15 stitches and join in yarn, ch1, hdc in same, hdc next 29, leave rest unworked. (30) Turn
Row5-6 ch1, hdc in same, hdc next 29. (30) Turn
Row7 ch1, dec, hdc next 26, dec. (28) Turn
Row8 ch1, dec, hdc next 24, dec. (26) Turn
Row9 ch1, dec, hdc next 22, dec. (24) Turn
Row10 ch1, dec, hdc next 20, dec. (22) Turn
Row11 ch1, dec, hdc next 18, dec. (20) Turn
Row12 ch1, dec, hdc next 16, dec. (18) Turn
Row13 ch1, dec, hdc next 14, dec. (16) Turn
Row14 ch1, dec, hdc next 14, dec. (14) Turn
Row15-16 ch1, hdc in same, hdc next 15. (14) Turn
Row17 ch1, 2 hdc in same, hdc next 12, 2 hdc in last. (16) Turn
Row18 ch1, 2 hdc in same, hdc next 14, 2 hdc in last. (18) Turn
Row19 ch1, hdc in same, hdc next 17. (18) Turn
Row20 ch1, 2 hdc in same, hdc next 16, 2 hdc in last. (20) Turn
Row21 ch1, hdc in same, hdc next 19. (20) Turn
Row22 ch1, 2 hdc in same, hdc next 18, 2 hdc in last. (22) Turn
Row23 ch1, hdc in same, hdc next 21. (22) Turn
Row24 ch1, 2 hdc in same, hdc next 20, 2 hdc in last. (24) Turn
Row25 ch1, hdc in same, hdc next 23. (24) Turn
Row26 ch1, 2 hdc in same, hdc next 22, 2 hdc in last. (26) Turn
Row27 ch1, hdc in same, hdc next 25. (26) Turn
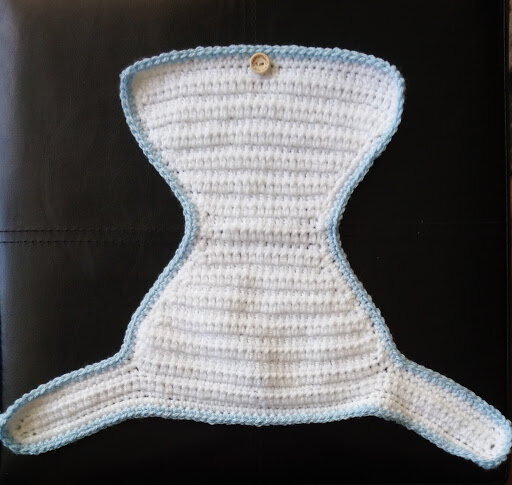
Continue to sc all around the diaper with the same colour yarn.
Fasten off.
Change yarn colour and sc all around the diaper.
Fasten off.
Sew a button that fits through the dc, at the centre of the front.
Work should measure 9.25 inches.
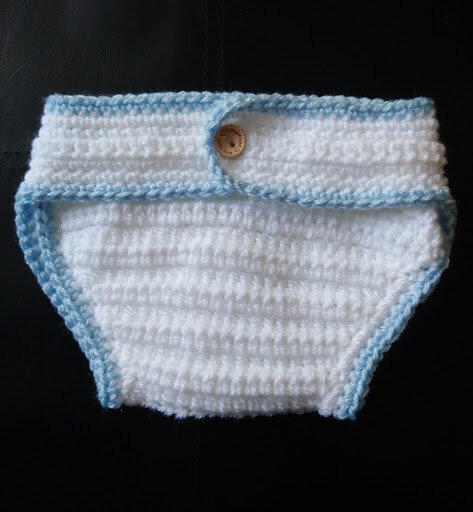
Hat Newborn
Hat to fit 12-14” head, 5” tall when finished.
Rnd1 ch4, slst to first to form a ring, ch2 and 10 hdc in ring, slst to top of ch2. (11)
Rnd2 ch2, hdc in same, 2 hdc in all, slst to first. (22)
Rnd3 ch2, hdc in same, hdc 1, *inc, hdc 1* repeat to end, slst to first. (33)
Rnd4 ch2, hdc in same, hdc 2, *inc, hdc 2* repeat to end, slst to first. (44)
Rnd5 ch2, hdc in same, hdc 3, *inc, hdc 3* repeat to end, slst to first. (55)
Work should measure 10 cm across
Rnd6 ch2, hdc in same, hdc next 54, slst to first. (55) Turn
Repeat round 6 till work measures 5 inches.
Fasten off.
Last rnd ch1, sc in base of ch1, sc to end, slst to first and fasten off.
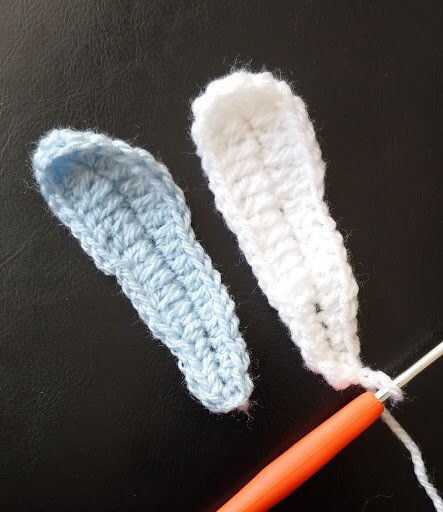
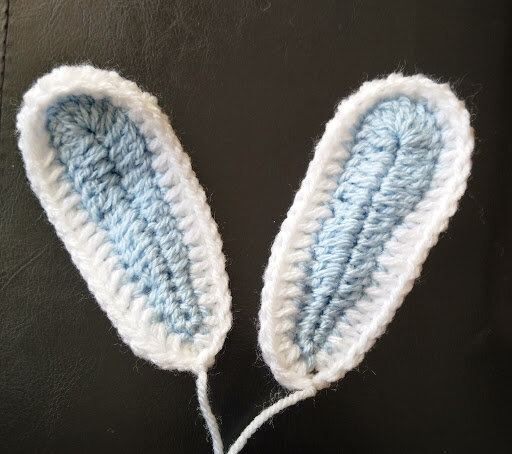
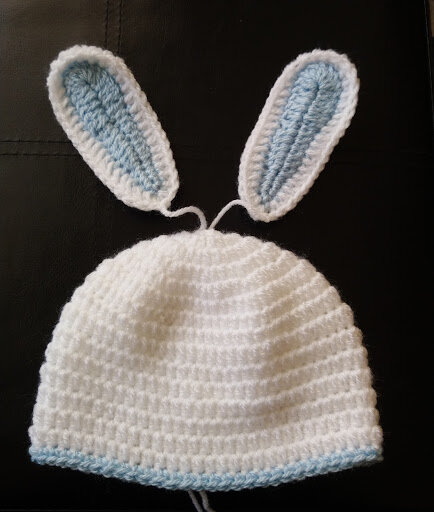
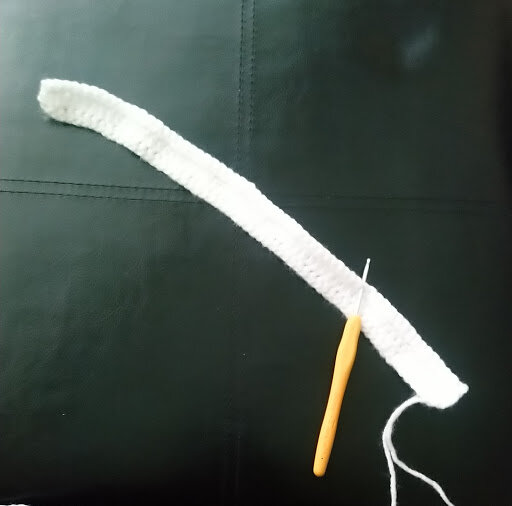
Ears
Make 2 in pink or blue and 2 in white.
Rnd1 ch18, sc in second chain from hook, 1 sc in next 3, 1 hdc in next 7, 1 dc in next 5, 8 dc in last chain then working along other side, 1 dc in next 5, 1 hdc in next 7, 1 sc in next 4, slst to first. (40)
Fasten off.
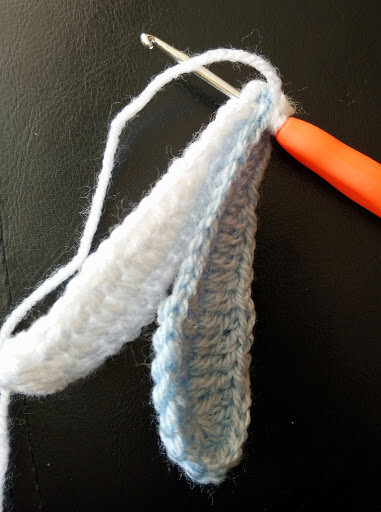
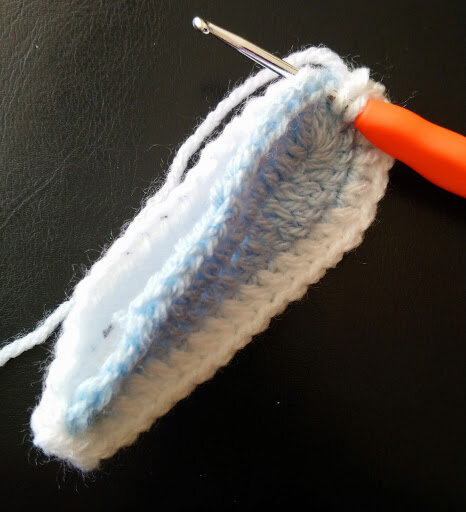
Place pink or blue and white together and hdc all around with white yarn, repeat for the second ear.
Fasten off leaving a long end for sewing. Sew ears in place, (it helps to pin in place first), and sew in all ends.
That's it completed. I hope you enjoyed making my pattern!
I would love to see your makes feel free to share @babycrochetdesigns Instagram, Pinterest and Facebook.
*COPYRIGHT 2021 This pattern is made for personal use only. You may not copy, share or sell this pattern, you may make and sell items made from my patterns but please credit me @BabyCrochetDesigns as the designer many thanks*