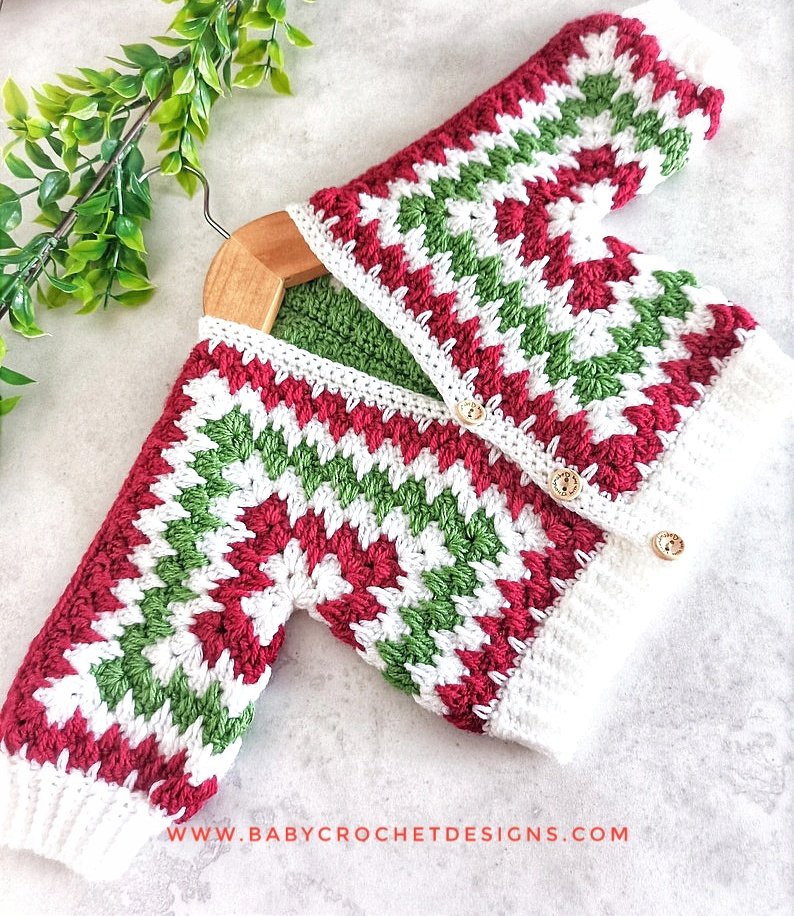
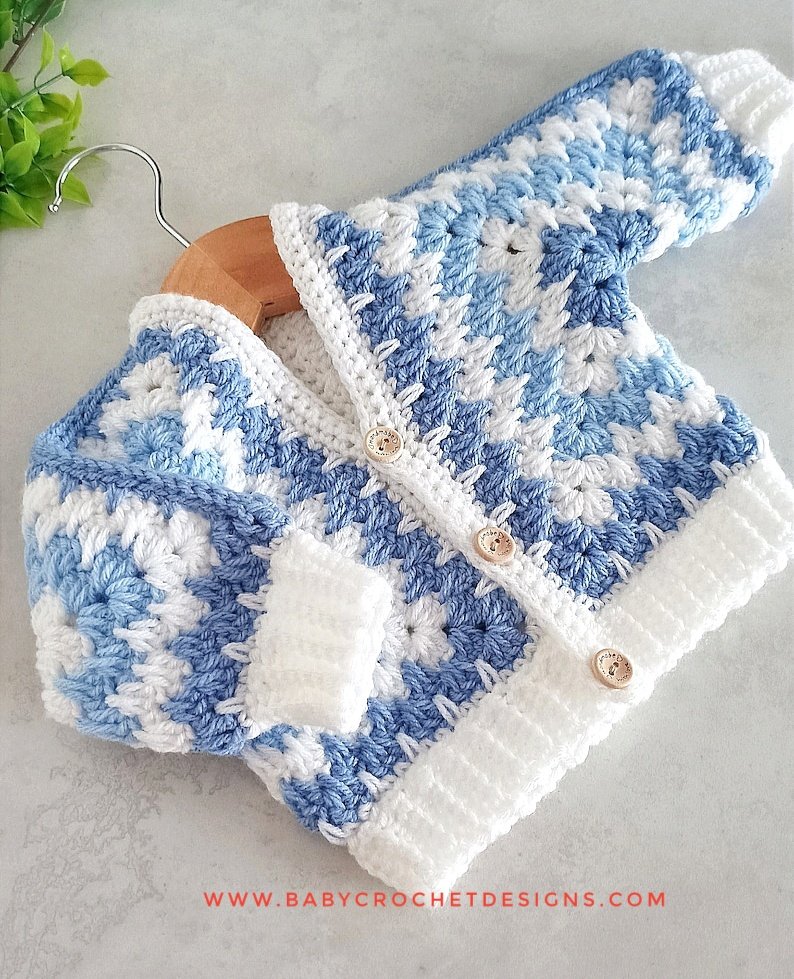
Cosy Hexi Cardi


Each size will have approx 2” positive ease when finished.
*Please note sizes for the lengths are just a guide you may want them shorter or longer depending on the individual you are making for*
Materials
Dk / weight 3 yarn or any weight yarn of your choosing as it is made to measure.
I used Nako Elit Baby Premium Acrylic 250 metres per 100 gram ball.
I used a 4.5mm hook for the main cardigan and a 3.5mm hook for the rib edging and four 20mm buttons, I use this set from Amazon*
Written in English US terms with abbreviations for UK
sc = single crochet (double crochet in UK)
dc = double crochet (treble crochet UK)
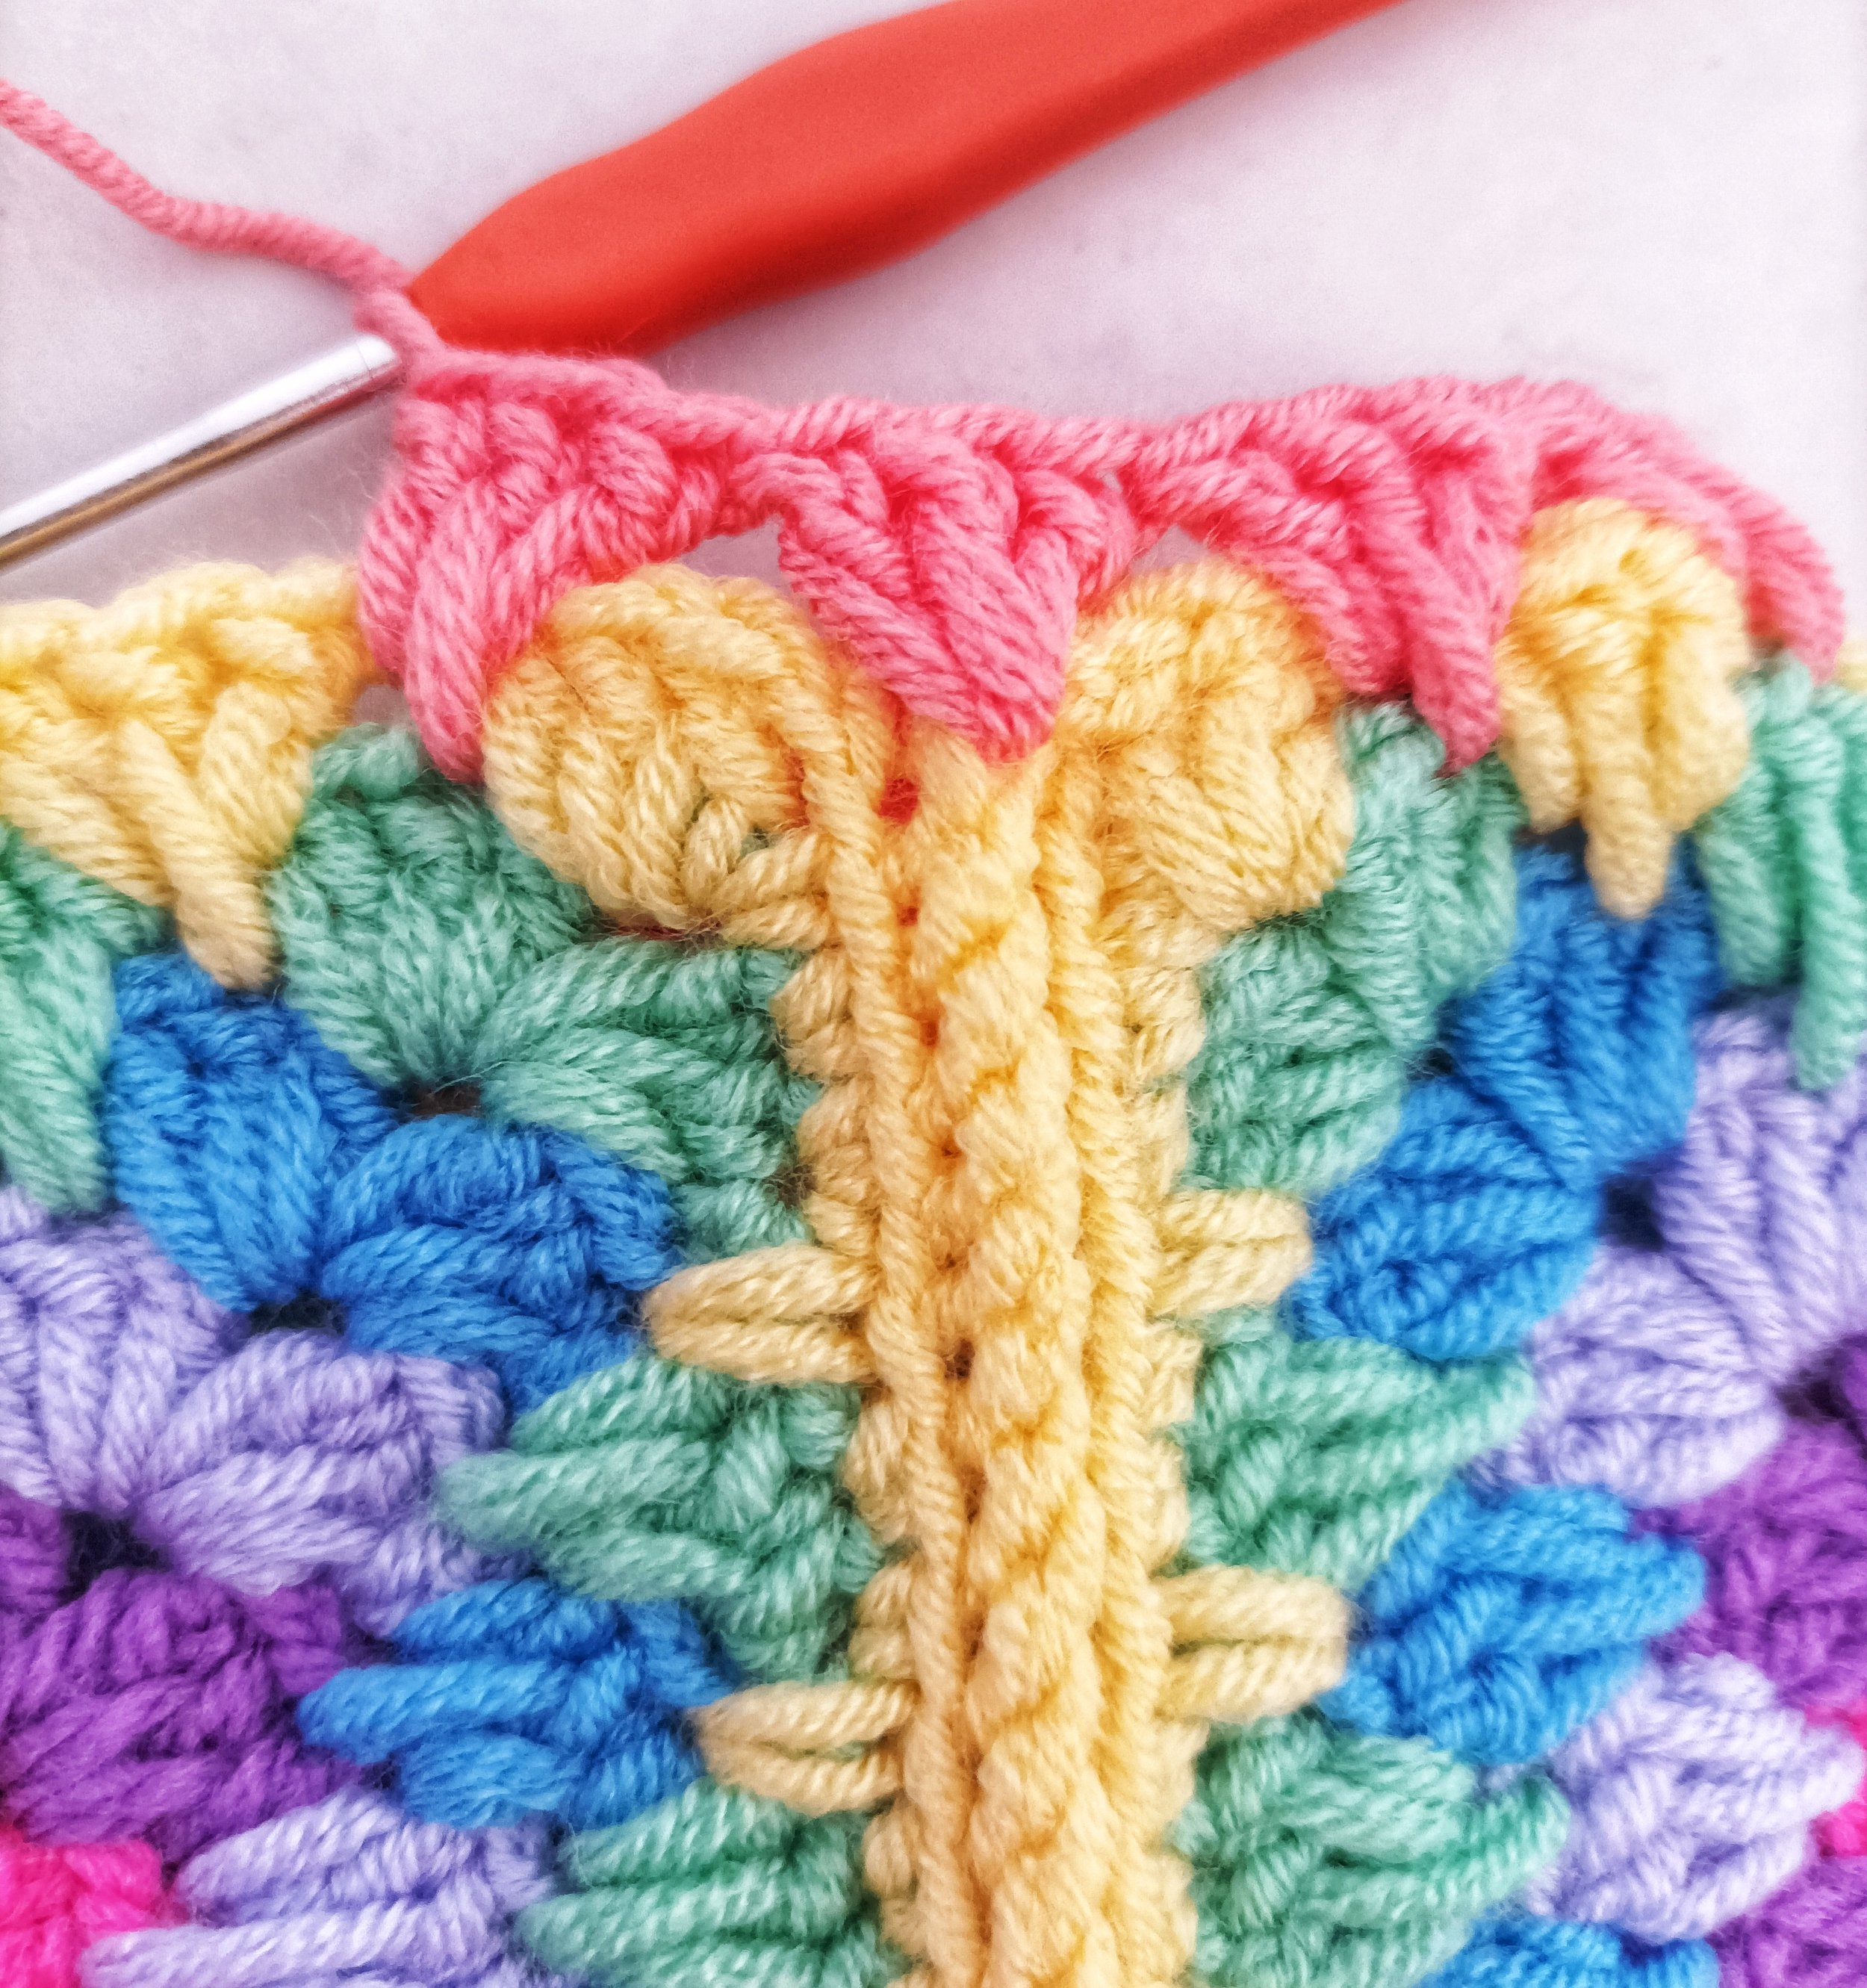
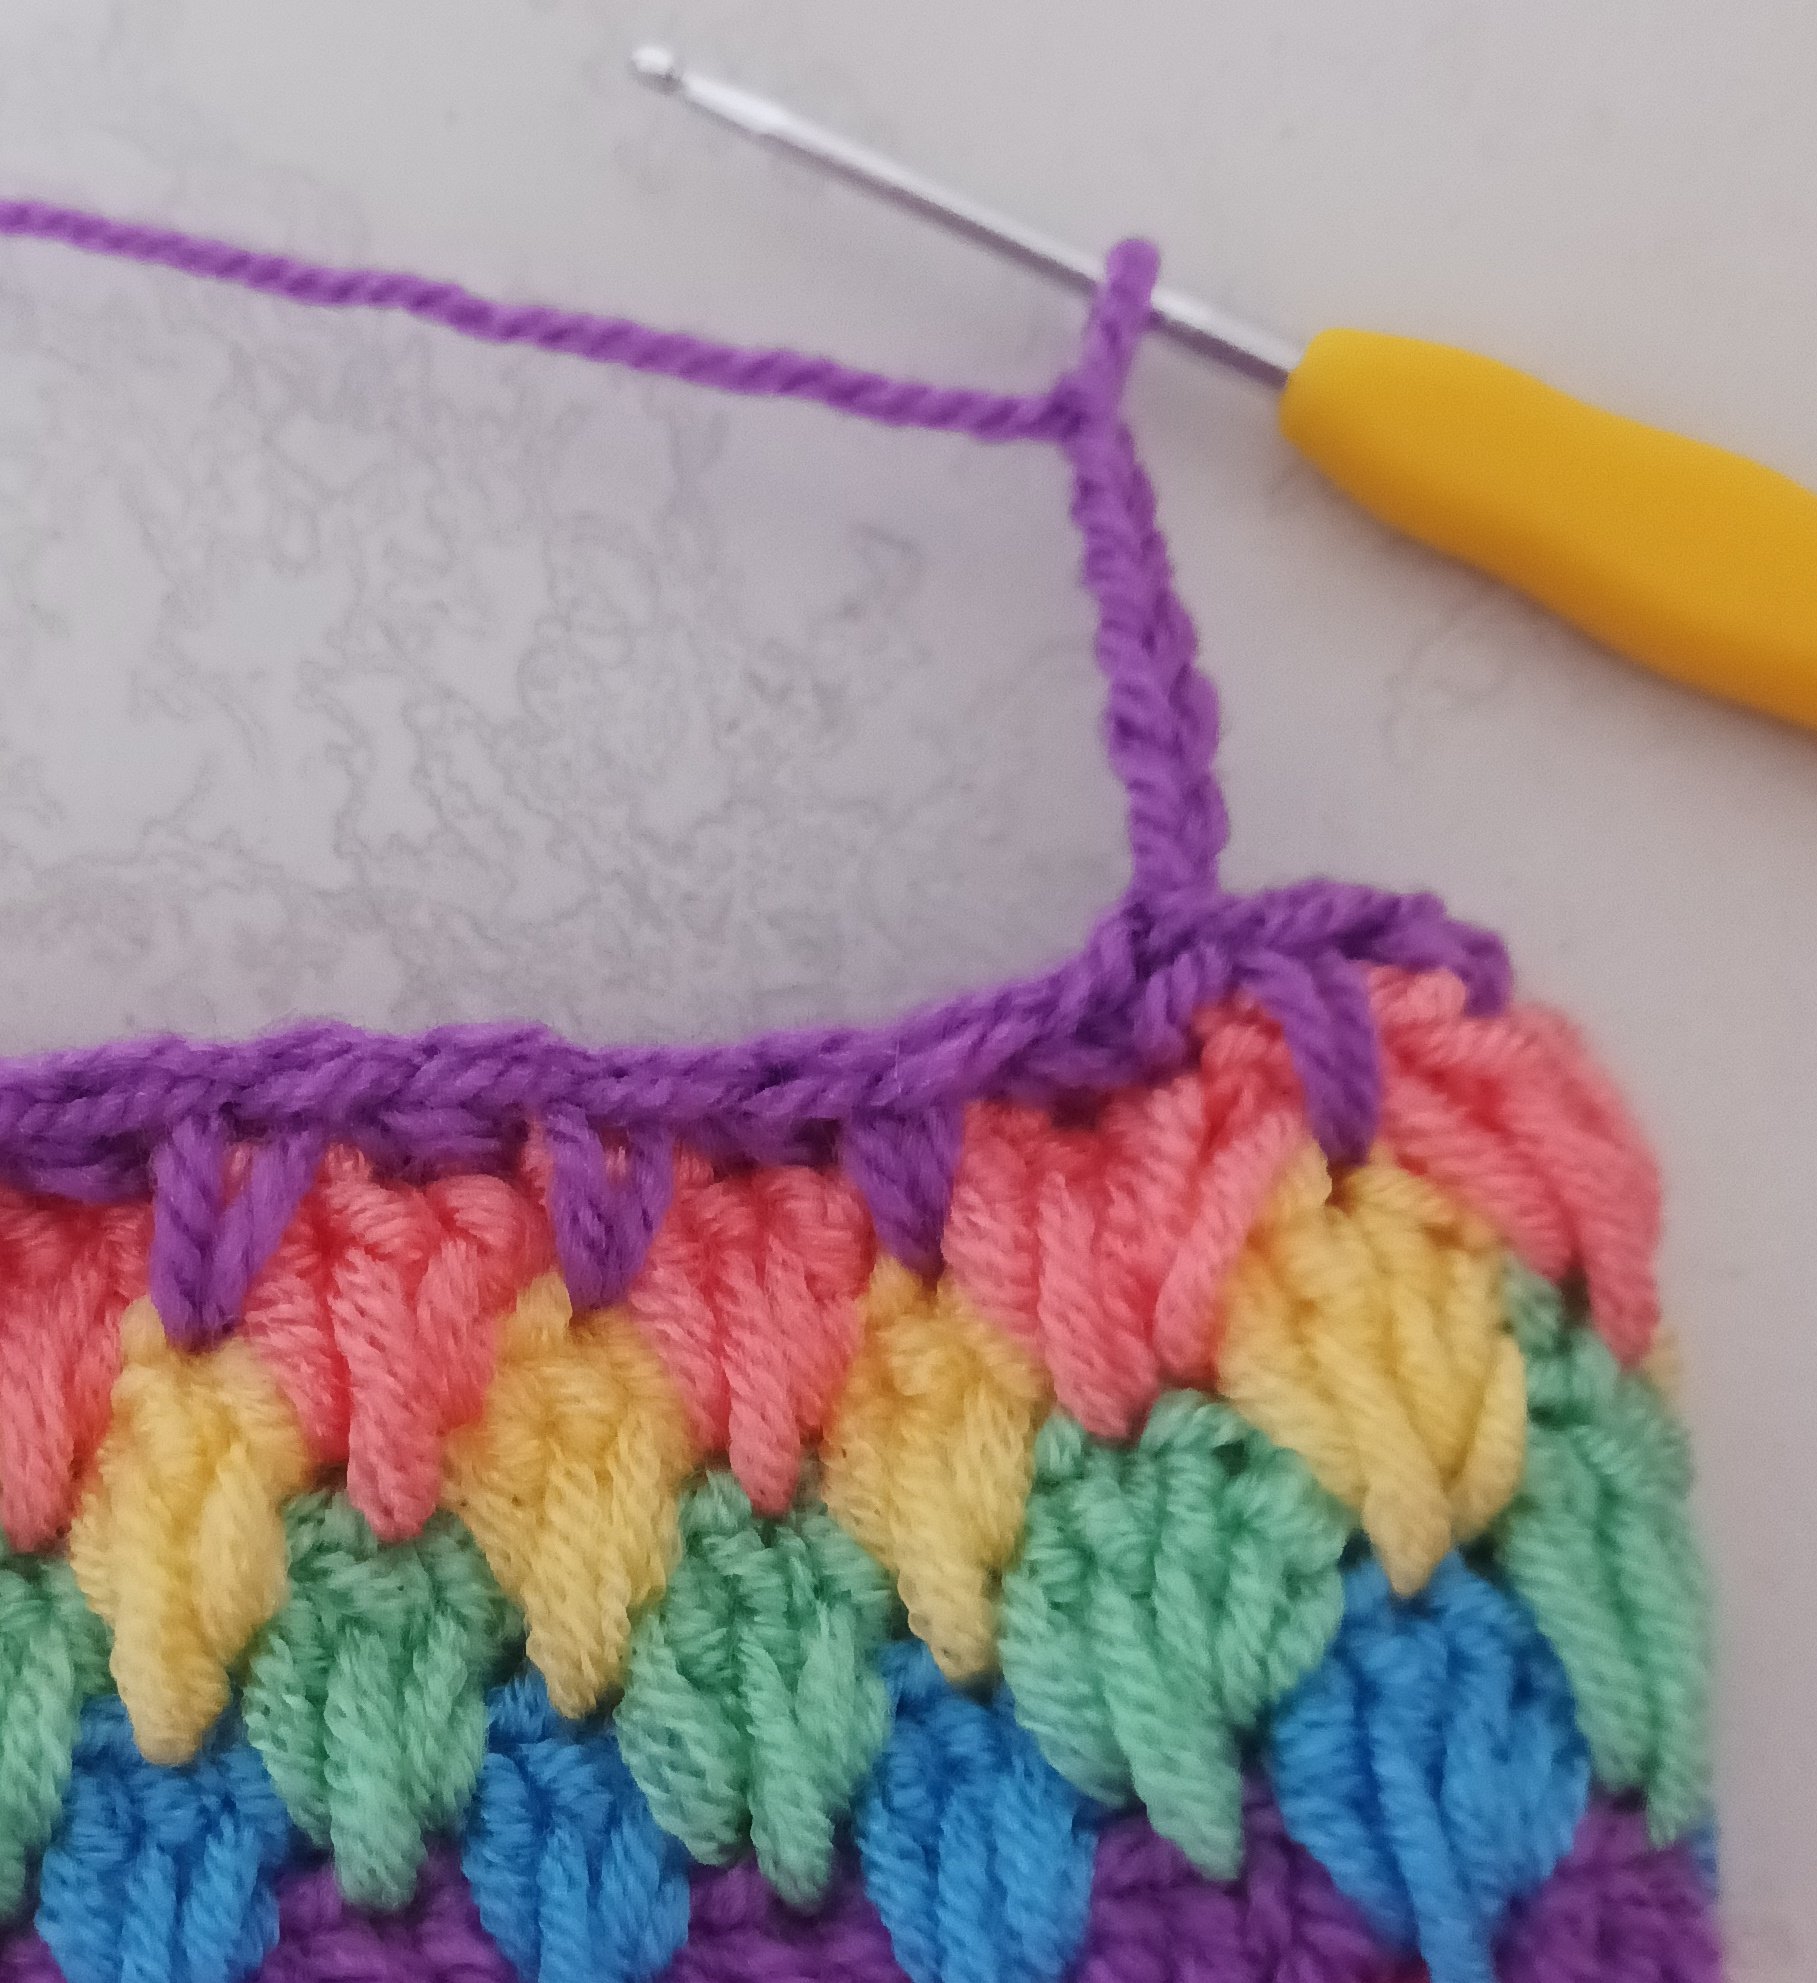
sdc = spike double crochet (double crochet in the centre of cluster two rows below (treble crochet in the centre of cluster two rows below UK)
ssc = spike single crochet (single crochet in the centre of cluster two rows below (double crochet in the centre of cluster two rows below)
cluster = (3 dc stitches) (3 treble crochet stitches UK)
slst = slip stitch
blo = back loop only (crochet into the back loop of the stitch
[ ] = in the same stitch
* * = repeat between
ch = chain
Gauge
For using dk / weight 3 yarn
With 4.5mm hook
9 dc x 4 rows = 2” x 2”
3 clusters x 4 rows = 2”x 2”
Pattern notes
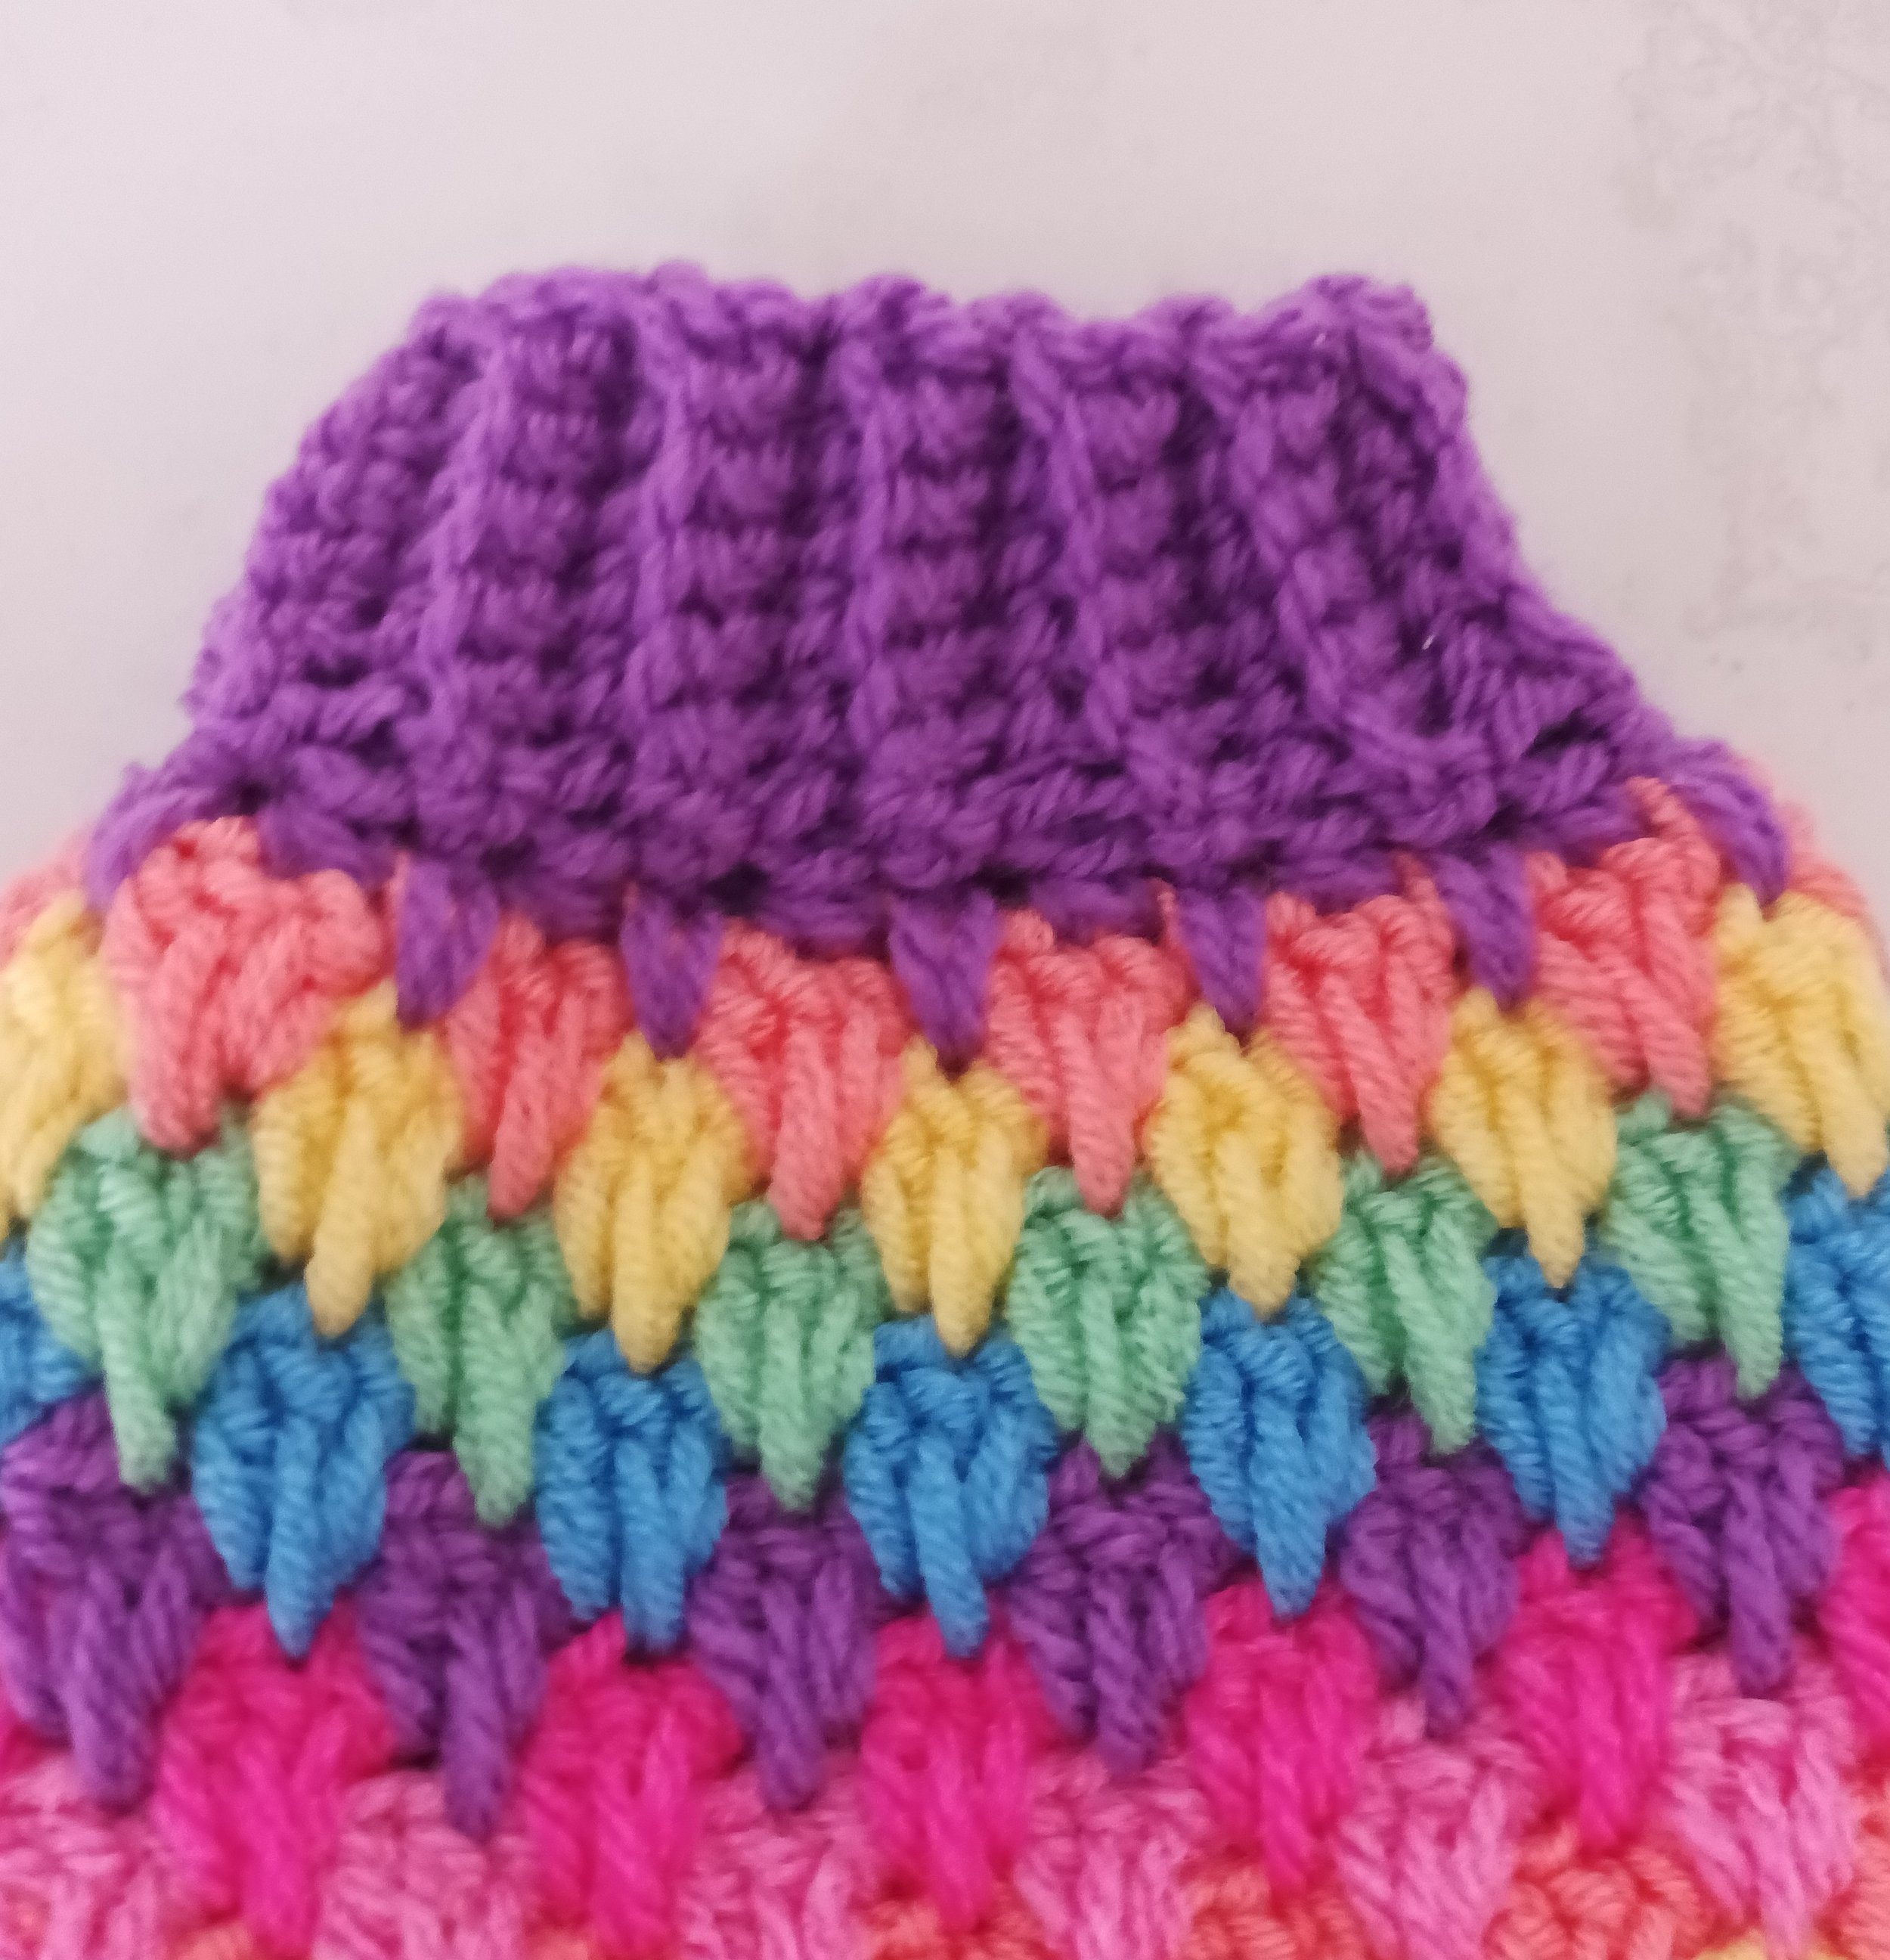
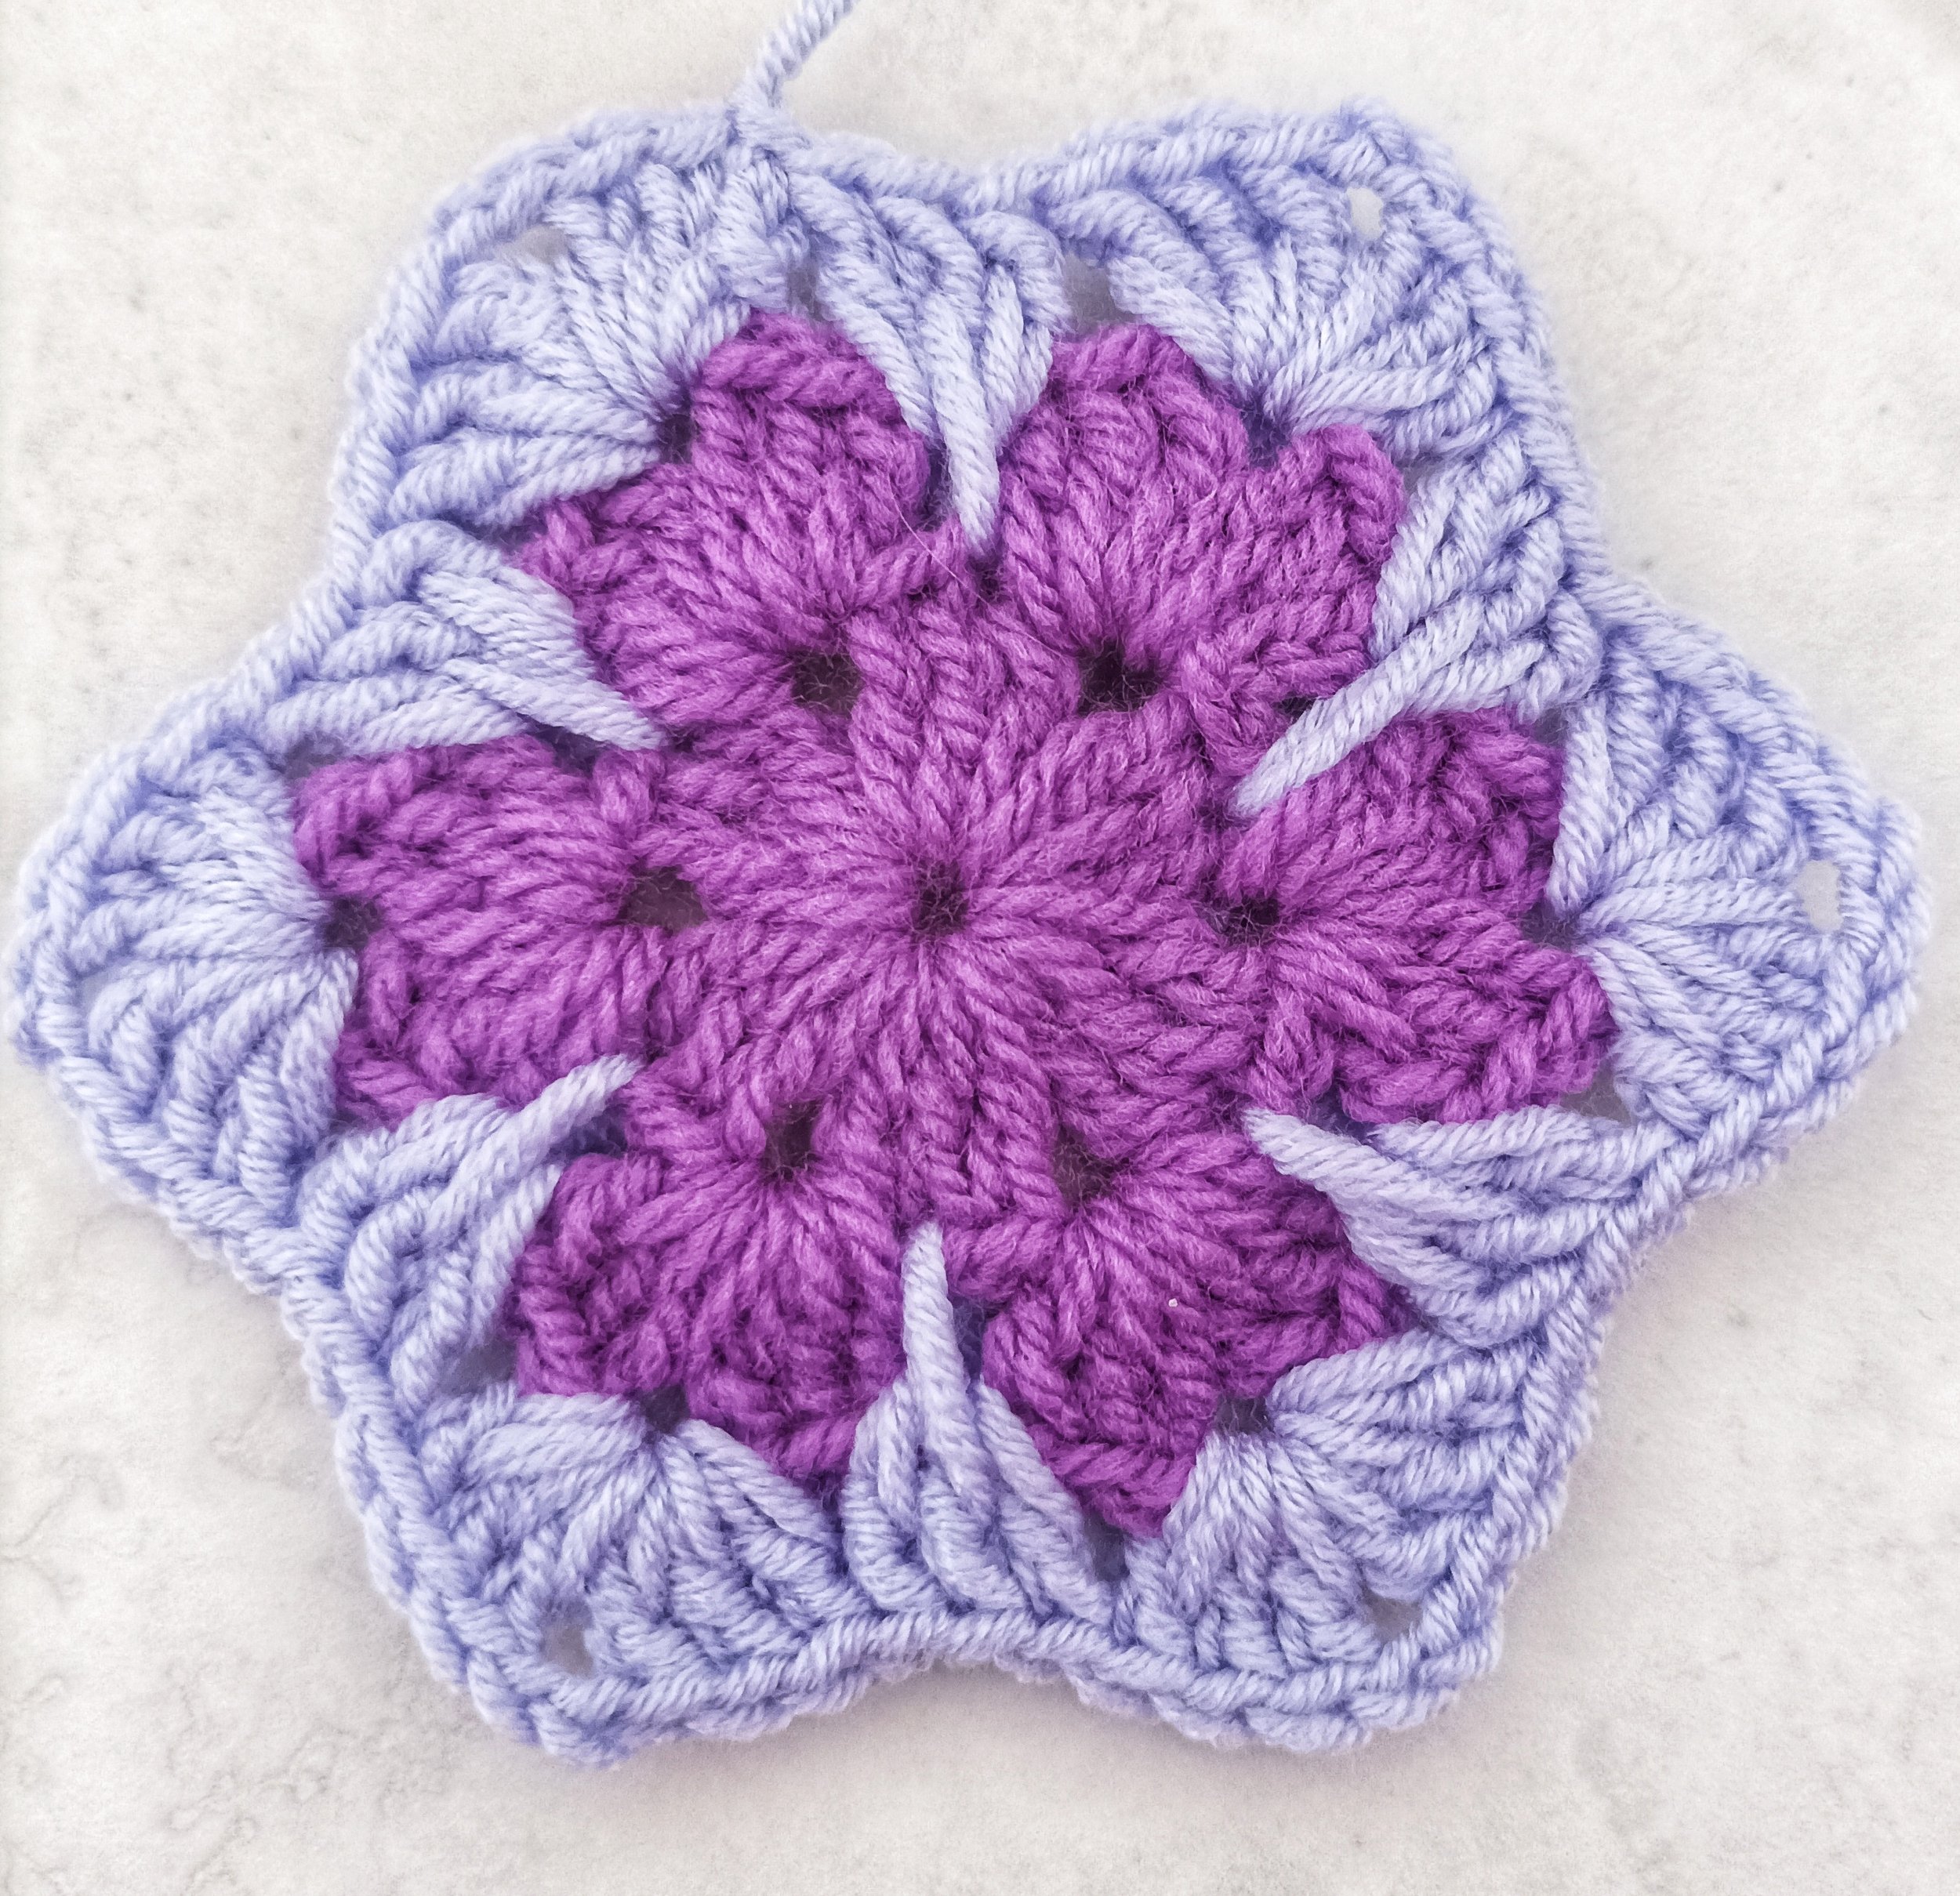
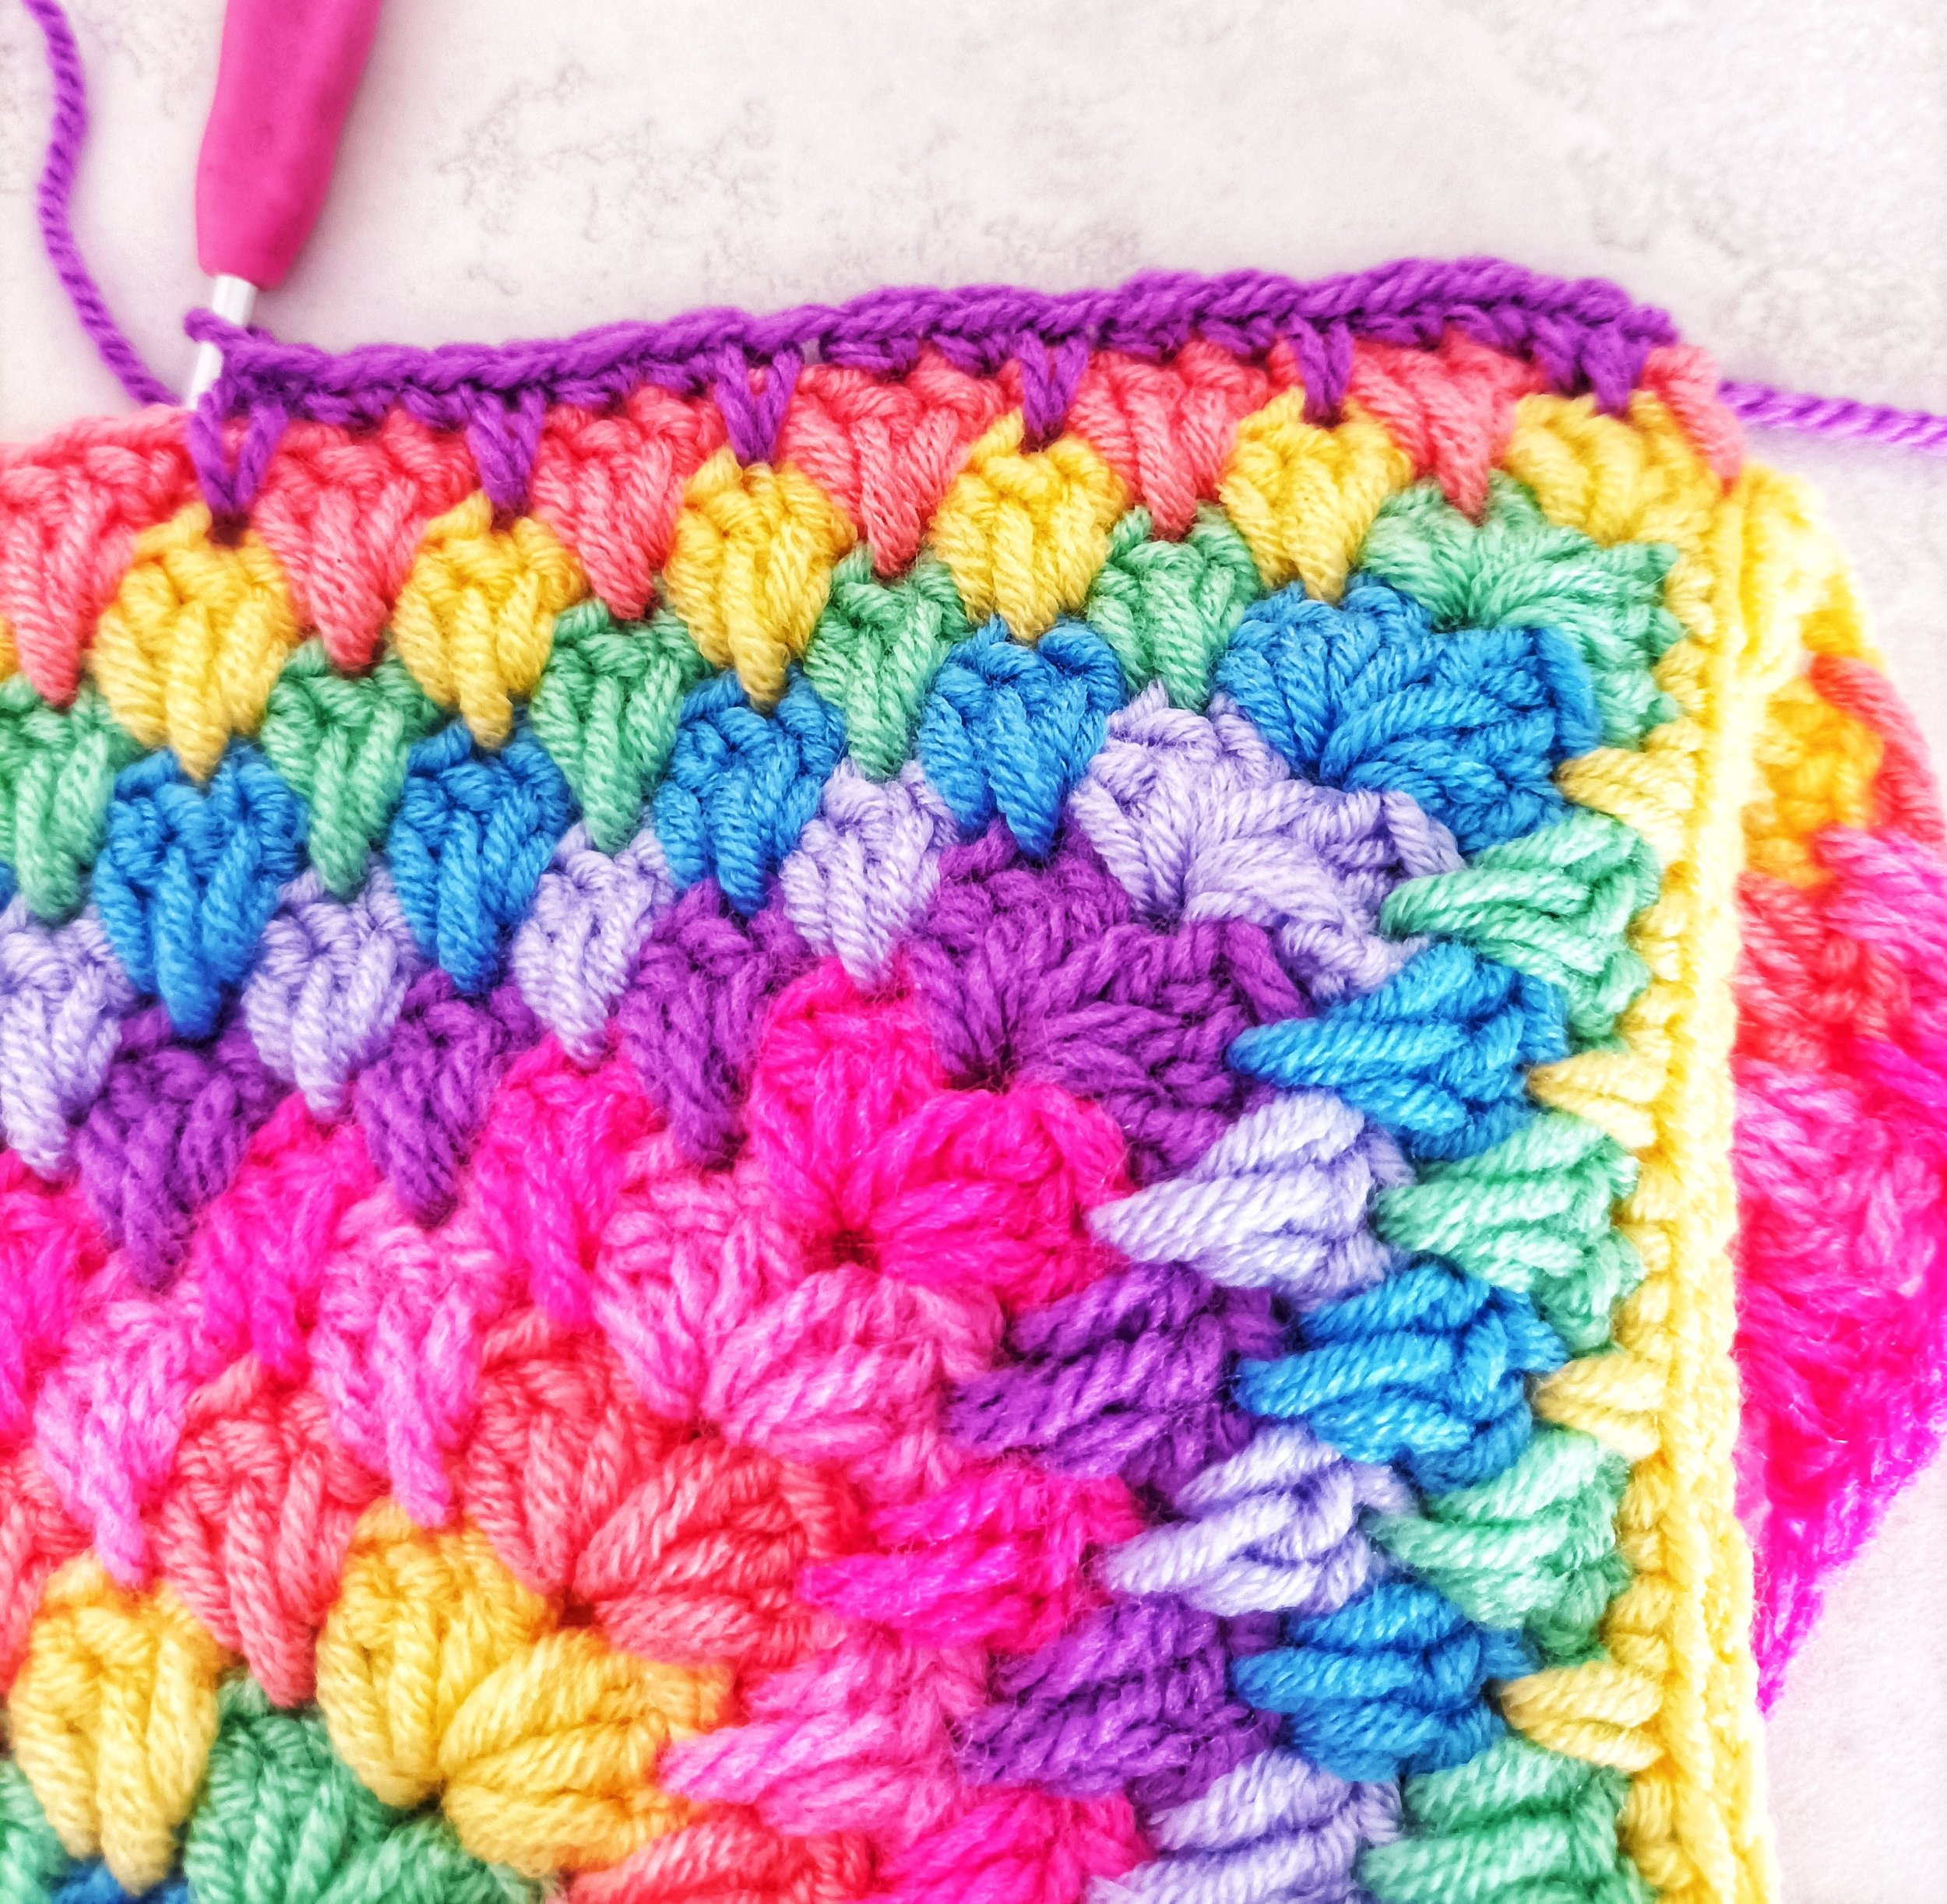
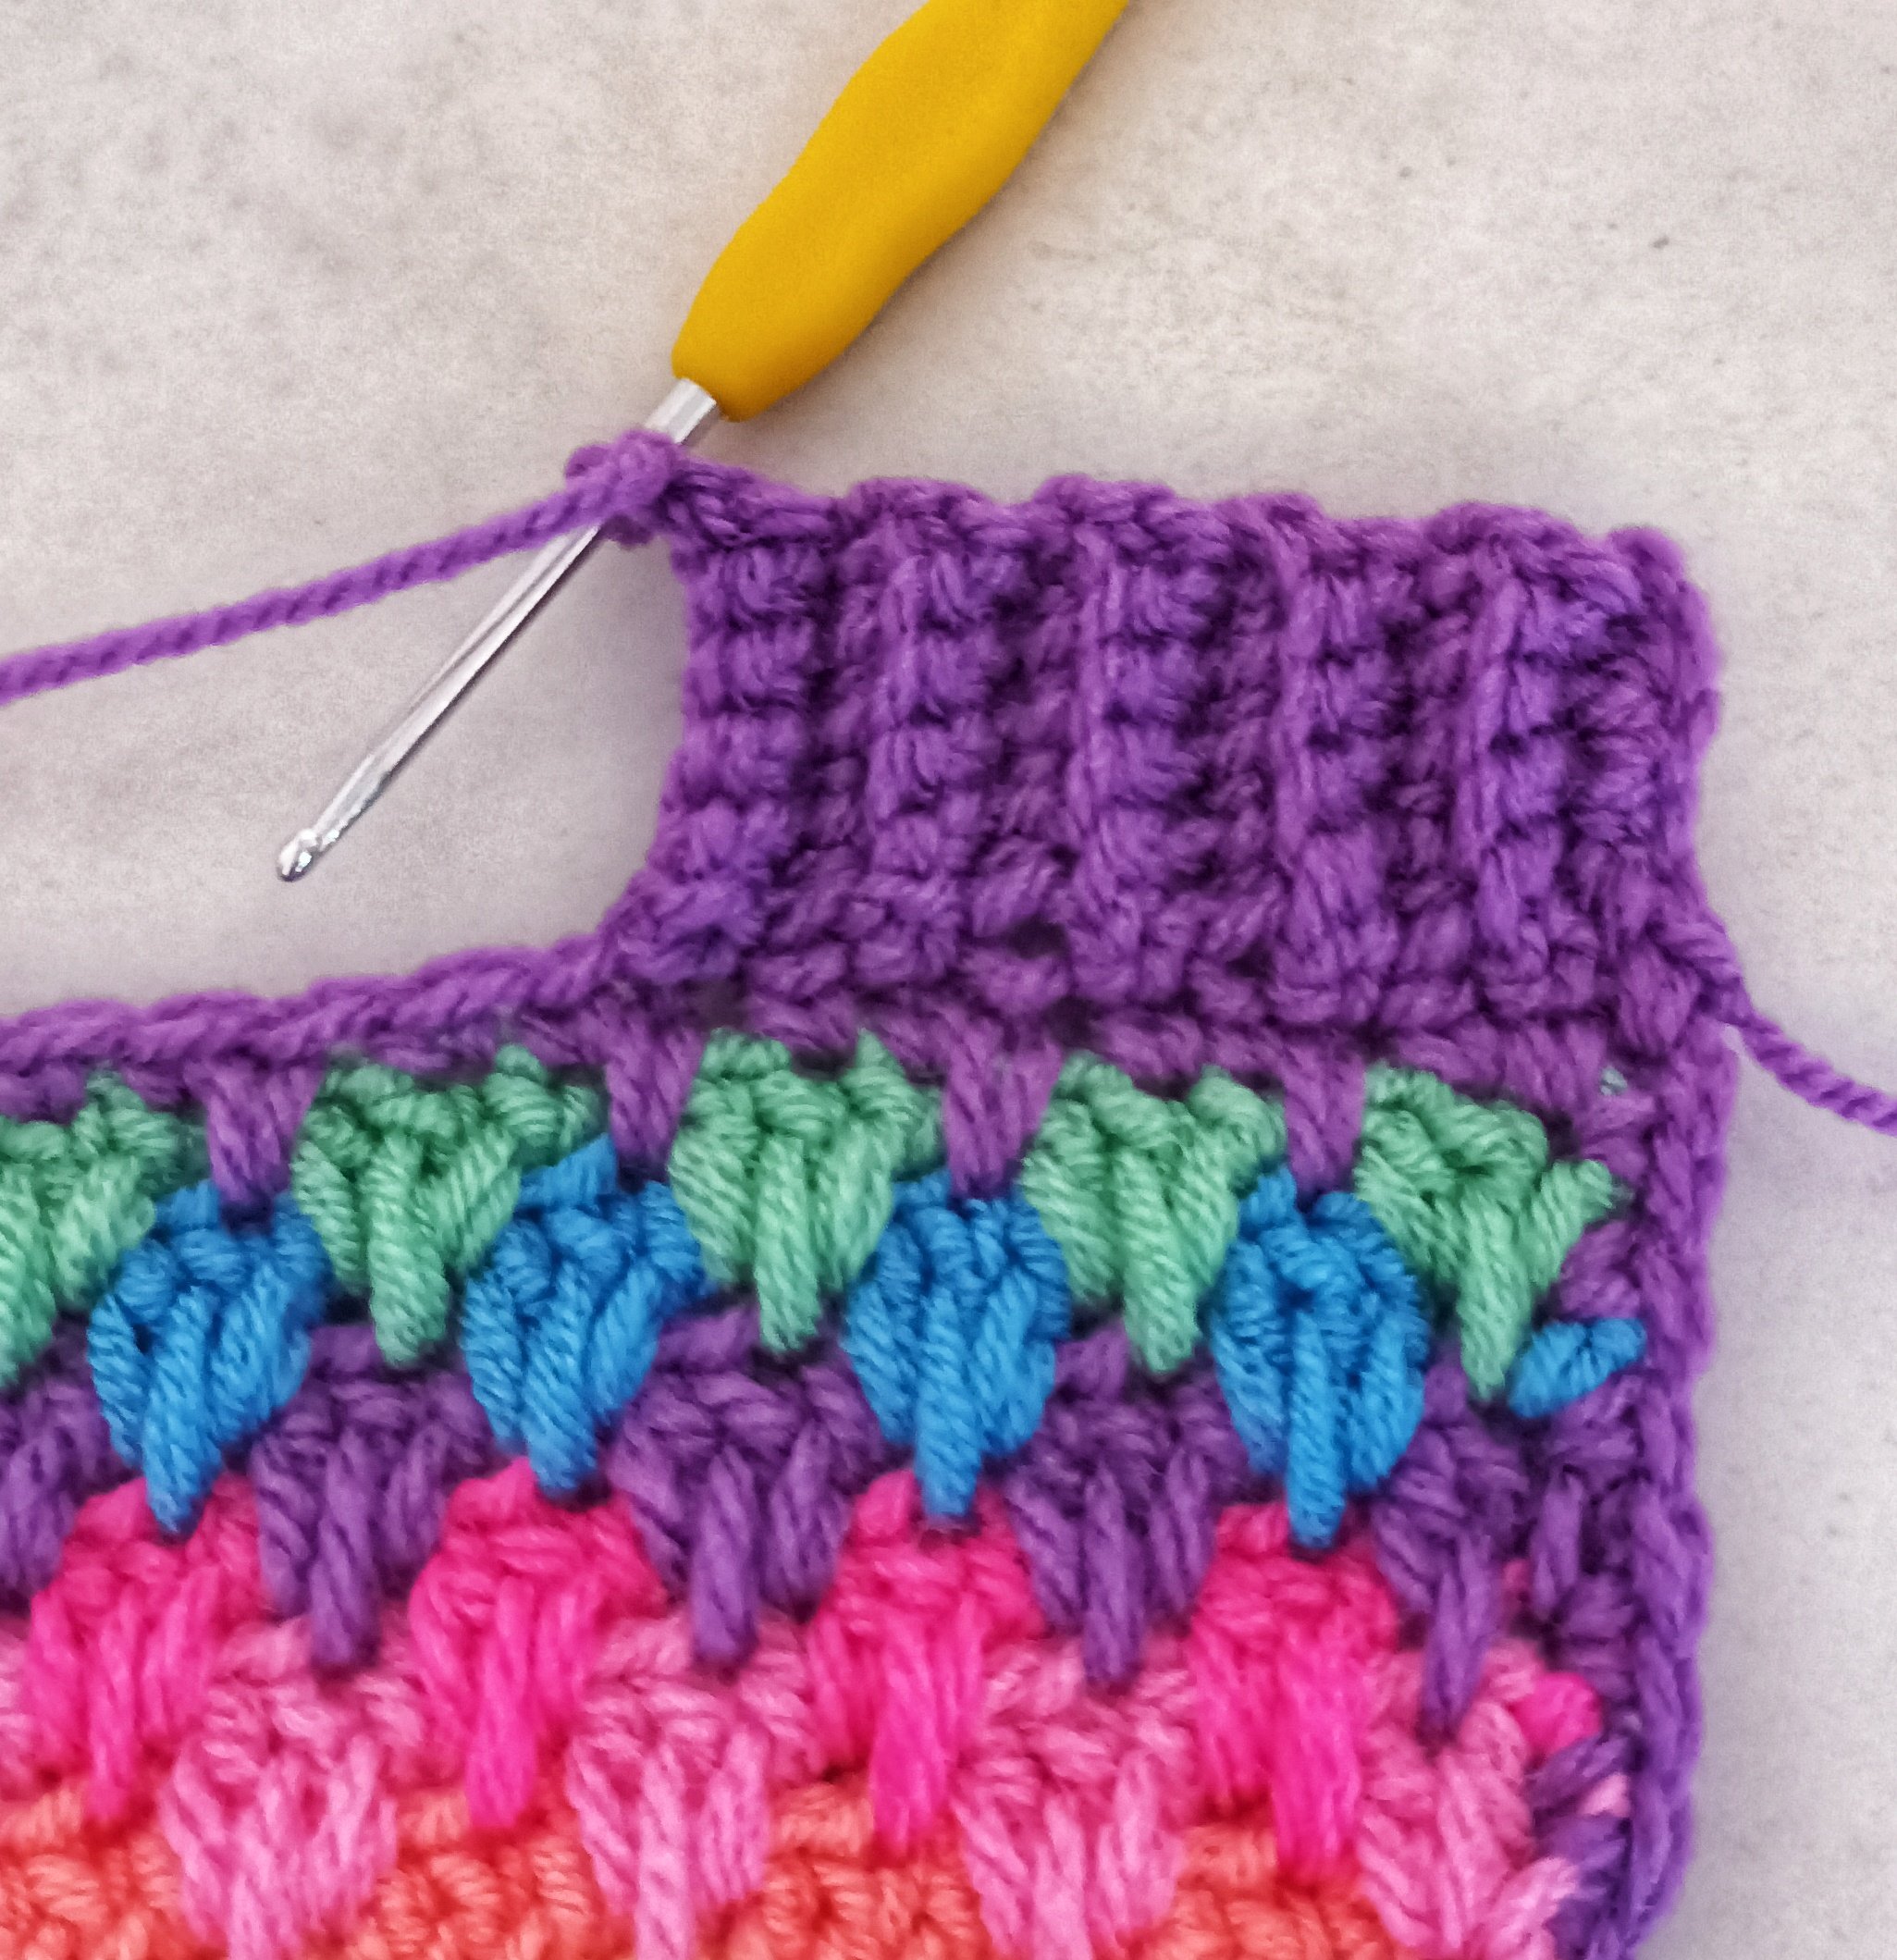
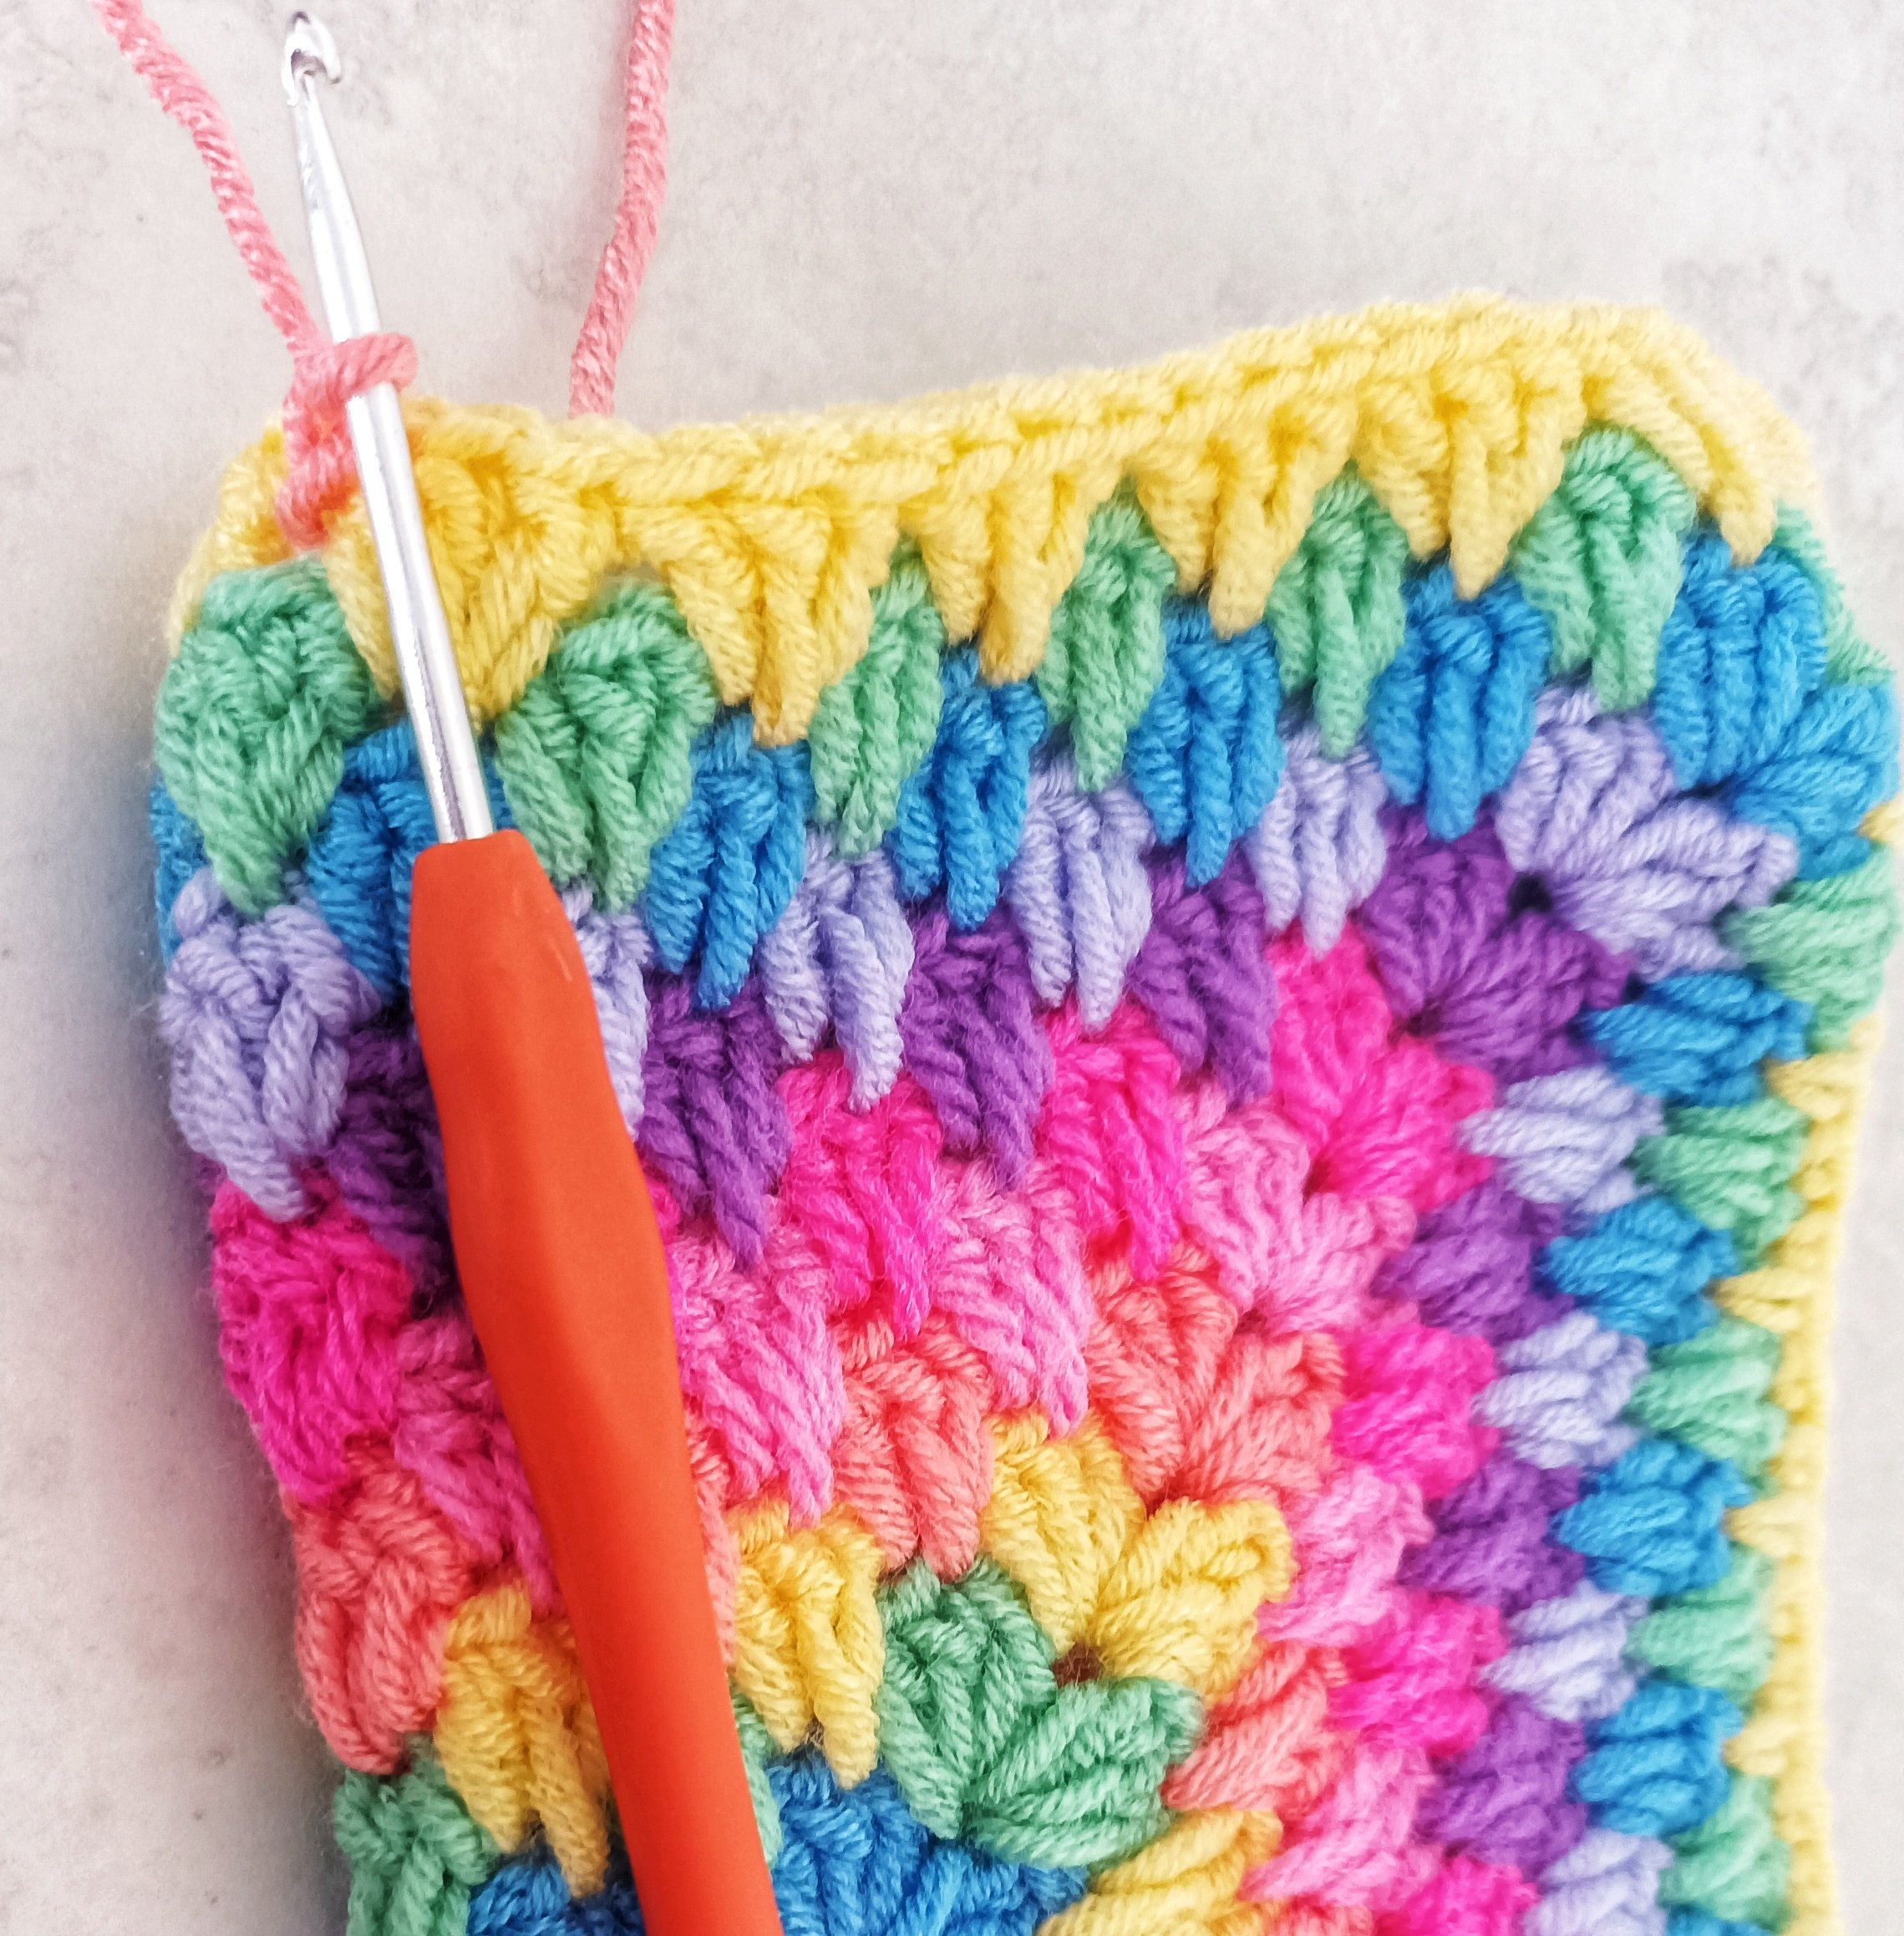
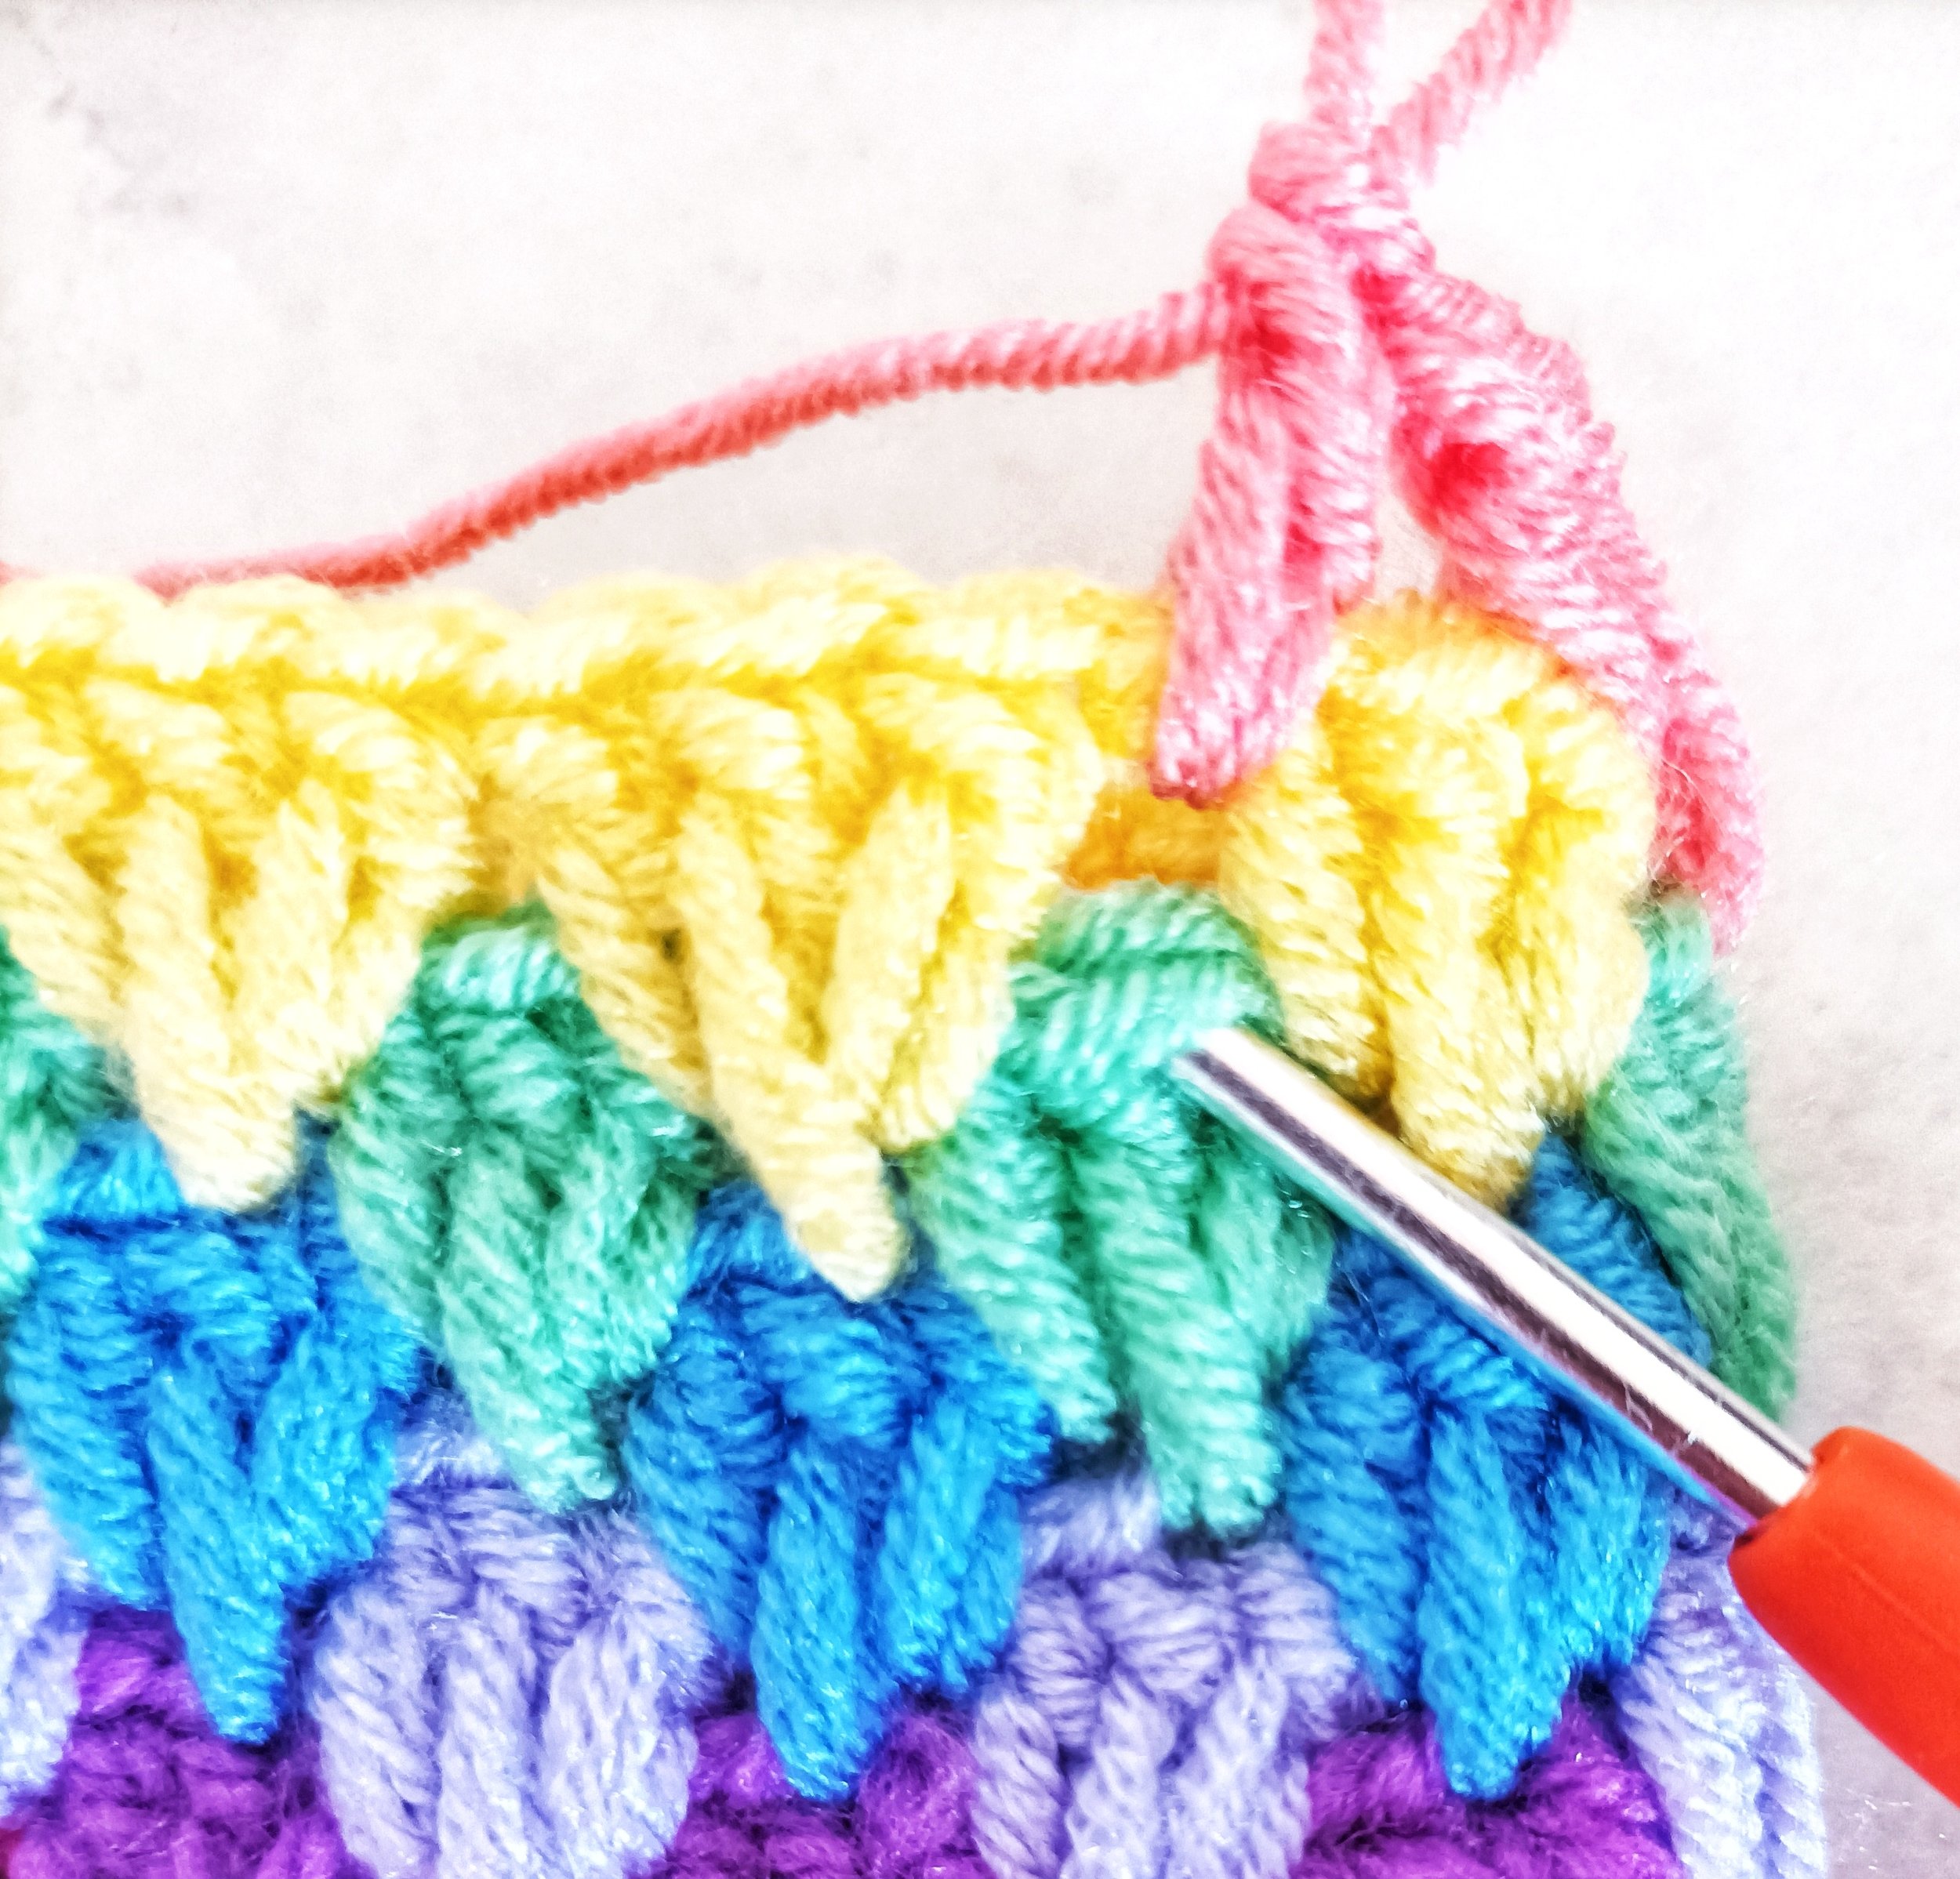
The cardigan is worked in the granny spike stitch, which is like granny stitch apart from the middle dc is worked in the middle stitch, two rows below to make a spike in the middle, this also gives it a less holey finish. It is important when doing the spike stitch to pull the stitch up as high as the previous stitch or your work will start going pointed. If you struggle with this do a treble crochet instead (double treble UK).
This cardigan can be made in any weight yarn and hook, as it is made to measure.
I have provided details for dk yarn and the hook size that I used.
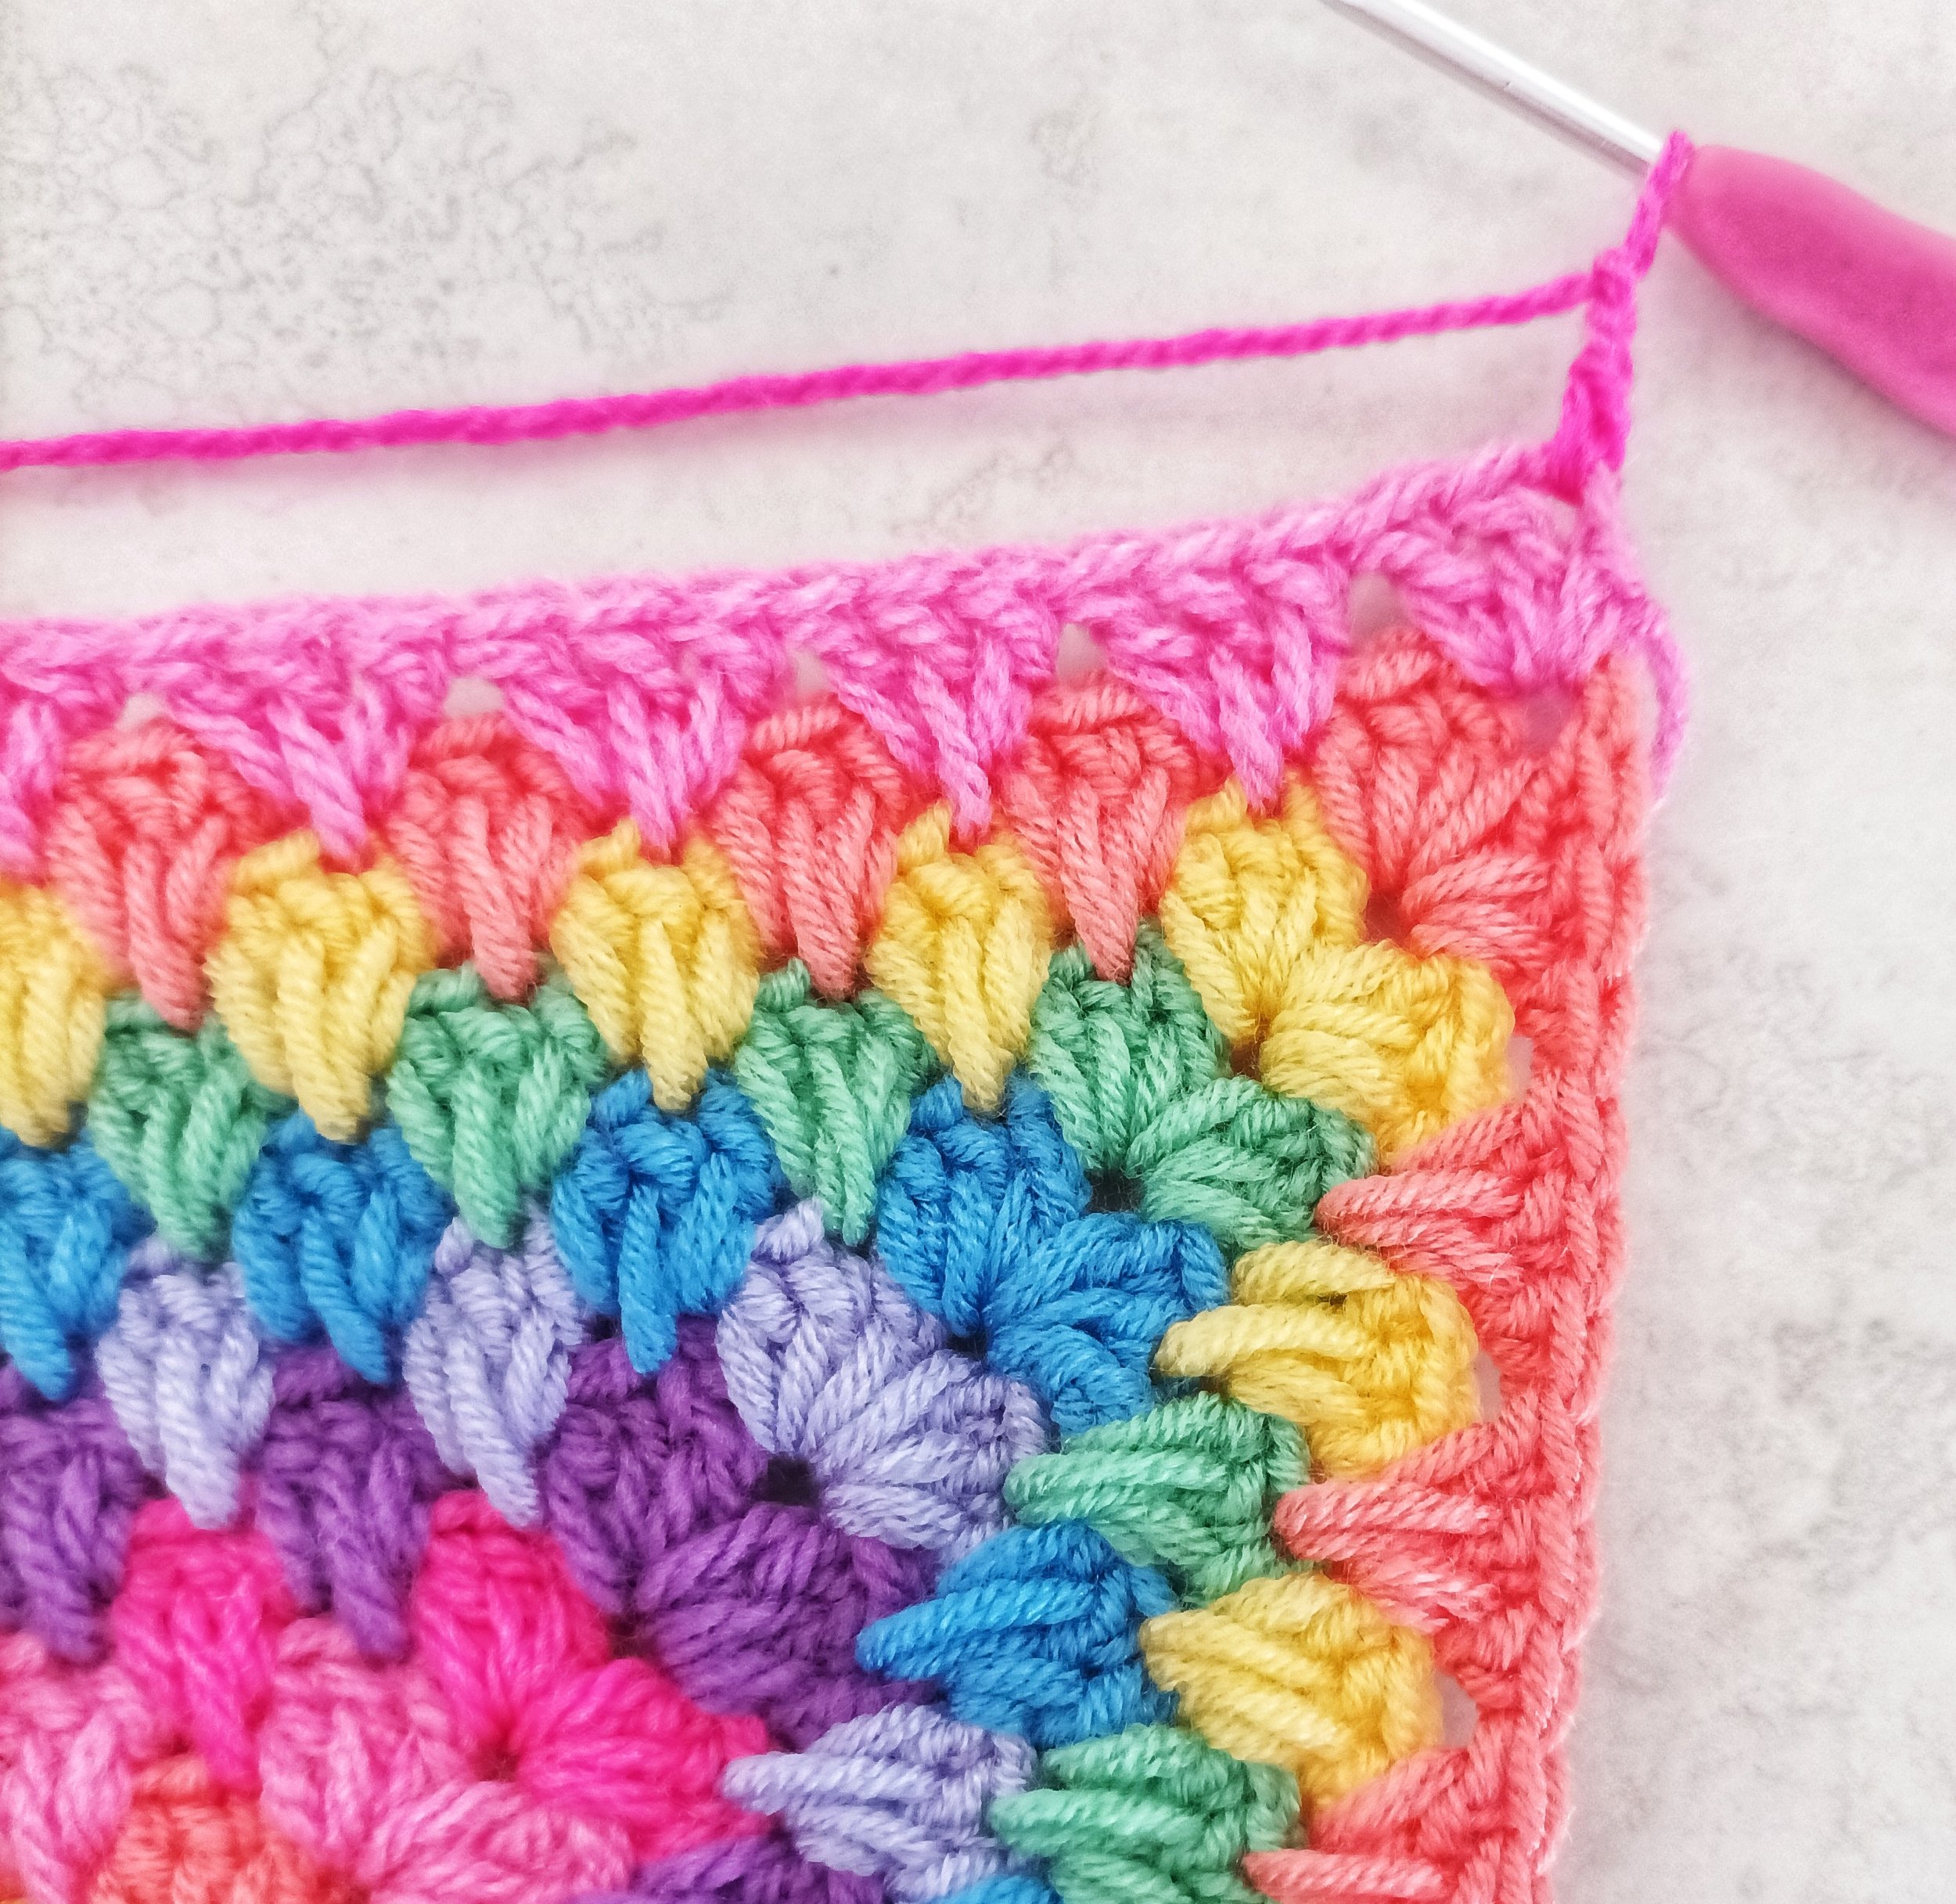
The ch1 corner does not count as a stitch.
The ch3 counts as a dc.
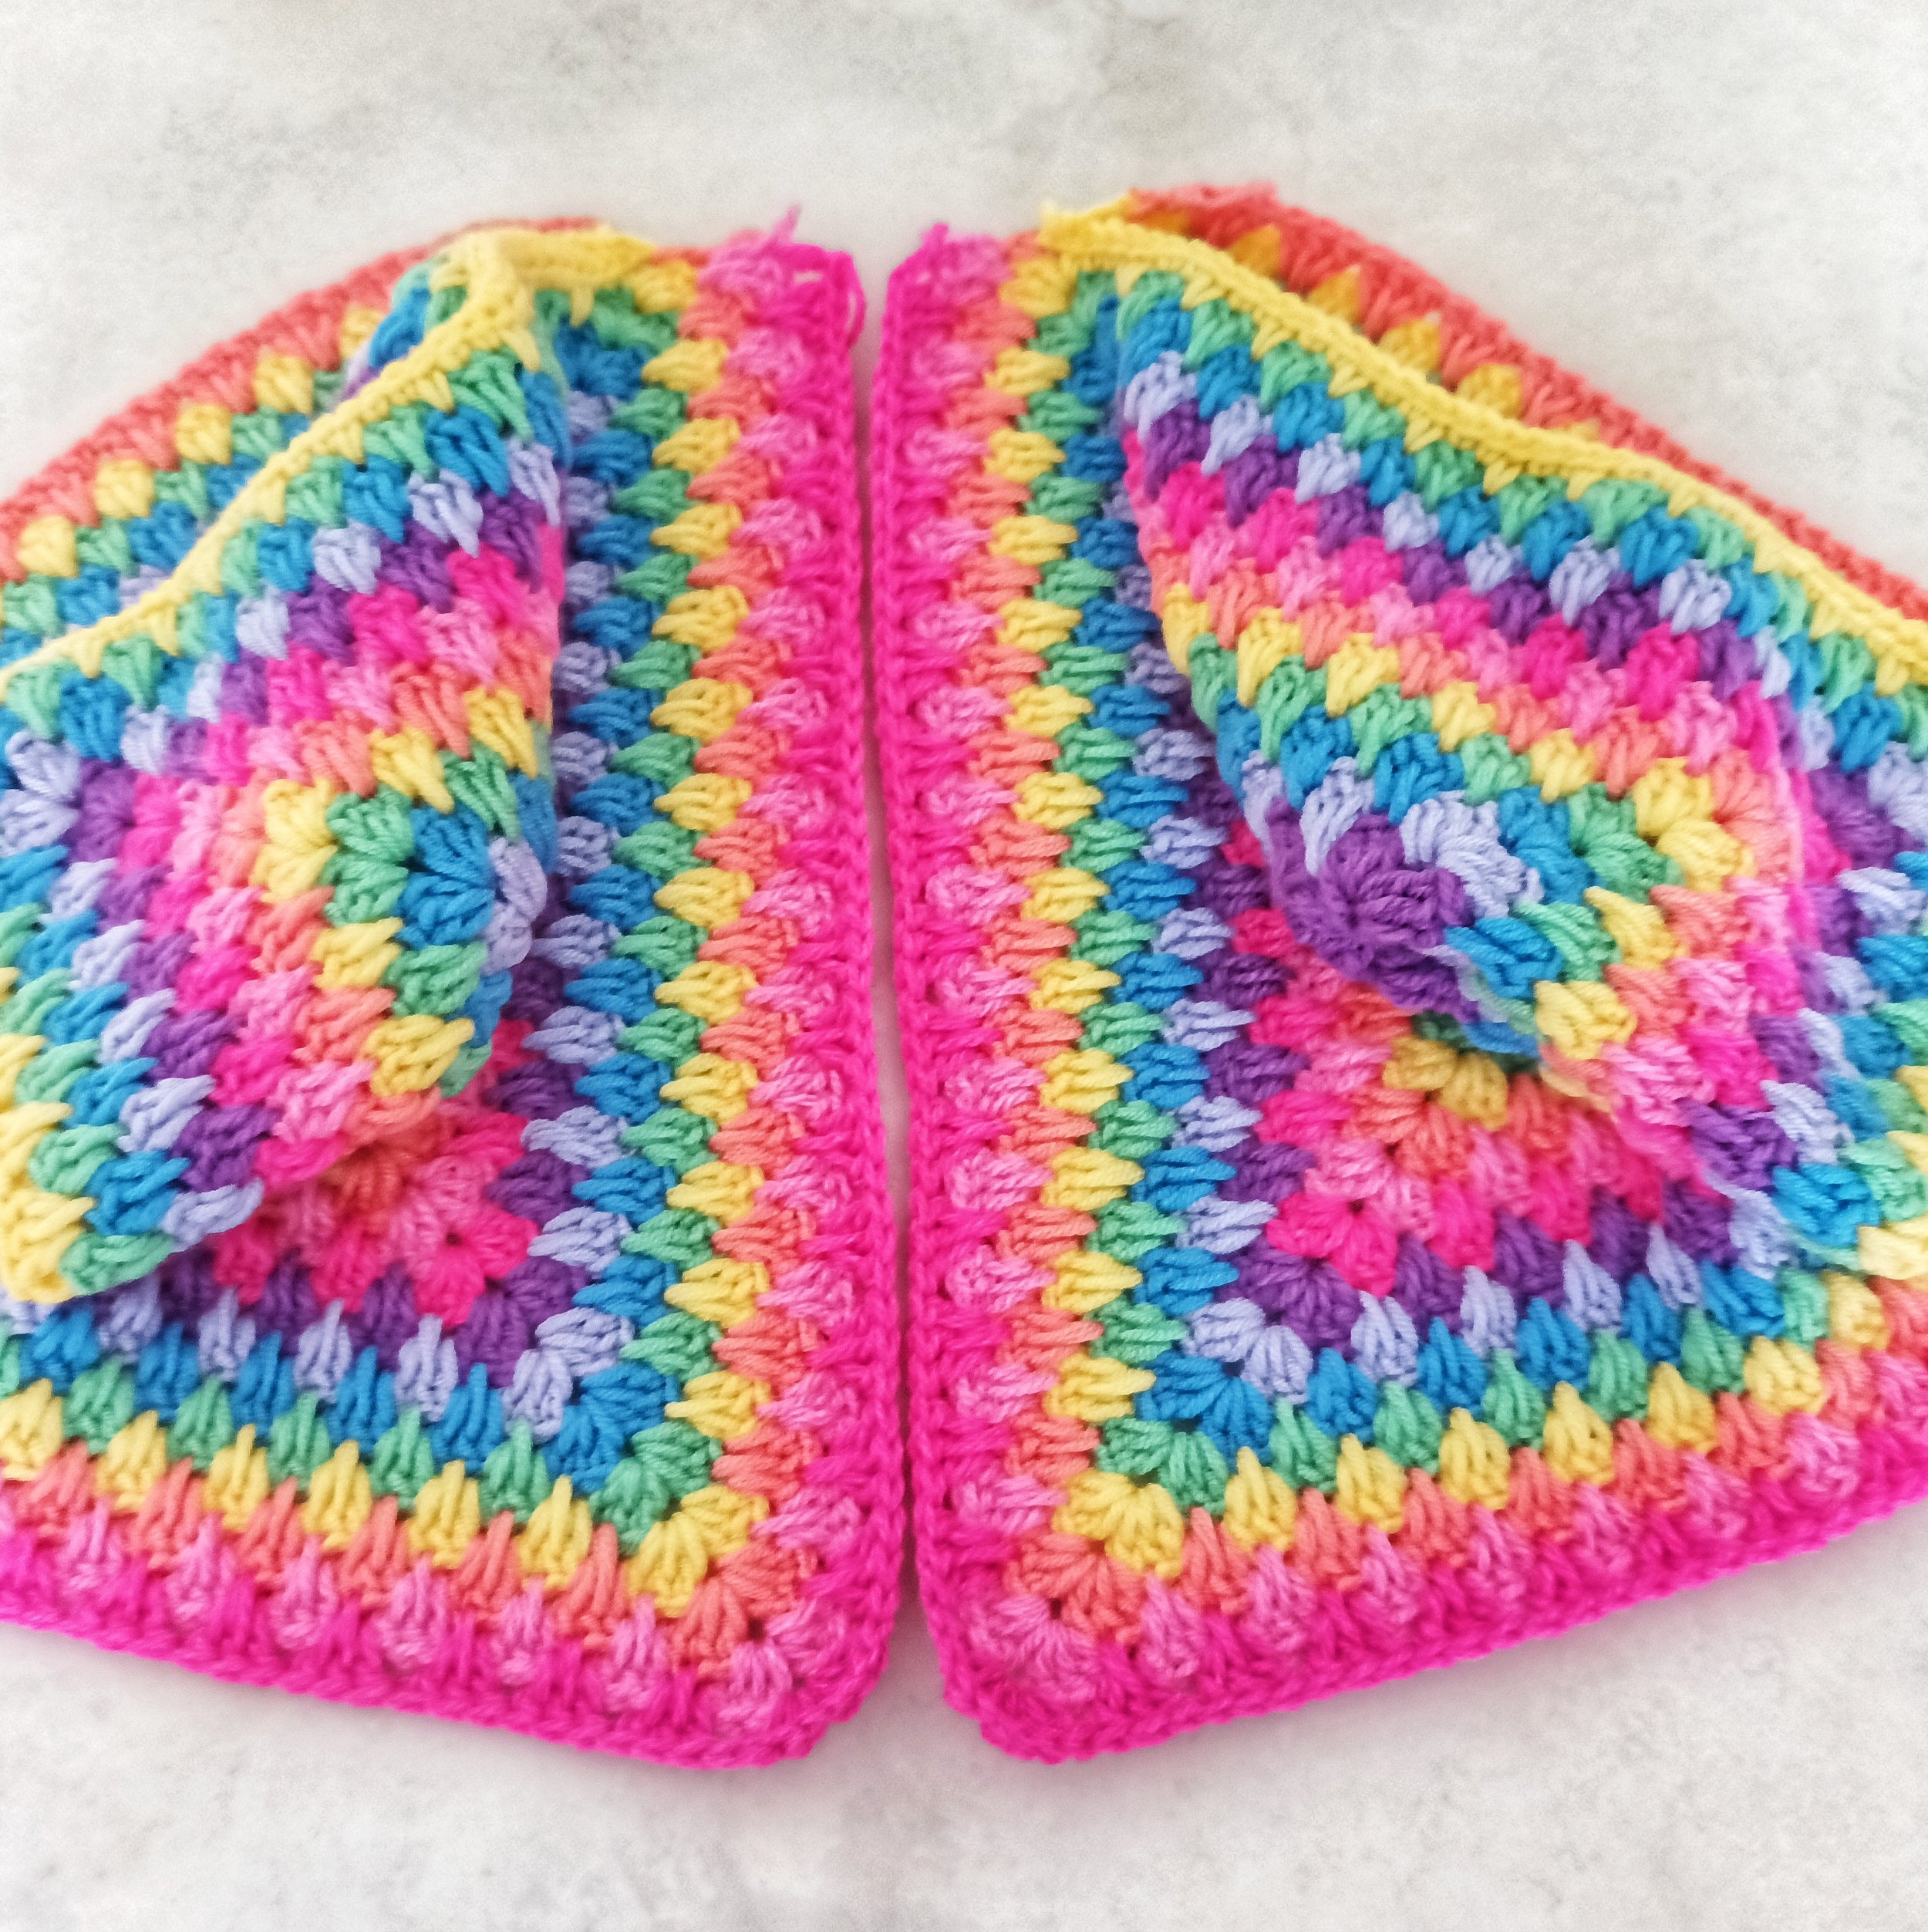
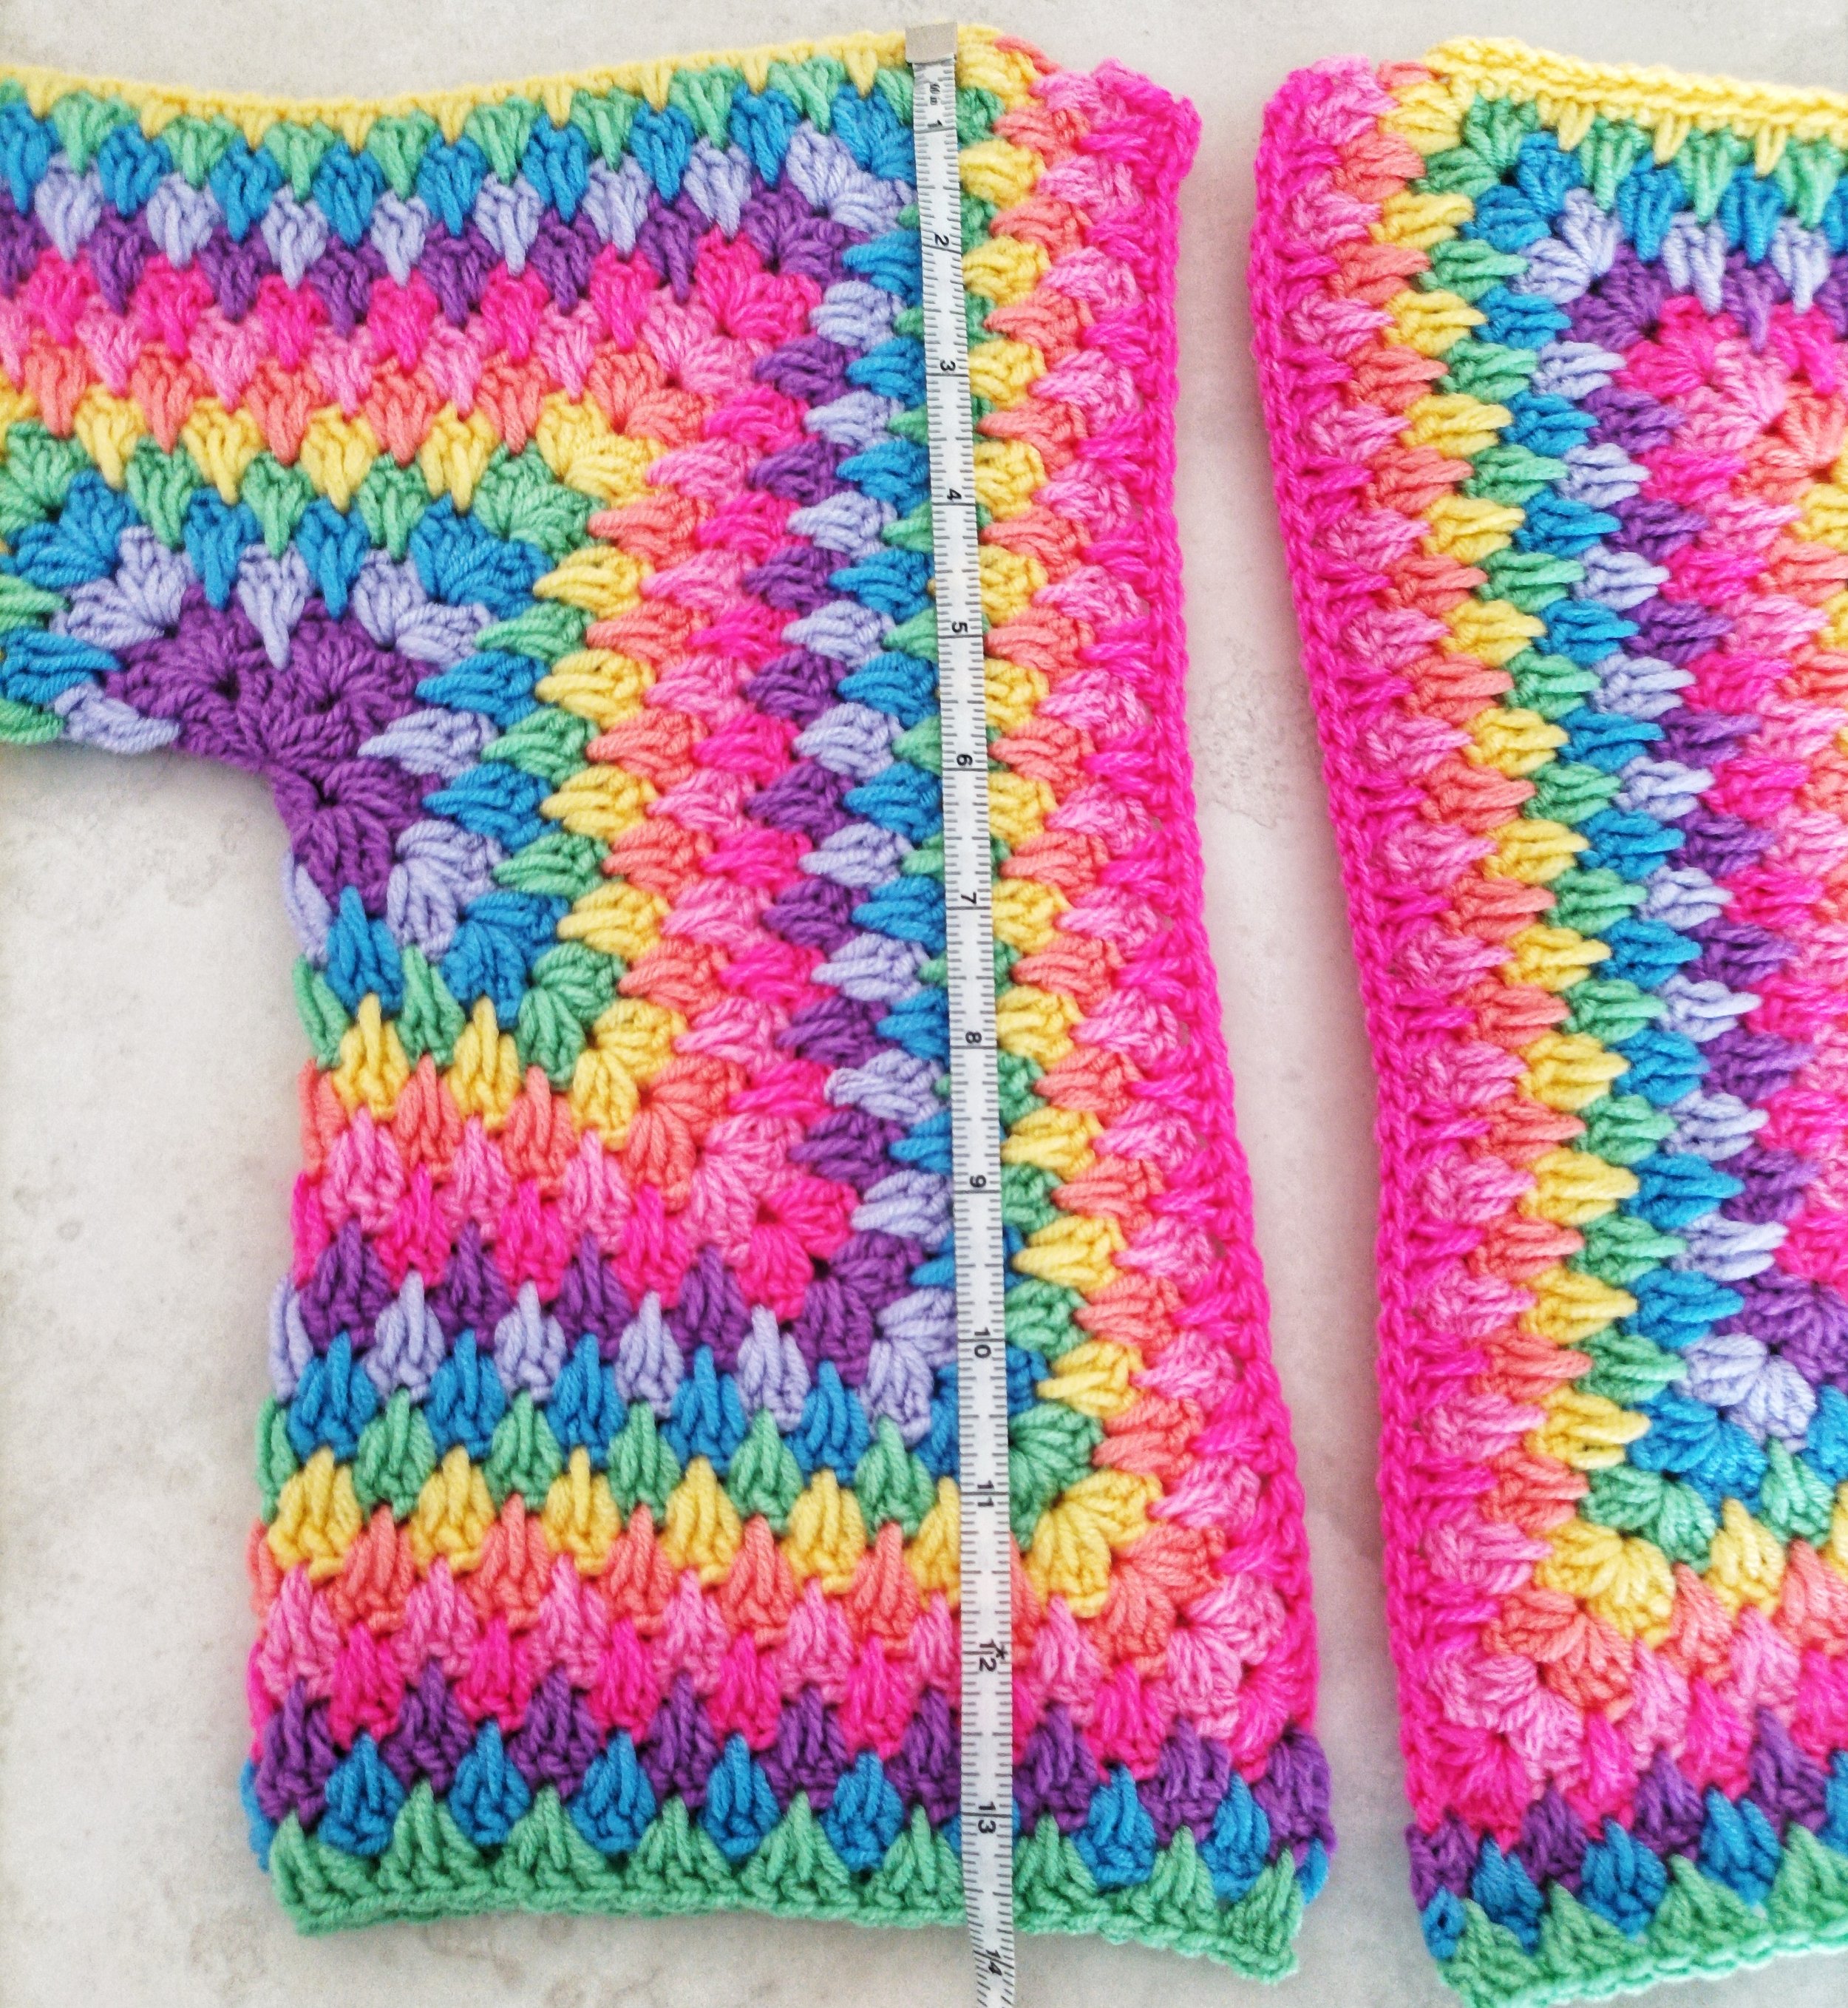
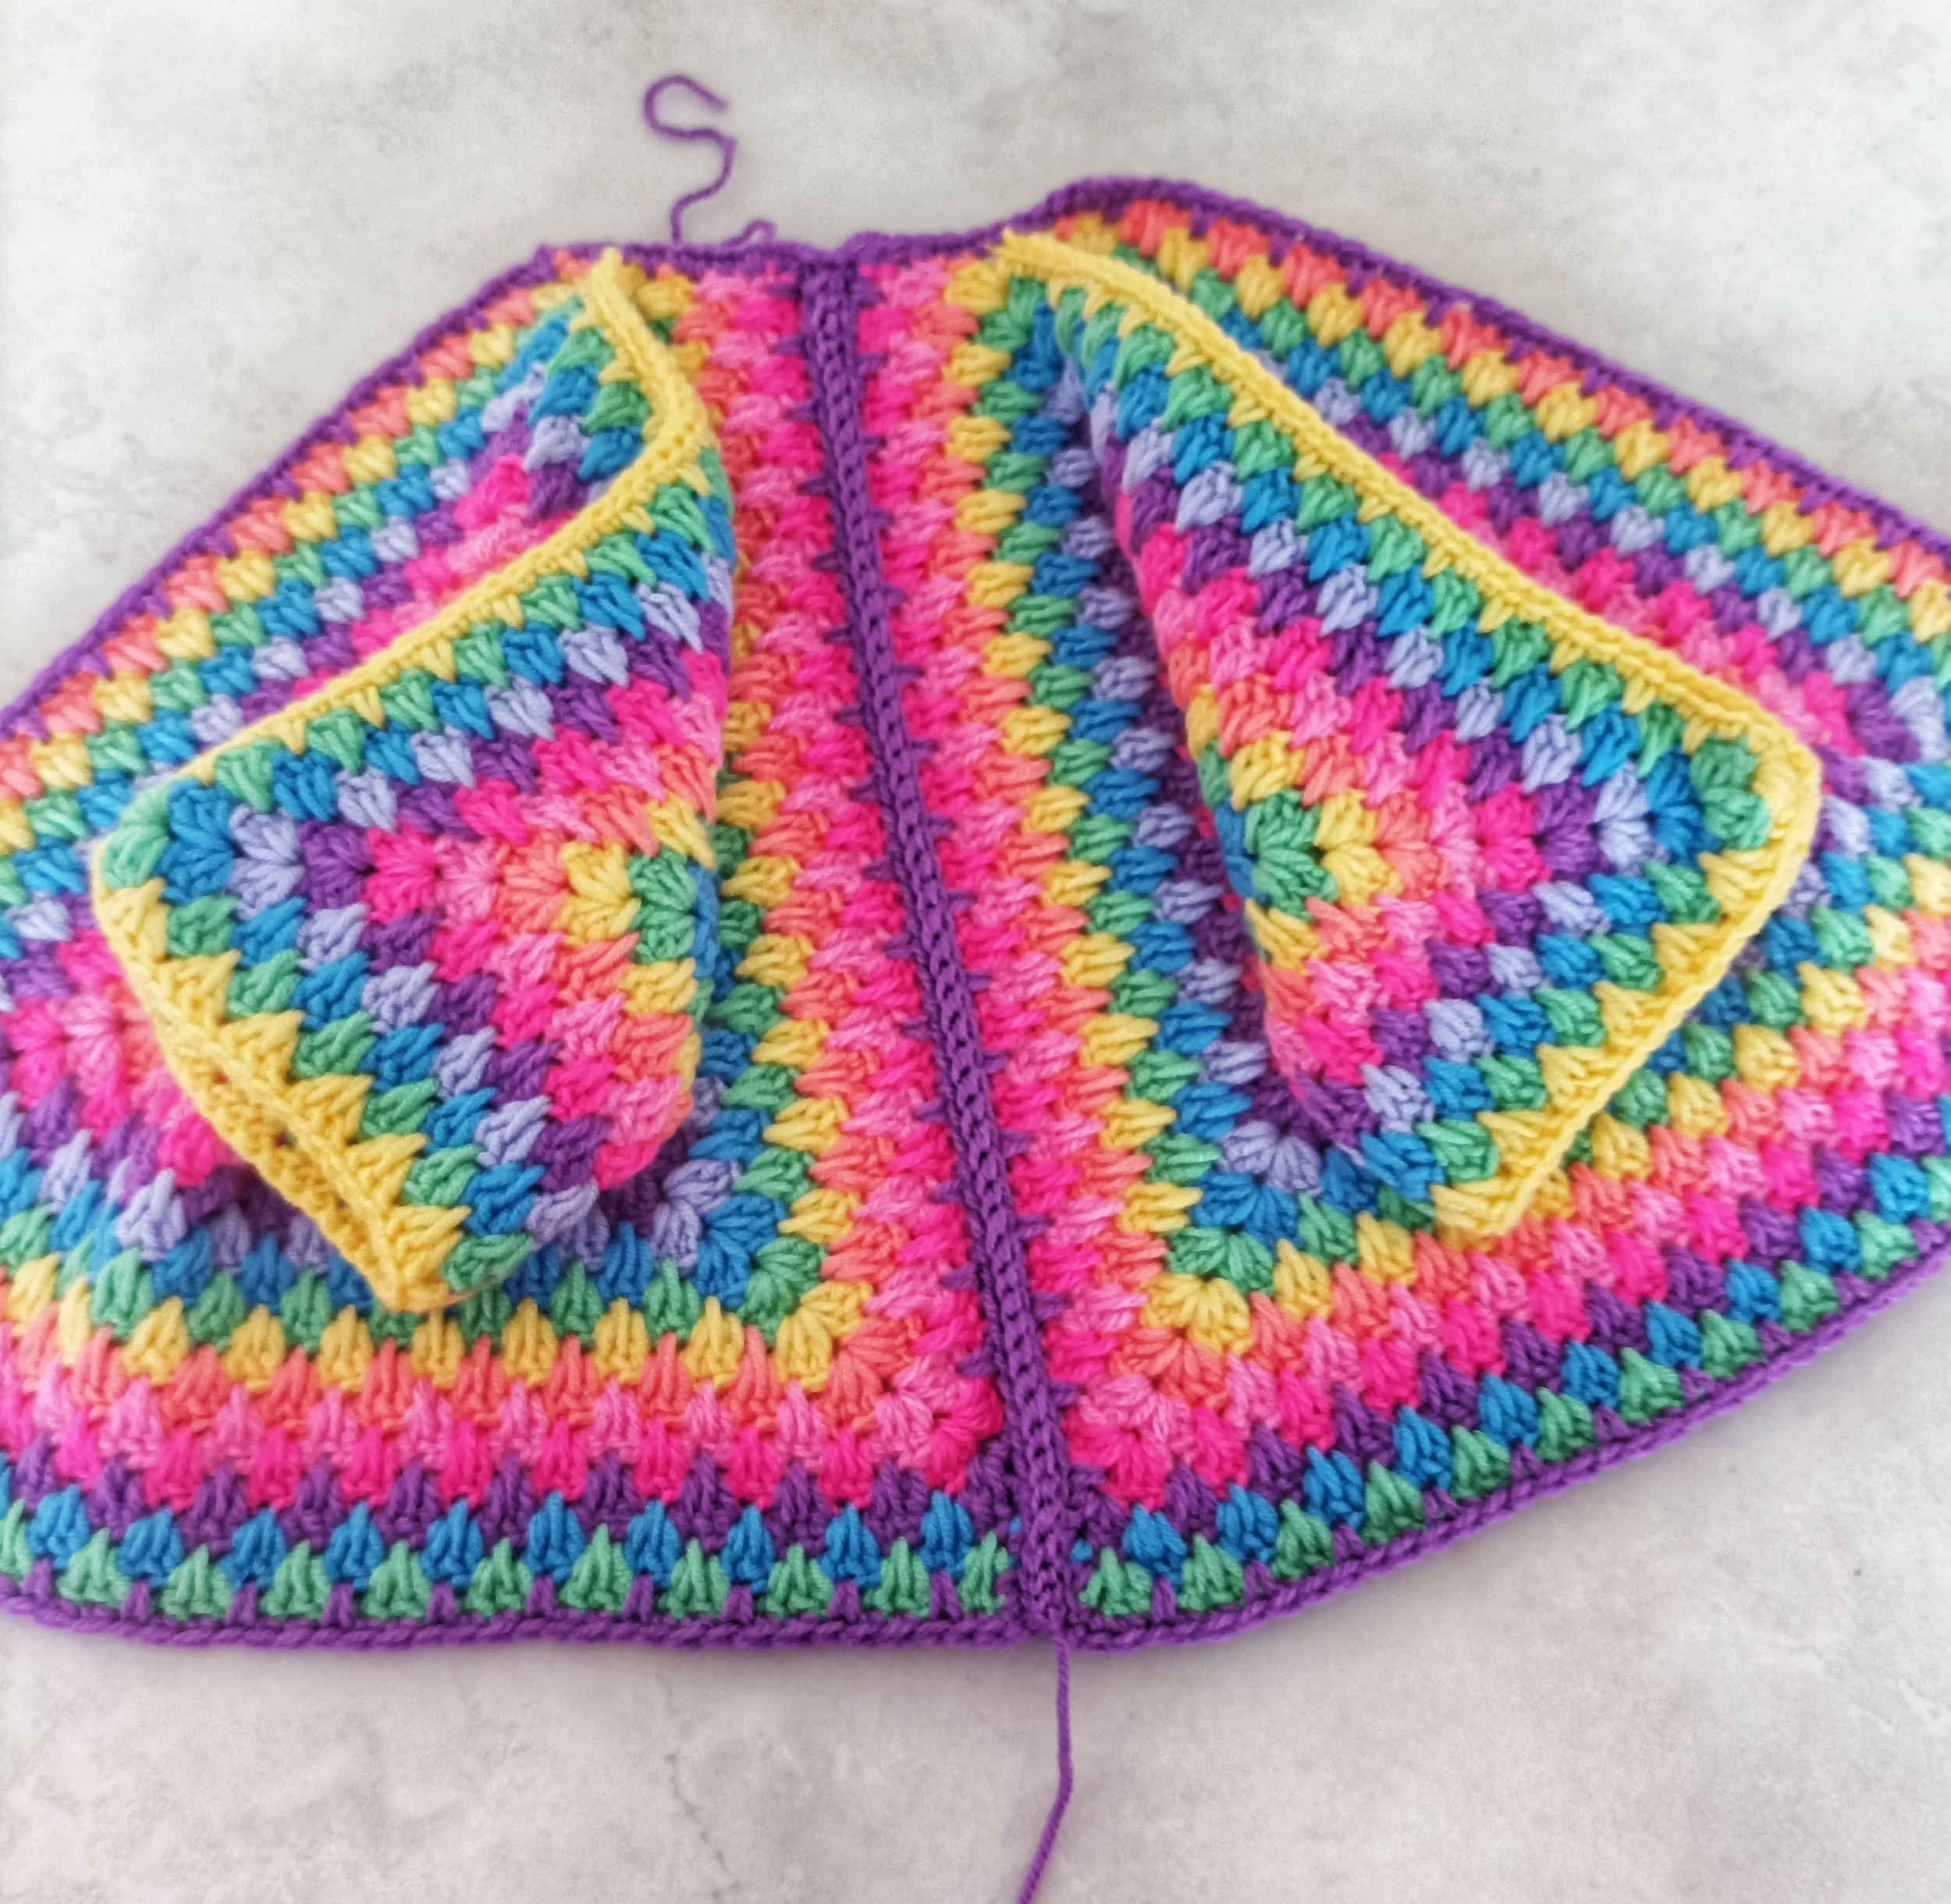
Follow the hexagon until you reach the size you are making then continue to seaming sleeves, adding rows to the back and rib edging.
If you are making the bigger sizes and you don’t want your arms too wide, you could make your hexagon until the arms are wide enough, seam the sleeves then just work 3 sides until you get the measurement that you need.
Follow the size chart to add extra rows to the back, bottom and sleeves, or add as many as you need for your size.
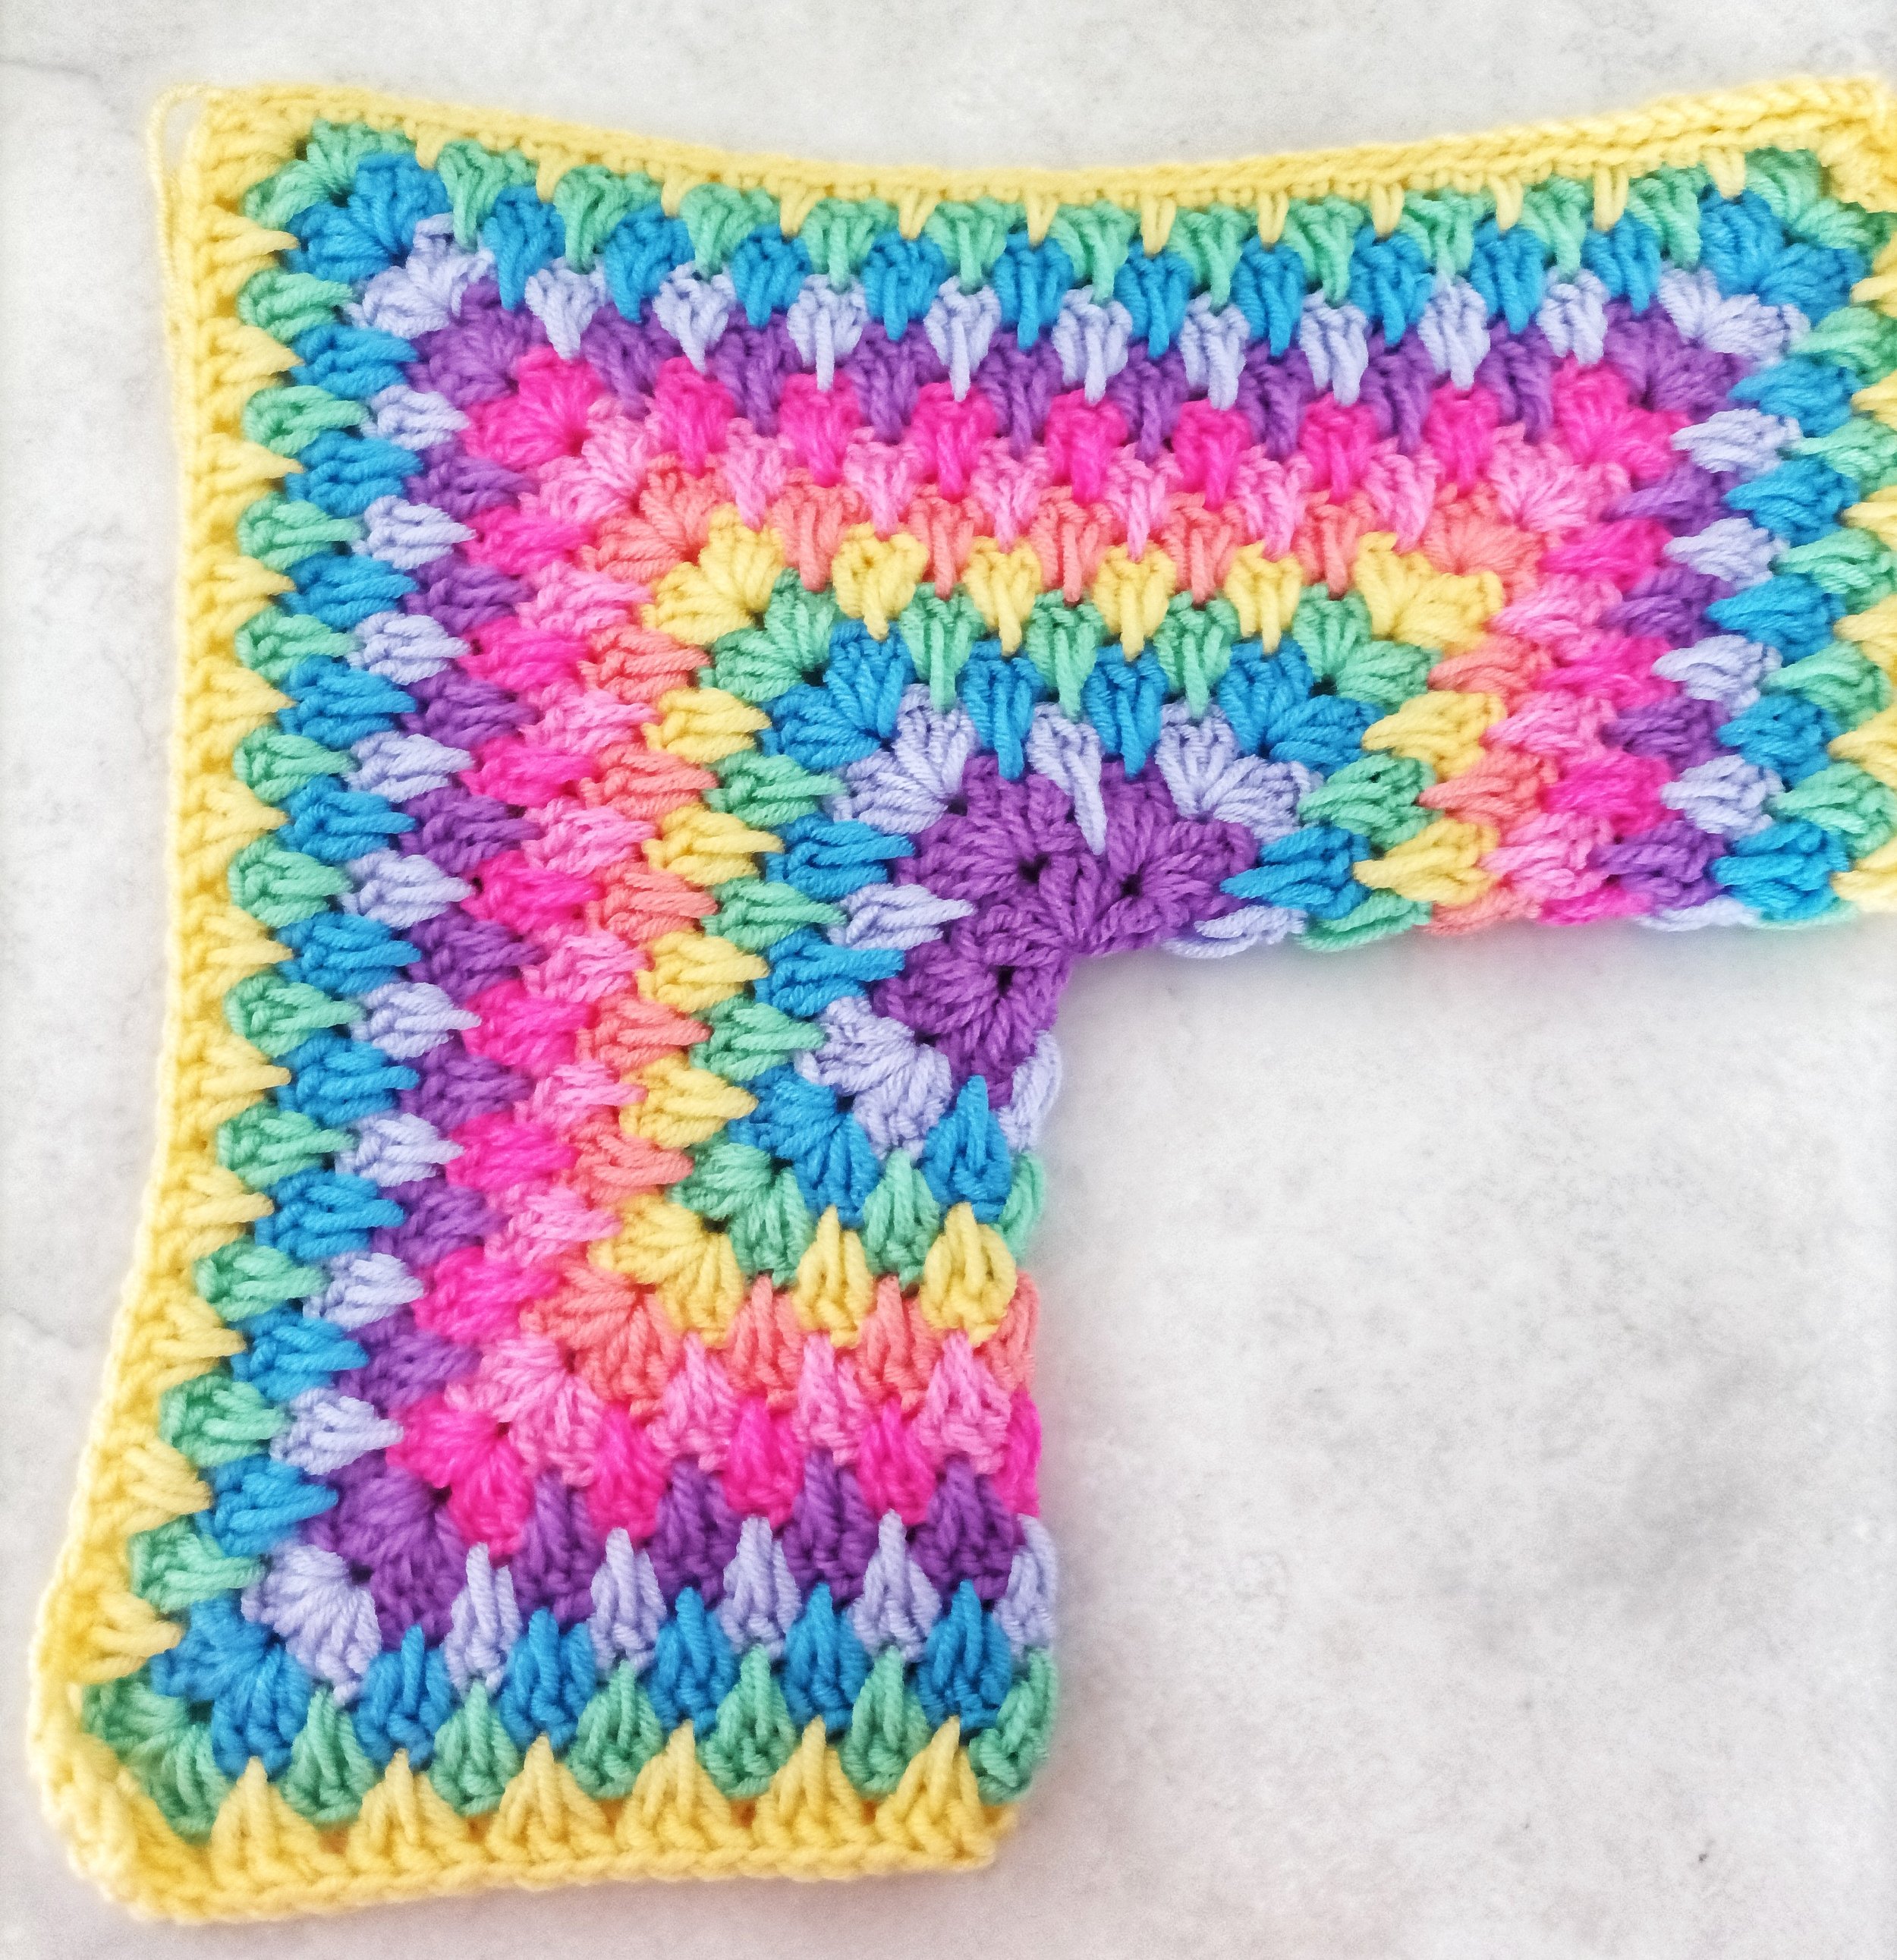
The hexagon will not lie flat, it will be wavy, this is how it should be, so that it can be folded in half to form half of a cardigan.
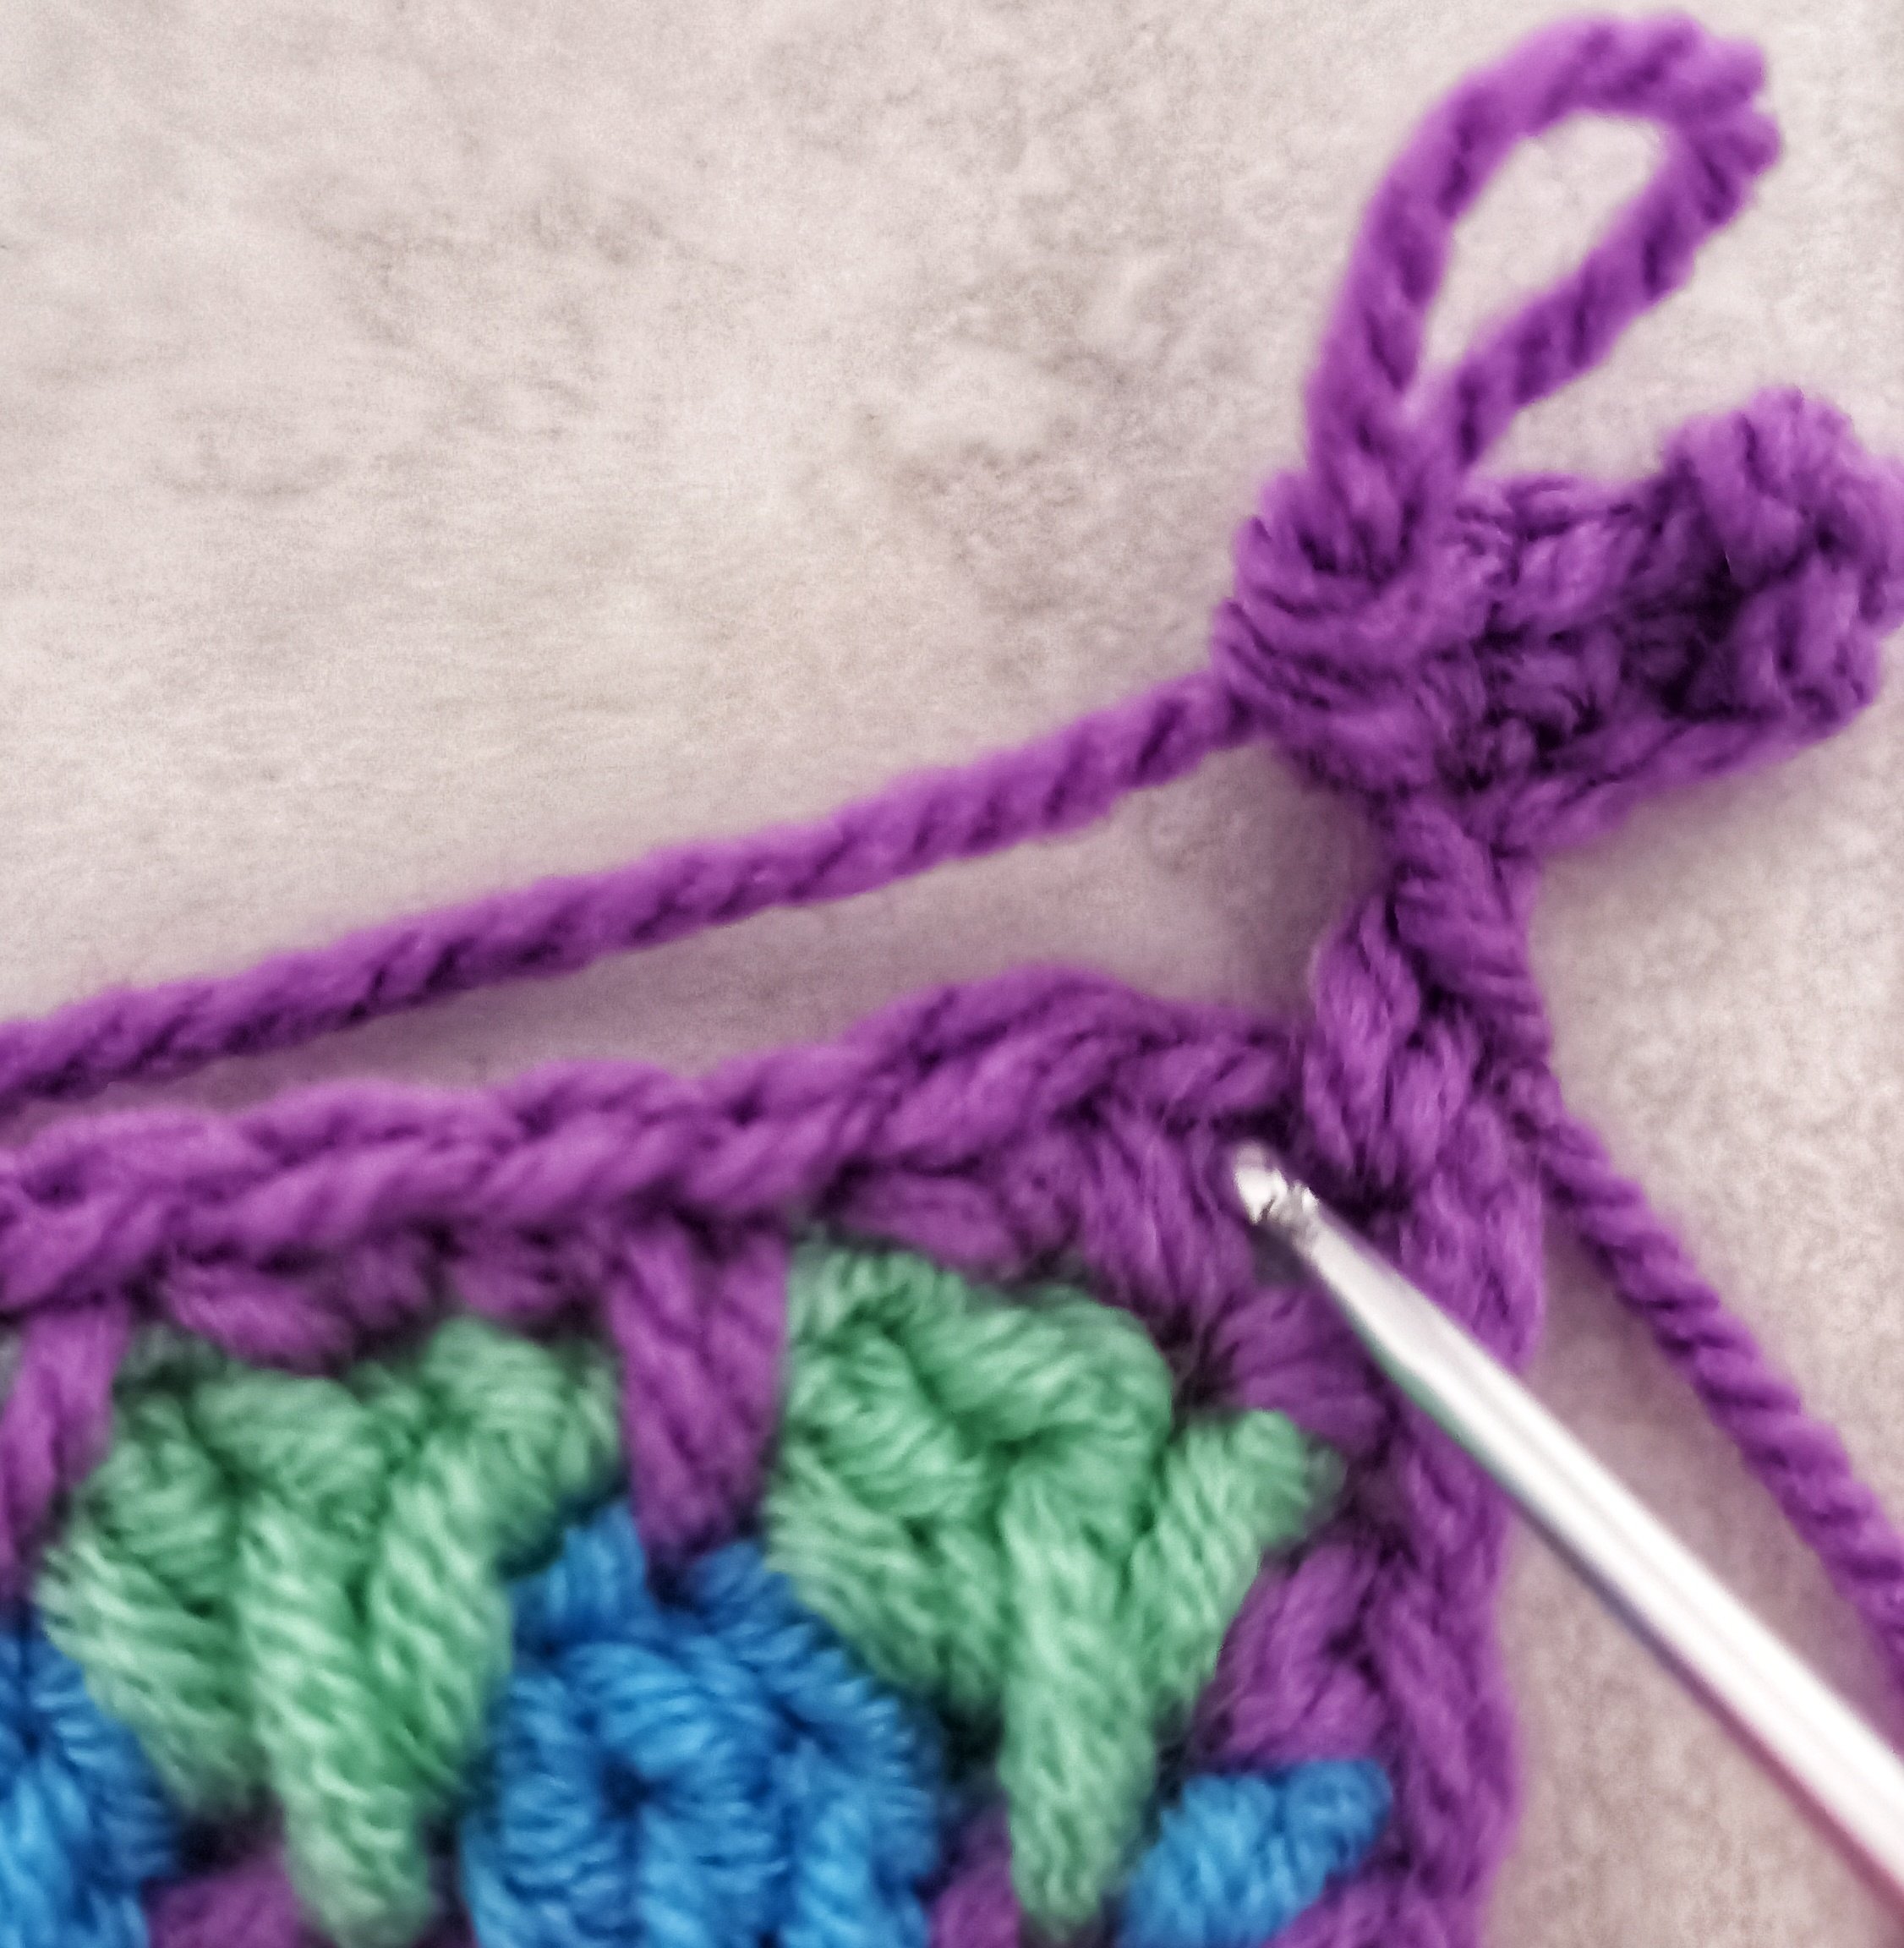
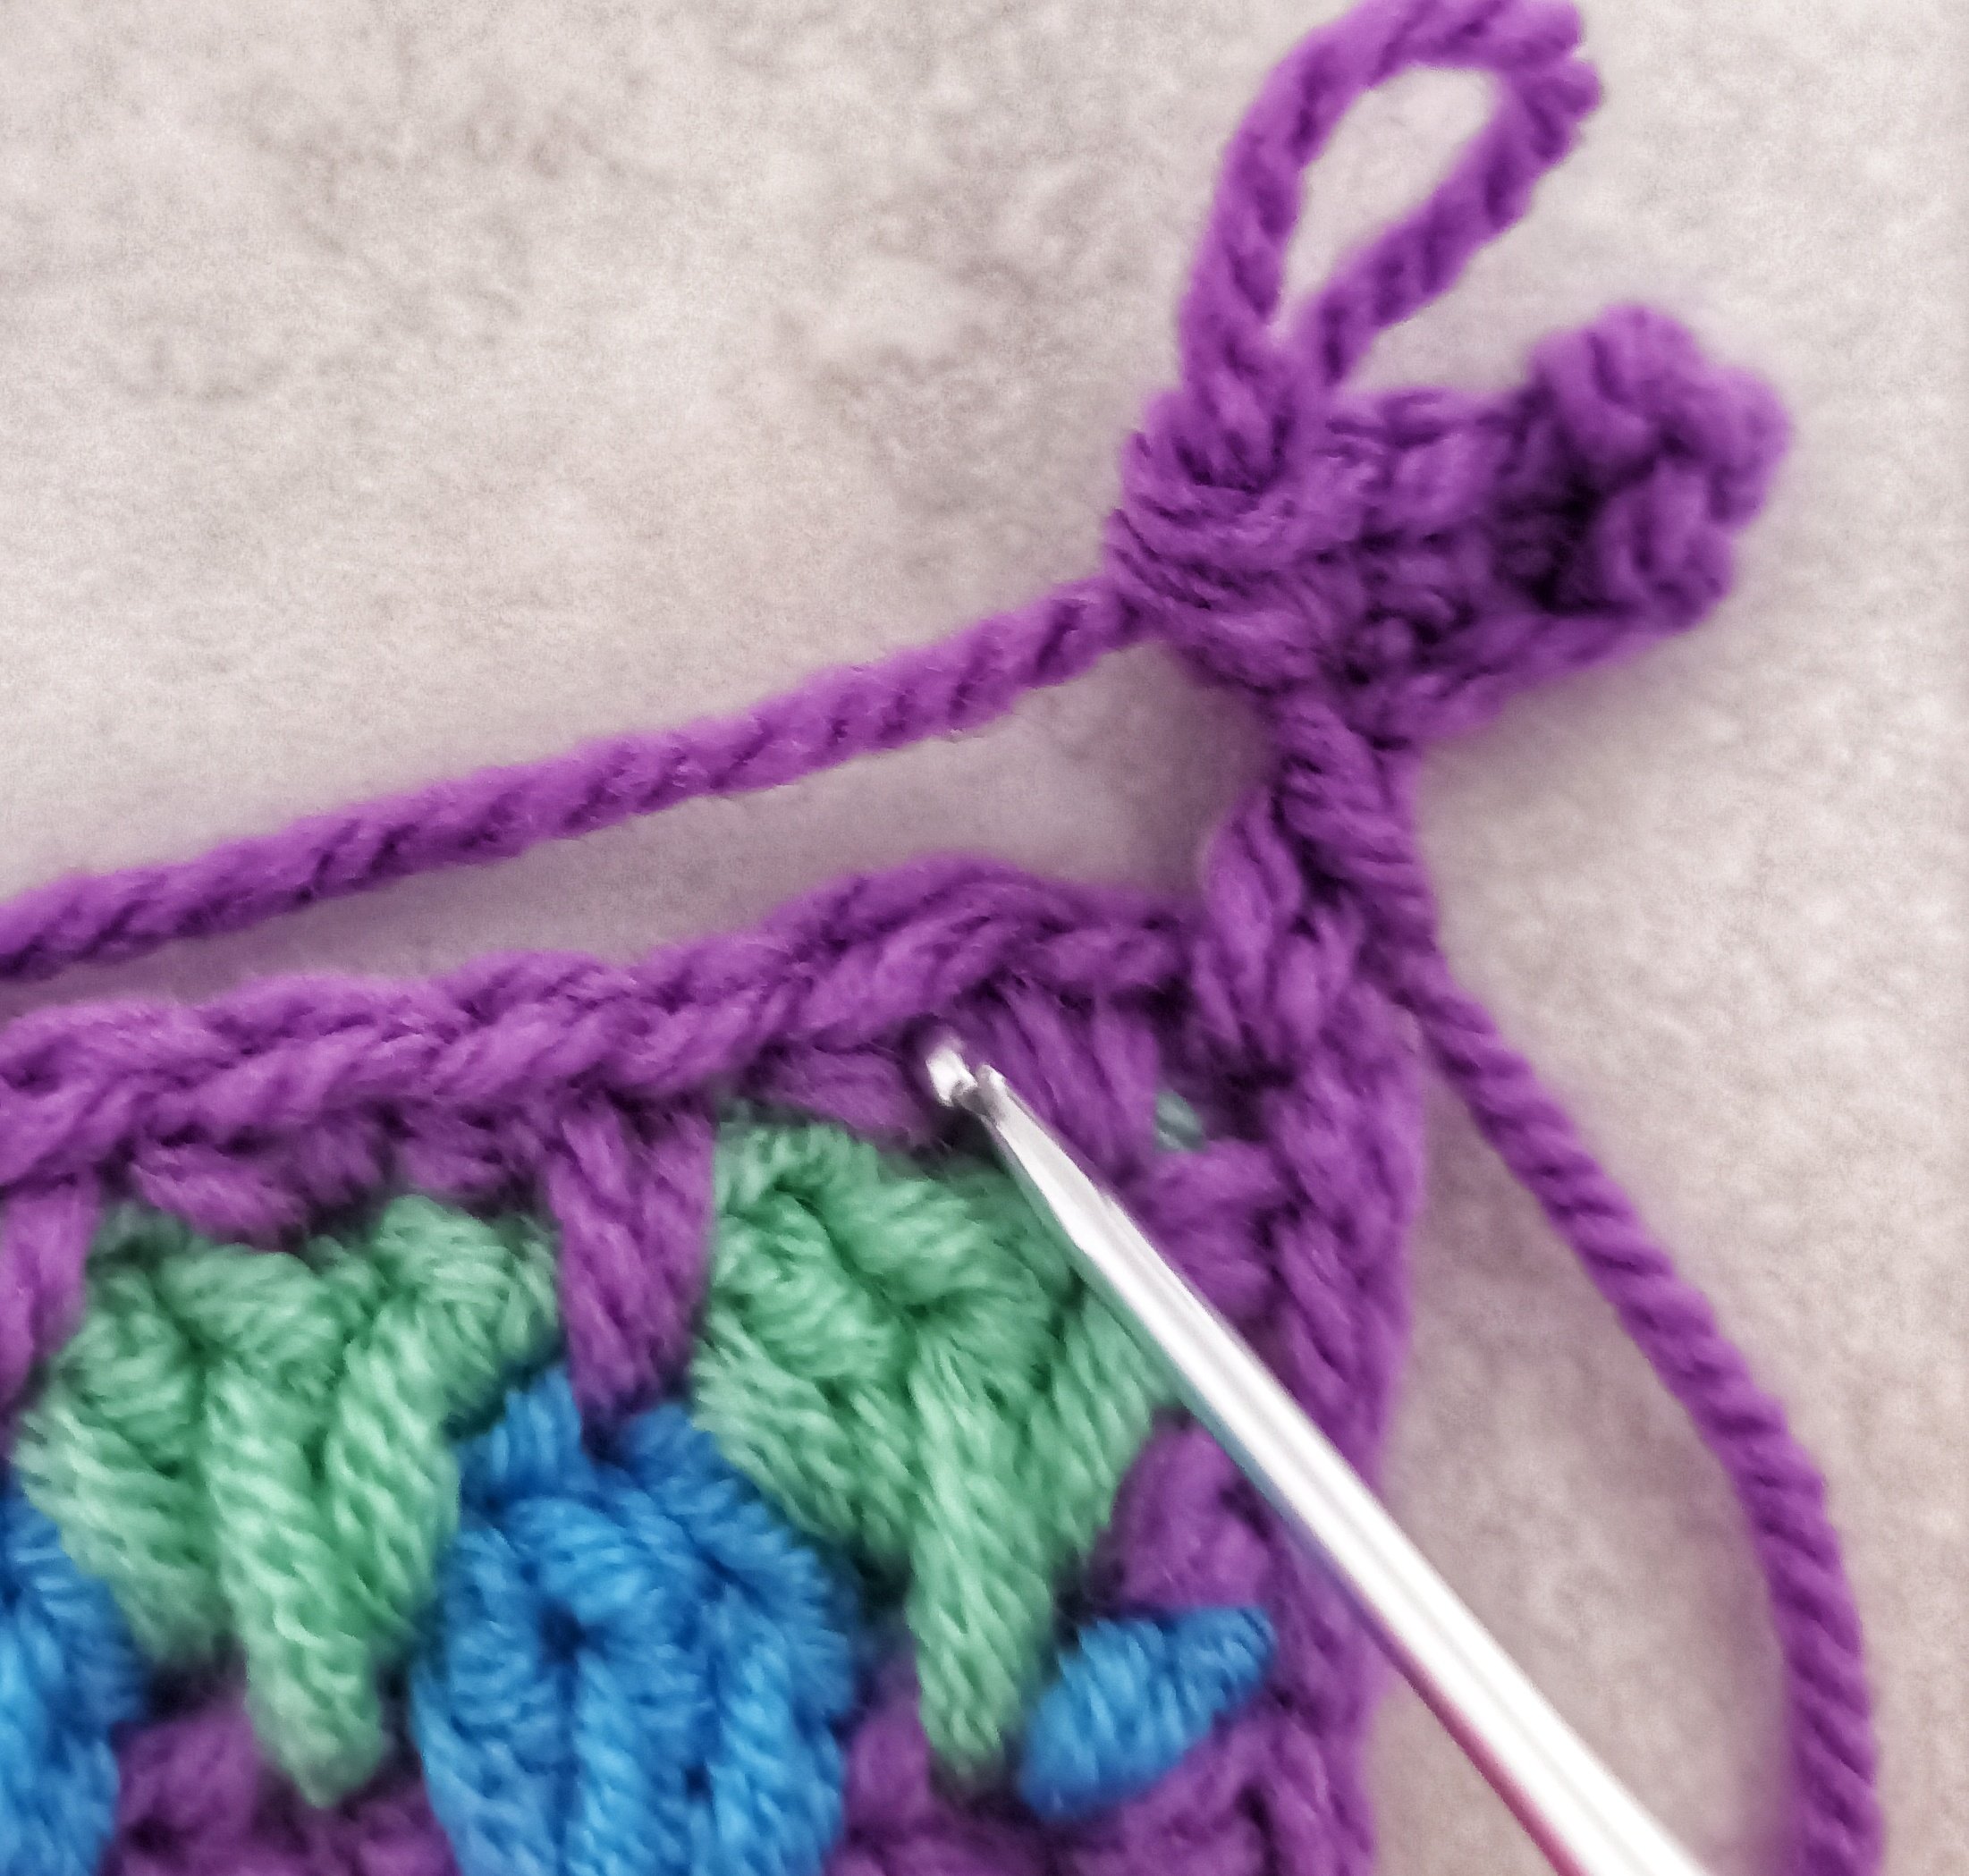
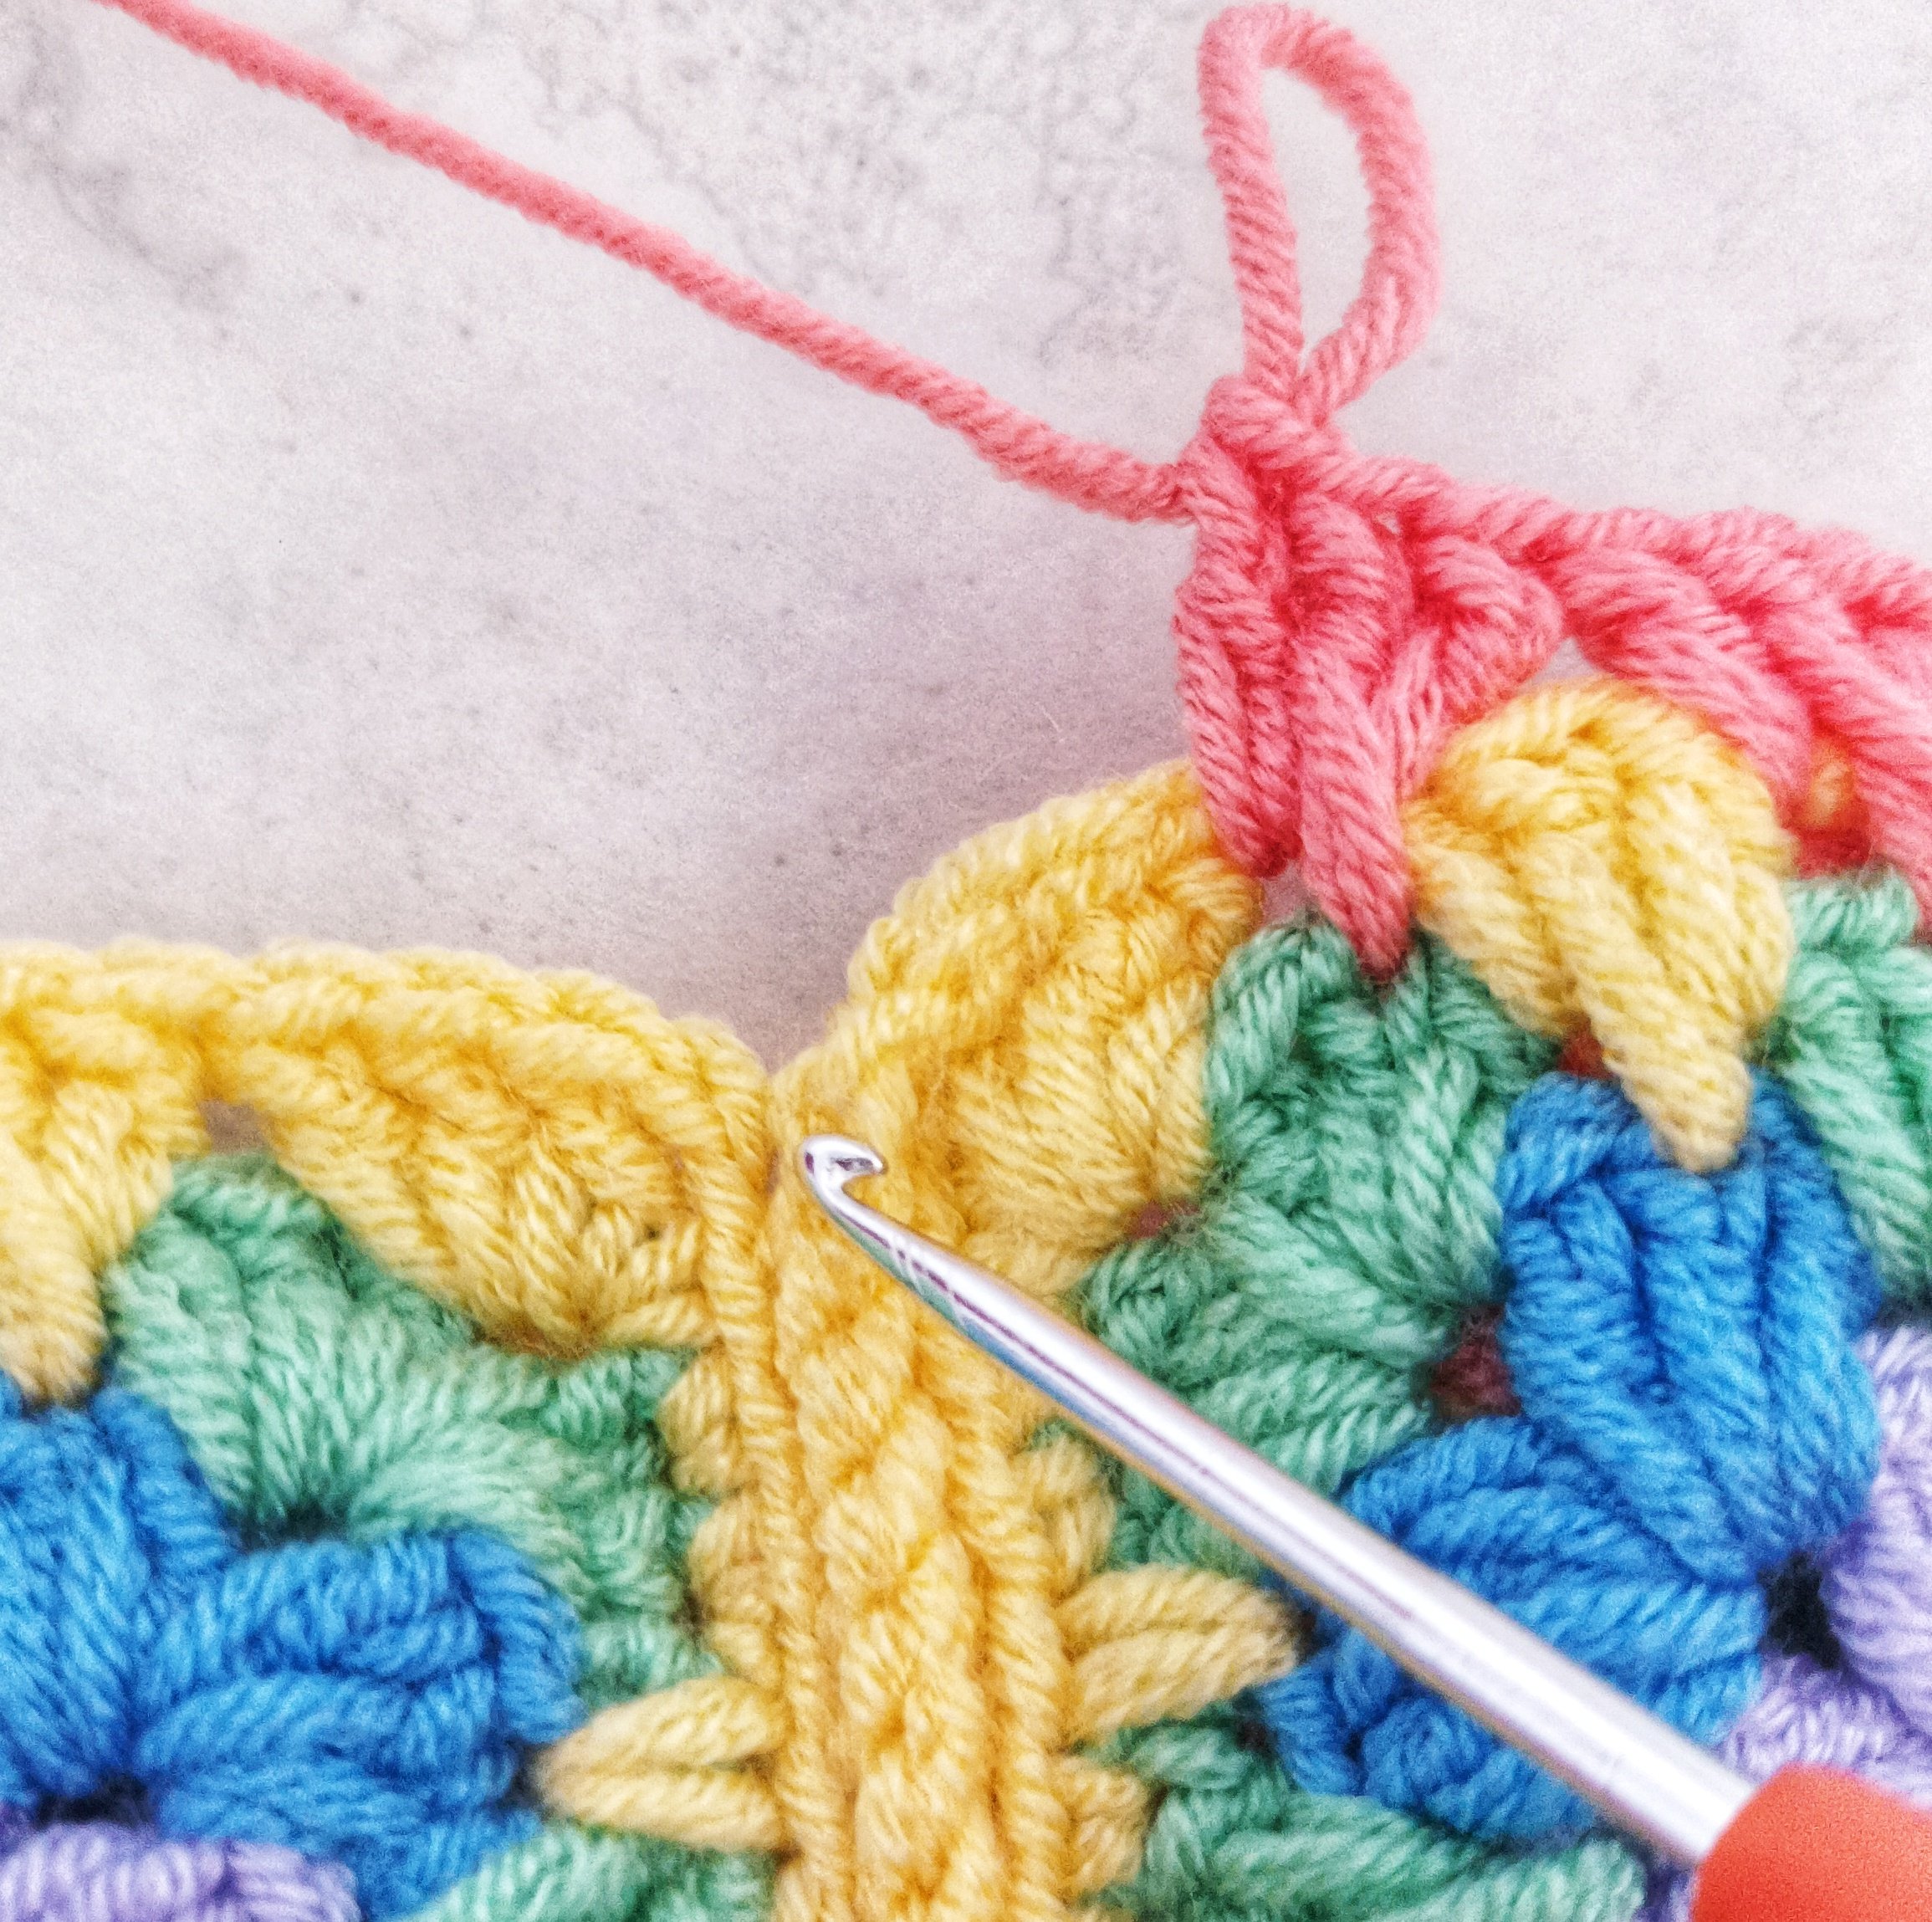
Slst to the ch1 corner space to start the next round, if using the same colour. Or if changing colour join in any ch1 space.
Each round of the hexagon is started with a ch3 (counted as a dc) and each row of the rib edging is started with a ch1 (not counted as a stitch)
My example pictures are for size 3-4 years. I made my hexagon to 5” then did the last round that took it to 5.5”.
To get the spike effect do two rows of each colour.
If you find it helpful watching a tutorial I made a video here Cosy Hexi Cardi Crochet Tutorial


Hexagon (make two)
Using a 4.5mm hook or your choosen hook
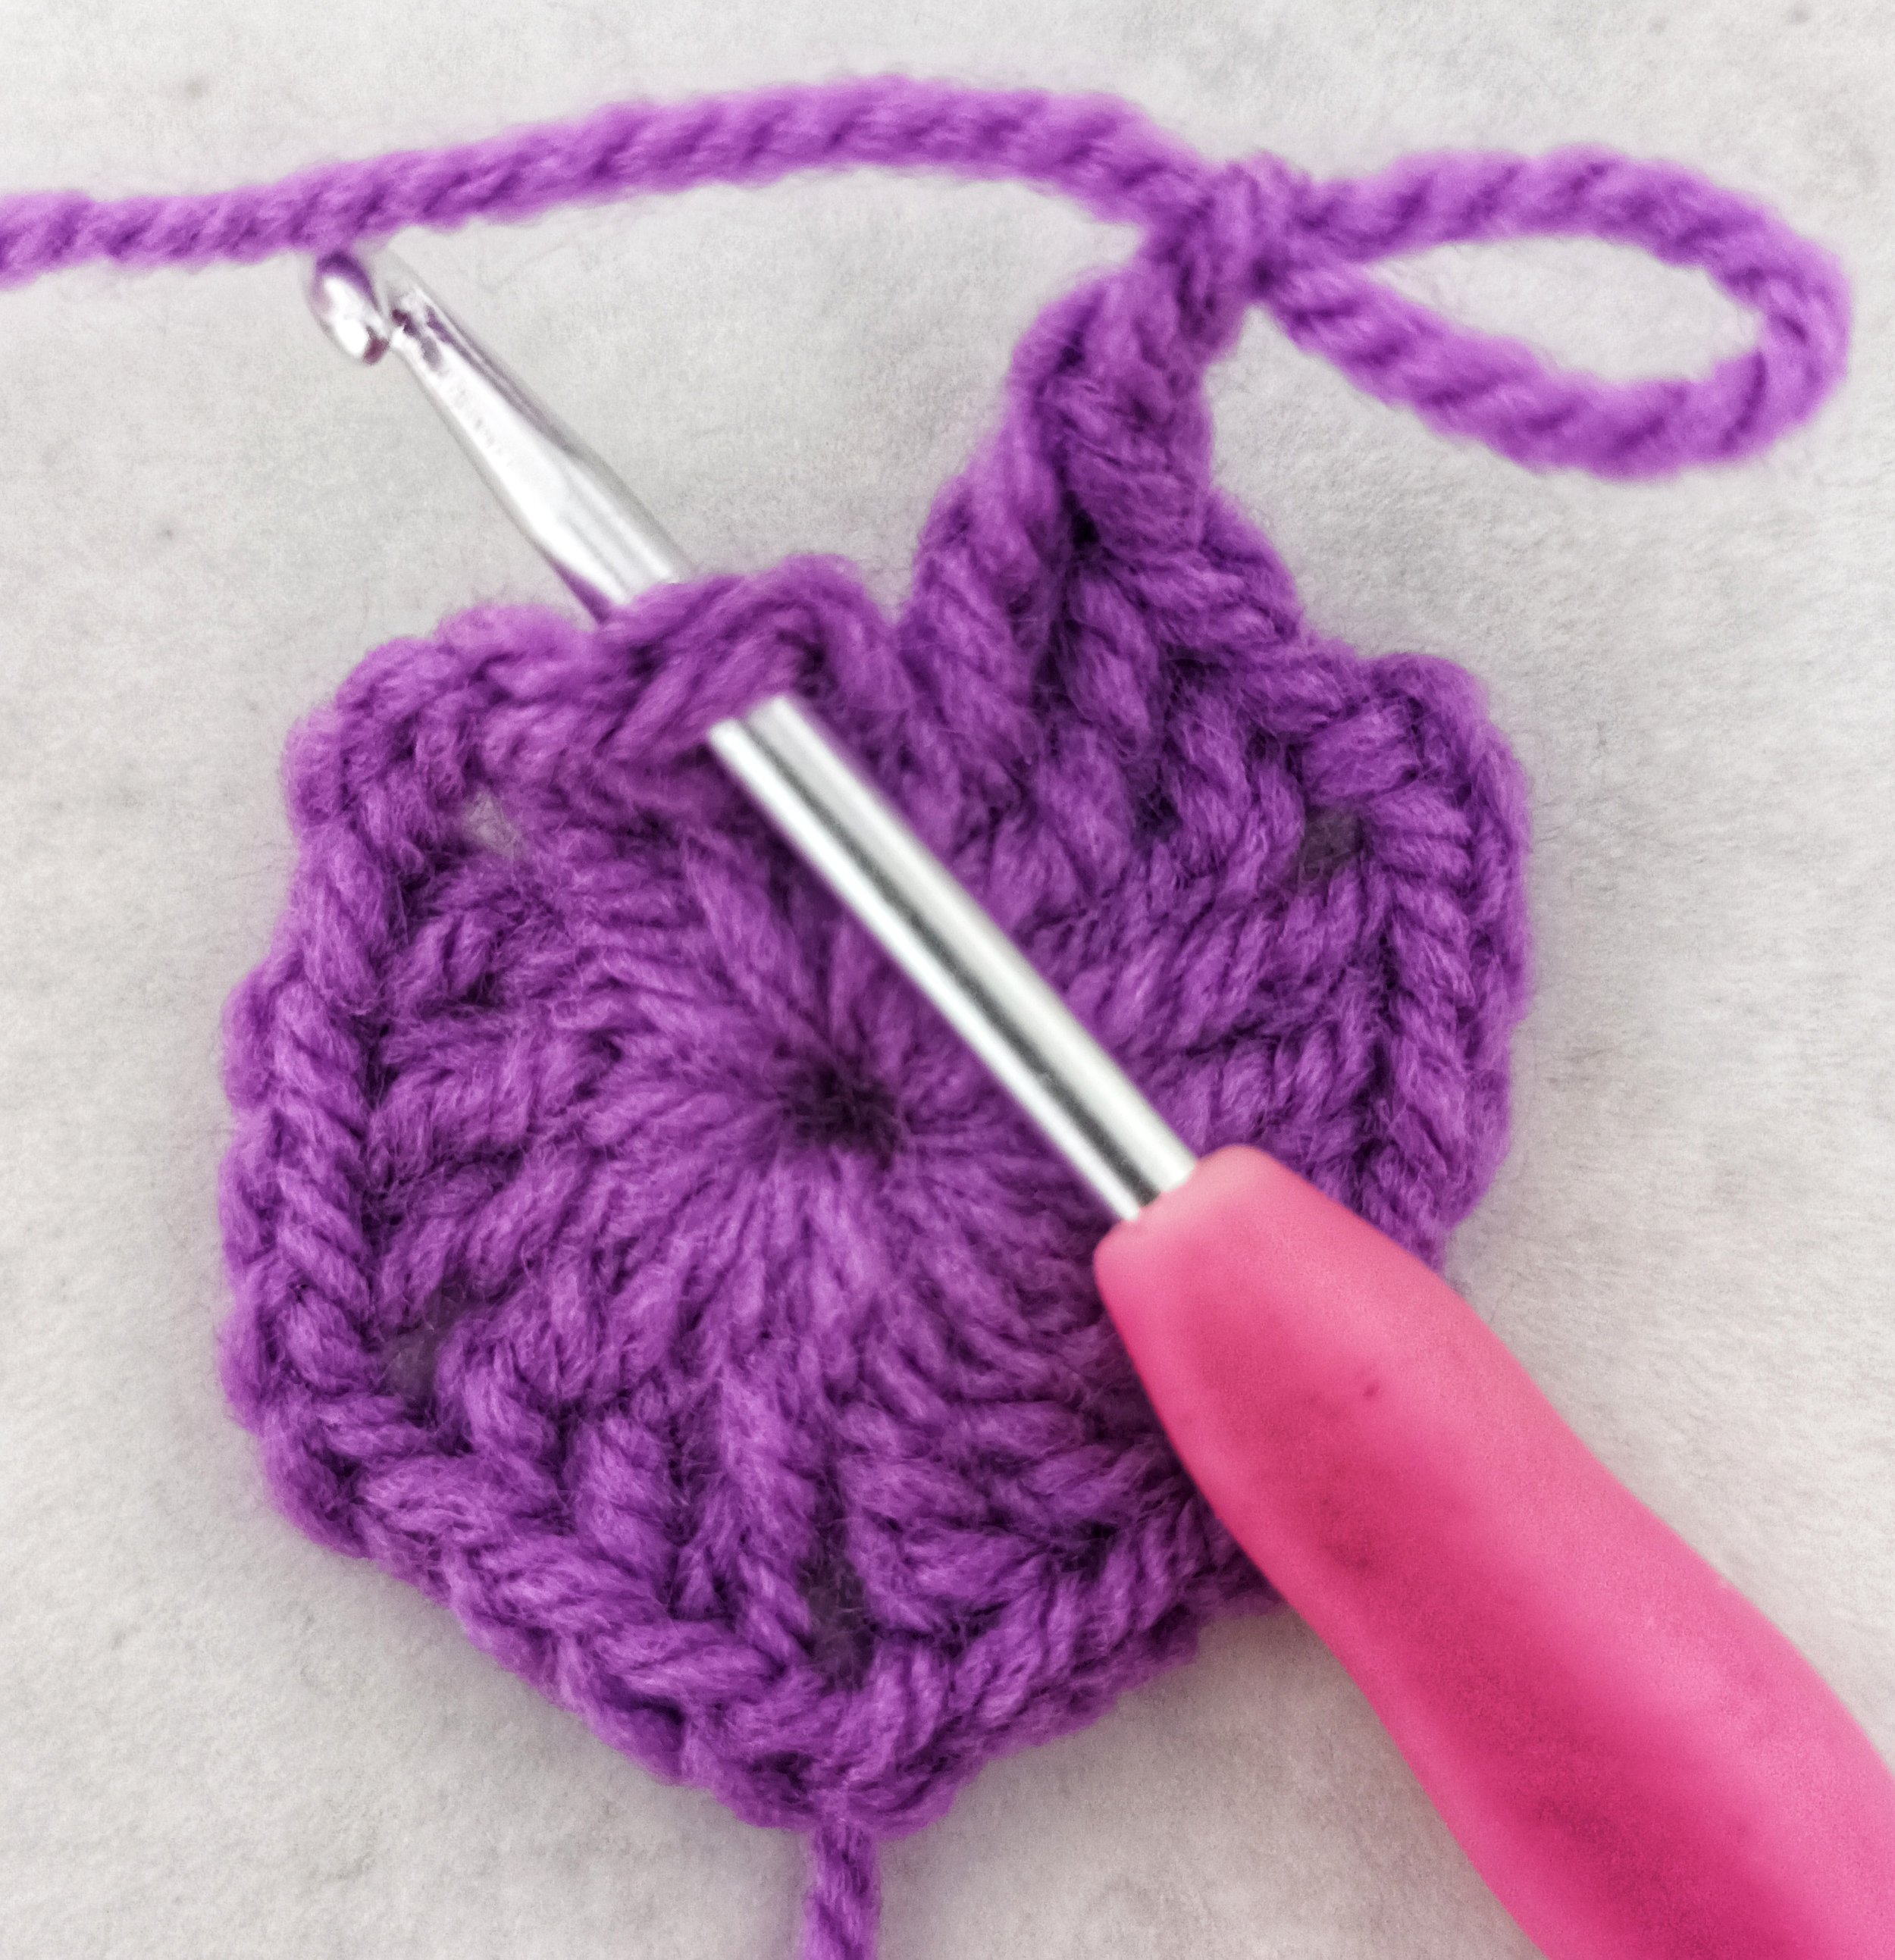
Round 1: In a magic circle, ch3, 2 dc, ch1, *3 dc, ch1* x 5, slst to first stitch, slst to the ch1 corner. (18)


Round 2: [ch3, 2 dc, ch1, 3 dc] in the same stitch for the first corner, *[3 dc, ch1, 3 dc] in each ch1 space, slst to the first stitch, then slst to the ch1 corner space to start the next round. (36)
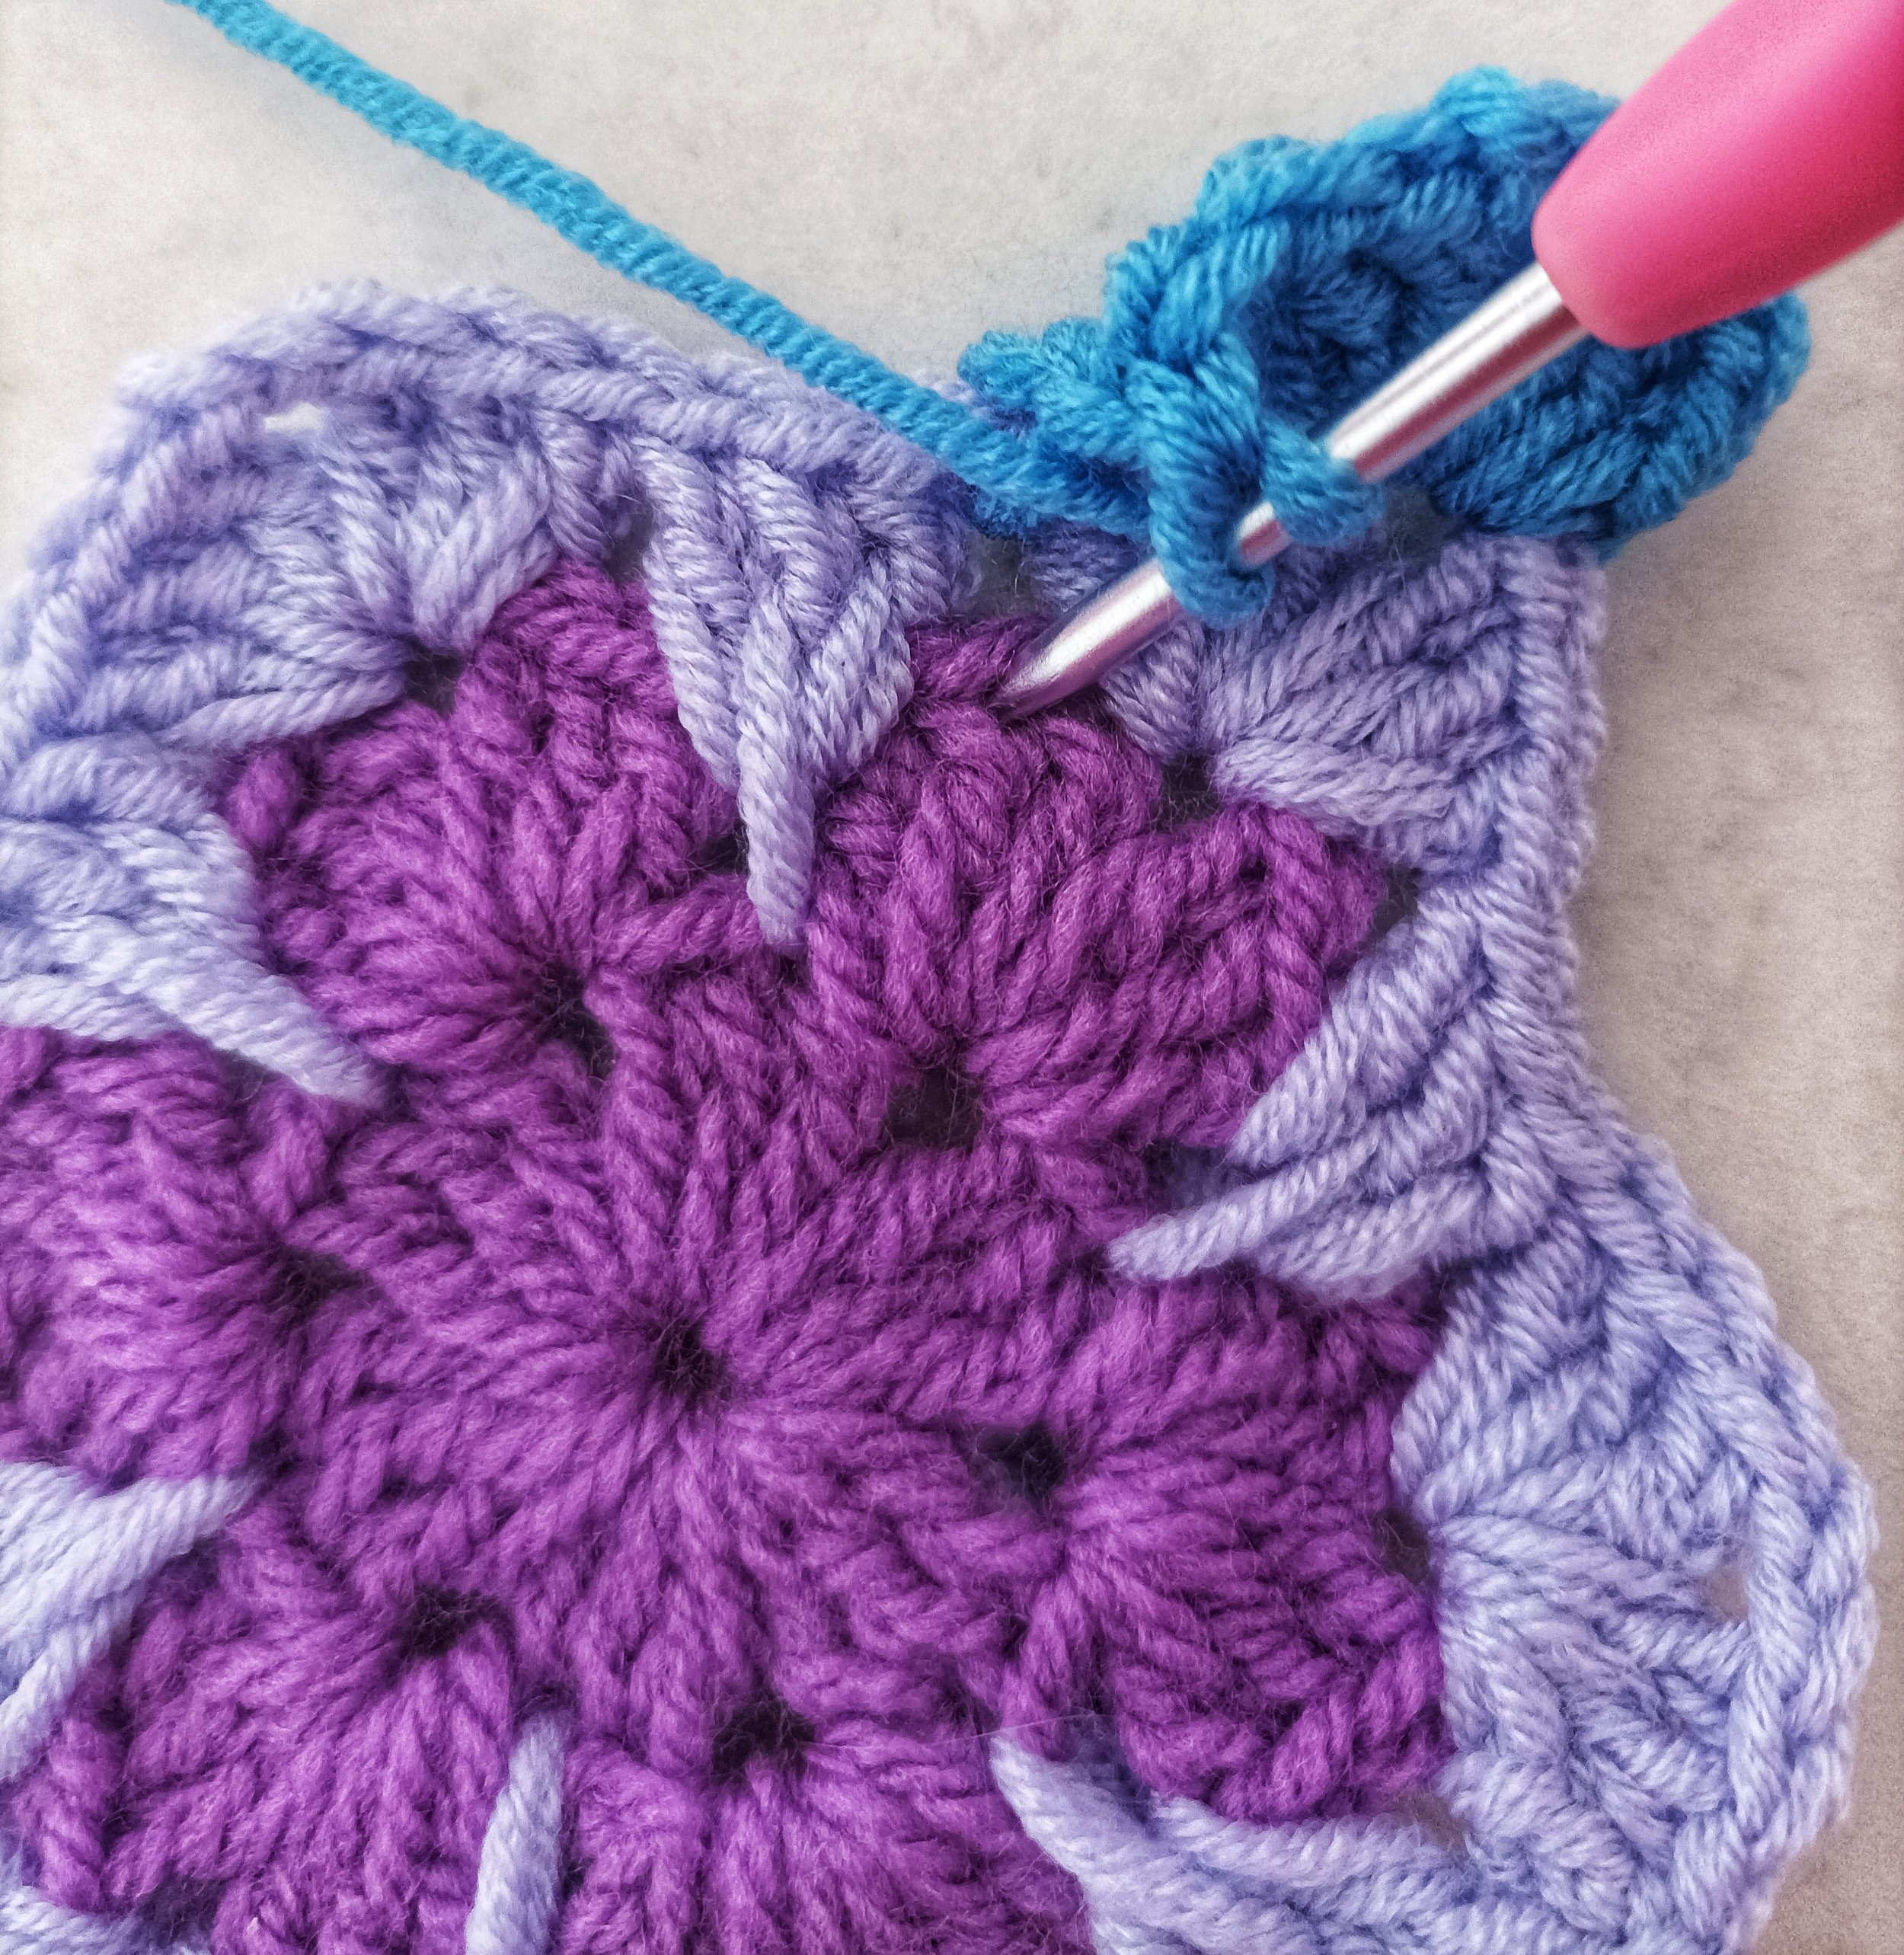
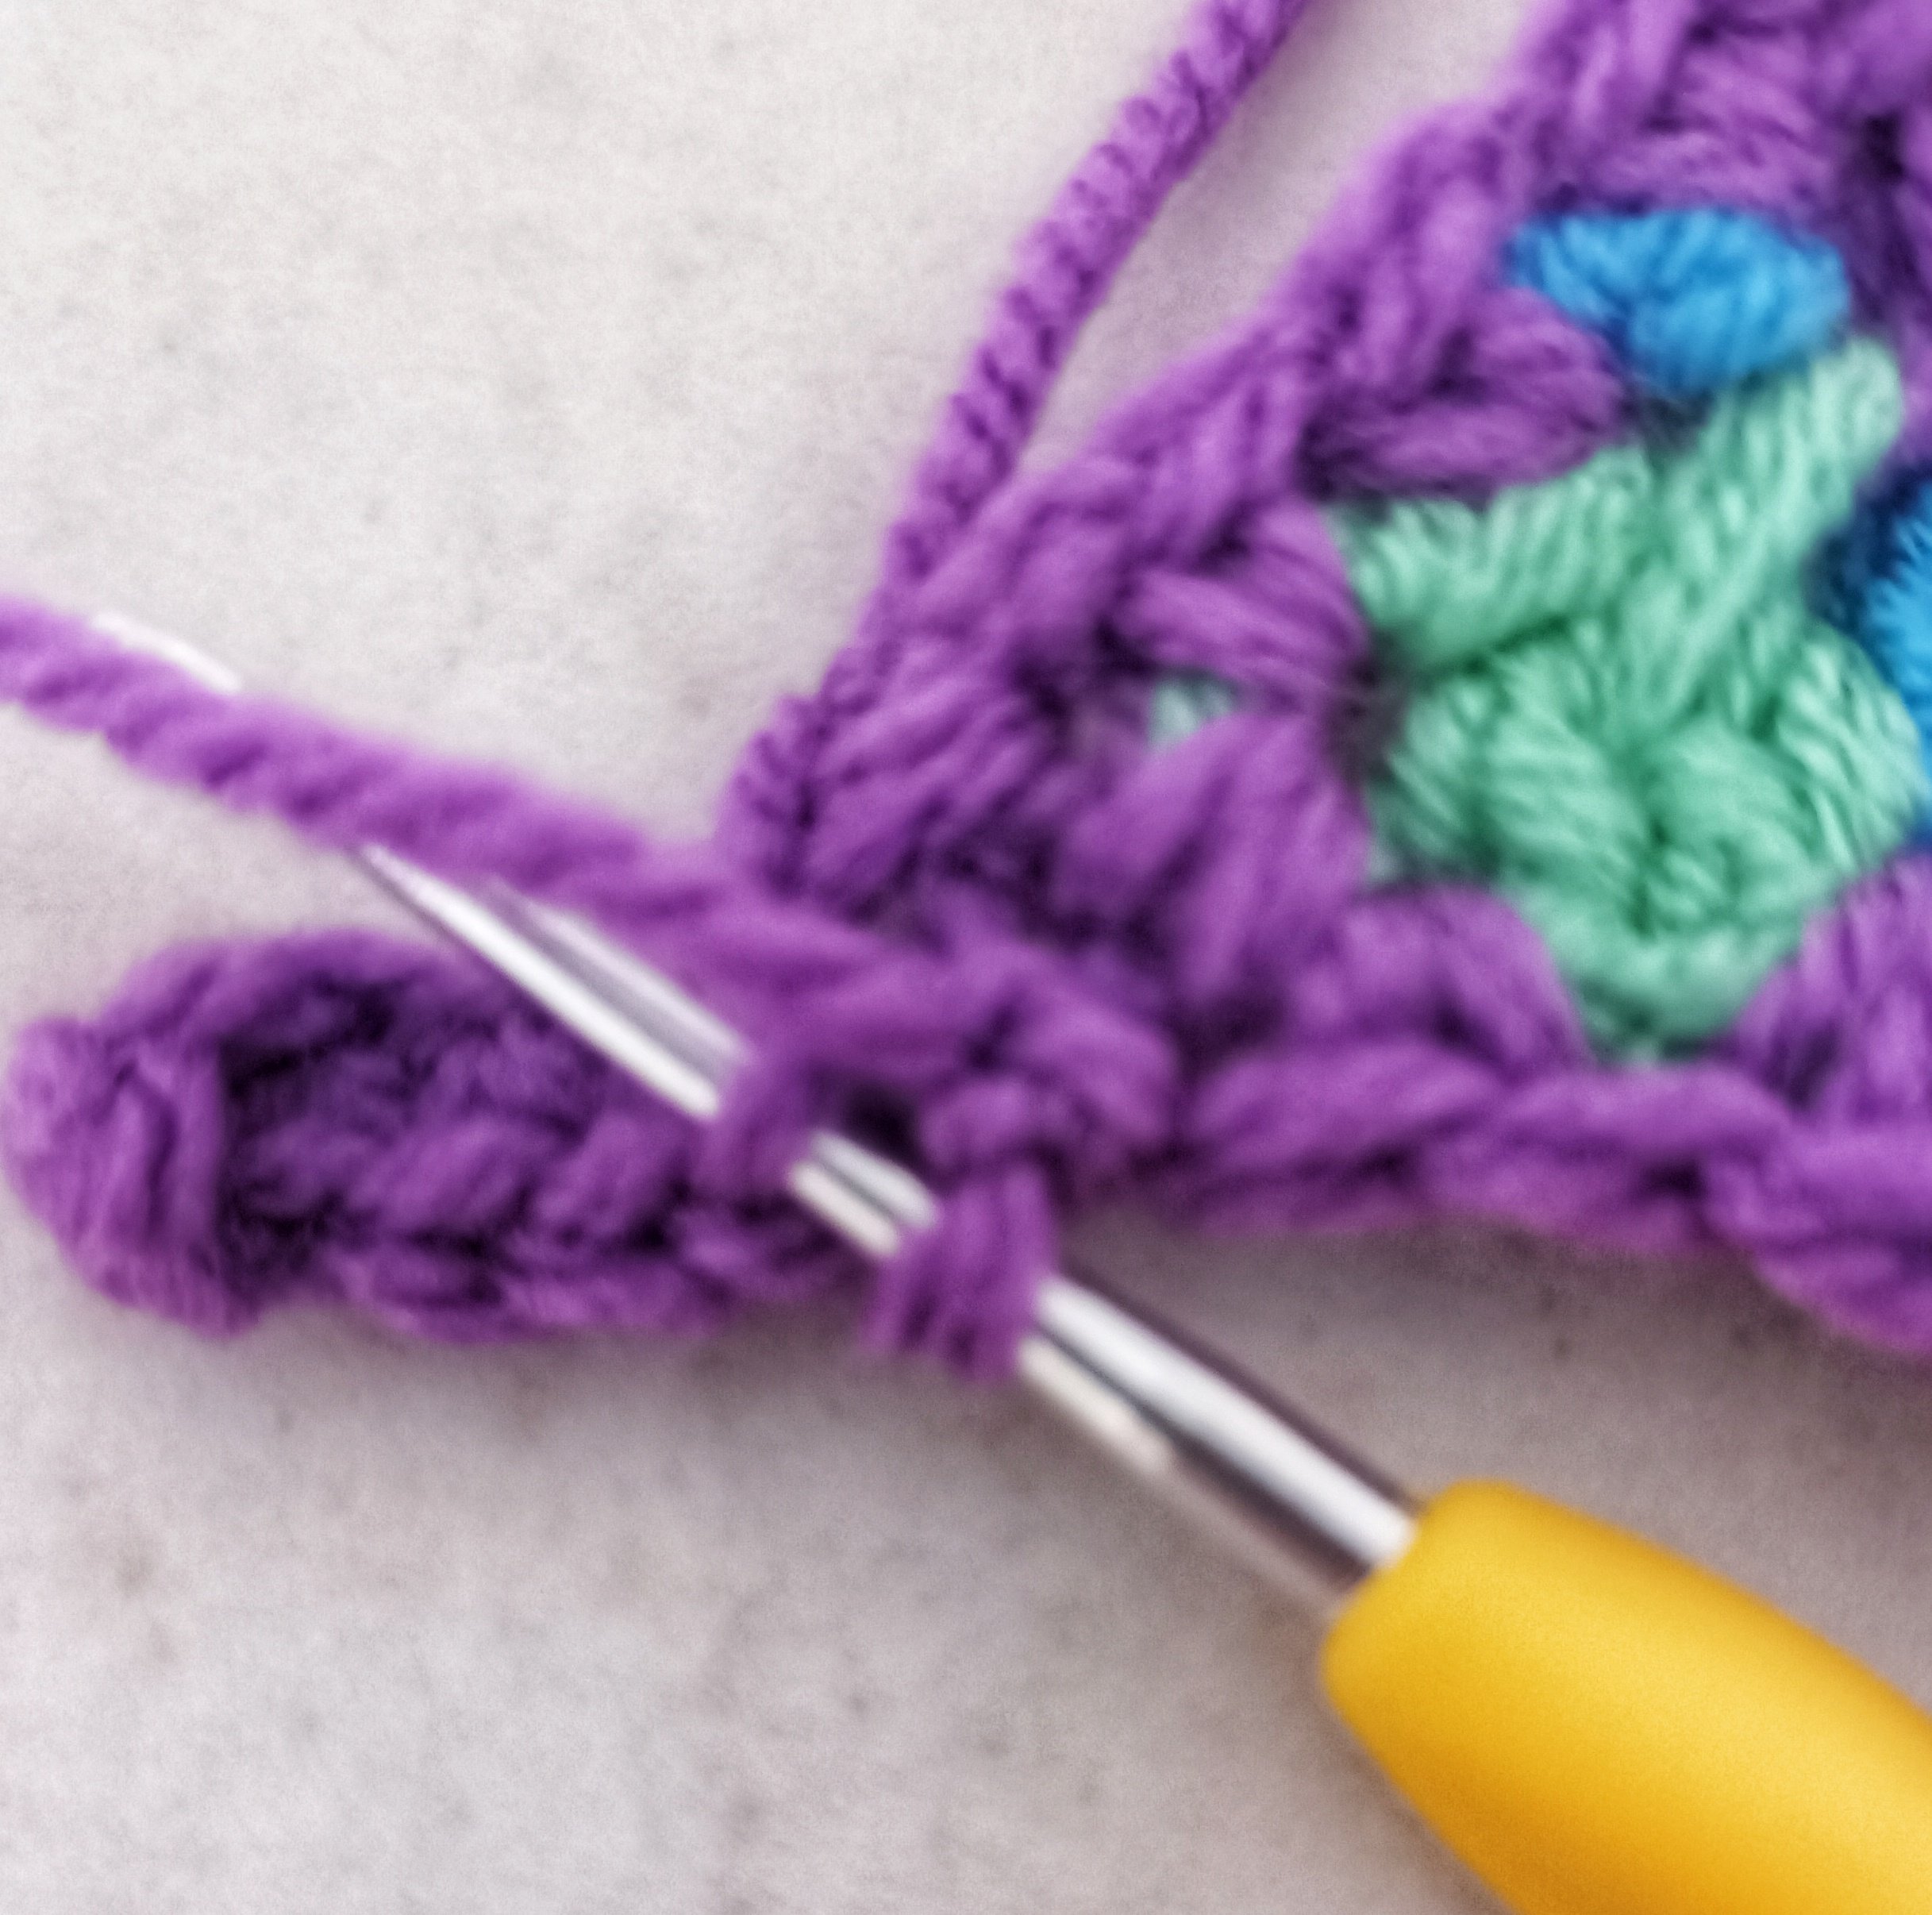
Round 3: [ch3, 2 dc, ch1, 3 dc] in the same stitch for the first corner, [dc, sdc, dc] between the cluster below, *[3 dc, ch1, 3 dc] in the ch1 corner, [dc, sdc, dc] between the cluster below* repeat to end, slst to first stitch, then slst to the ch1 corner space to start the next round. (54)
Round 4: [ch3, 2 dc, ch1, 3 dc] in the same stitch for the first corner, [dc, sdc, dc] between the next 2 clusters, *[3 dc, ch1, 3 dc] in the ch1 corner, [dc, sdc, dc] between the next 2 clusters* repeat to end, slst to first stitch, then slst to the ch1 corner space to start the next round. (72)
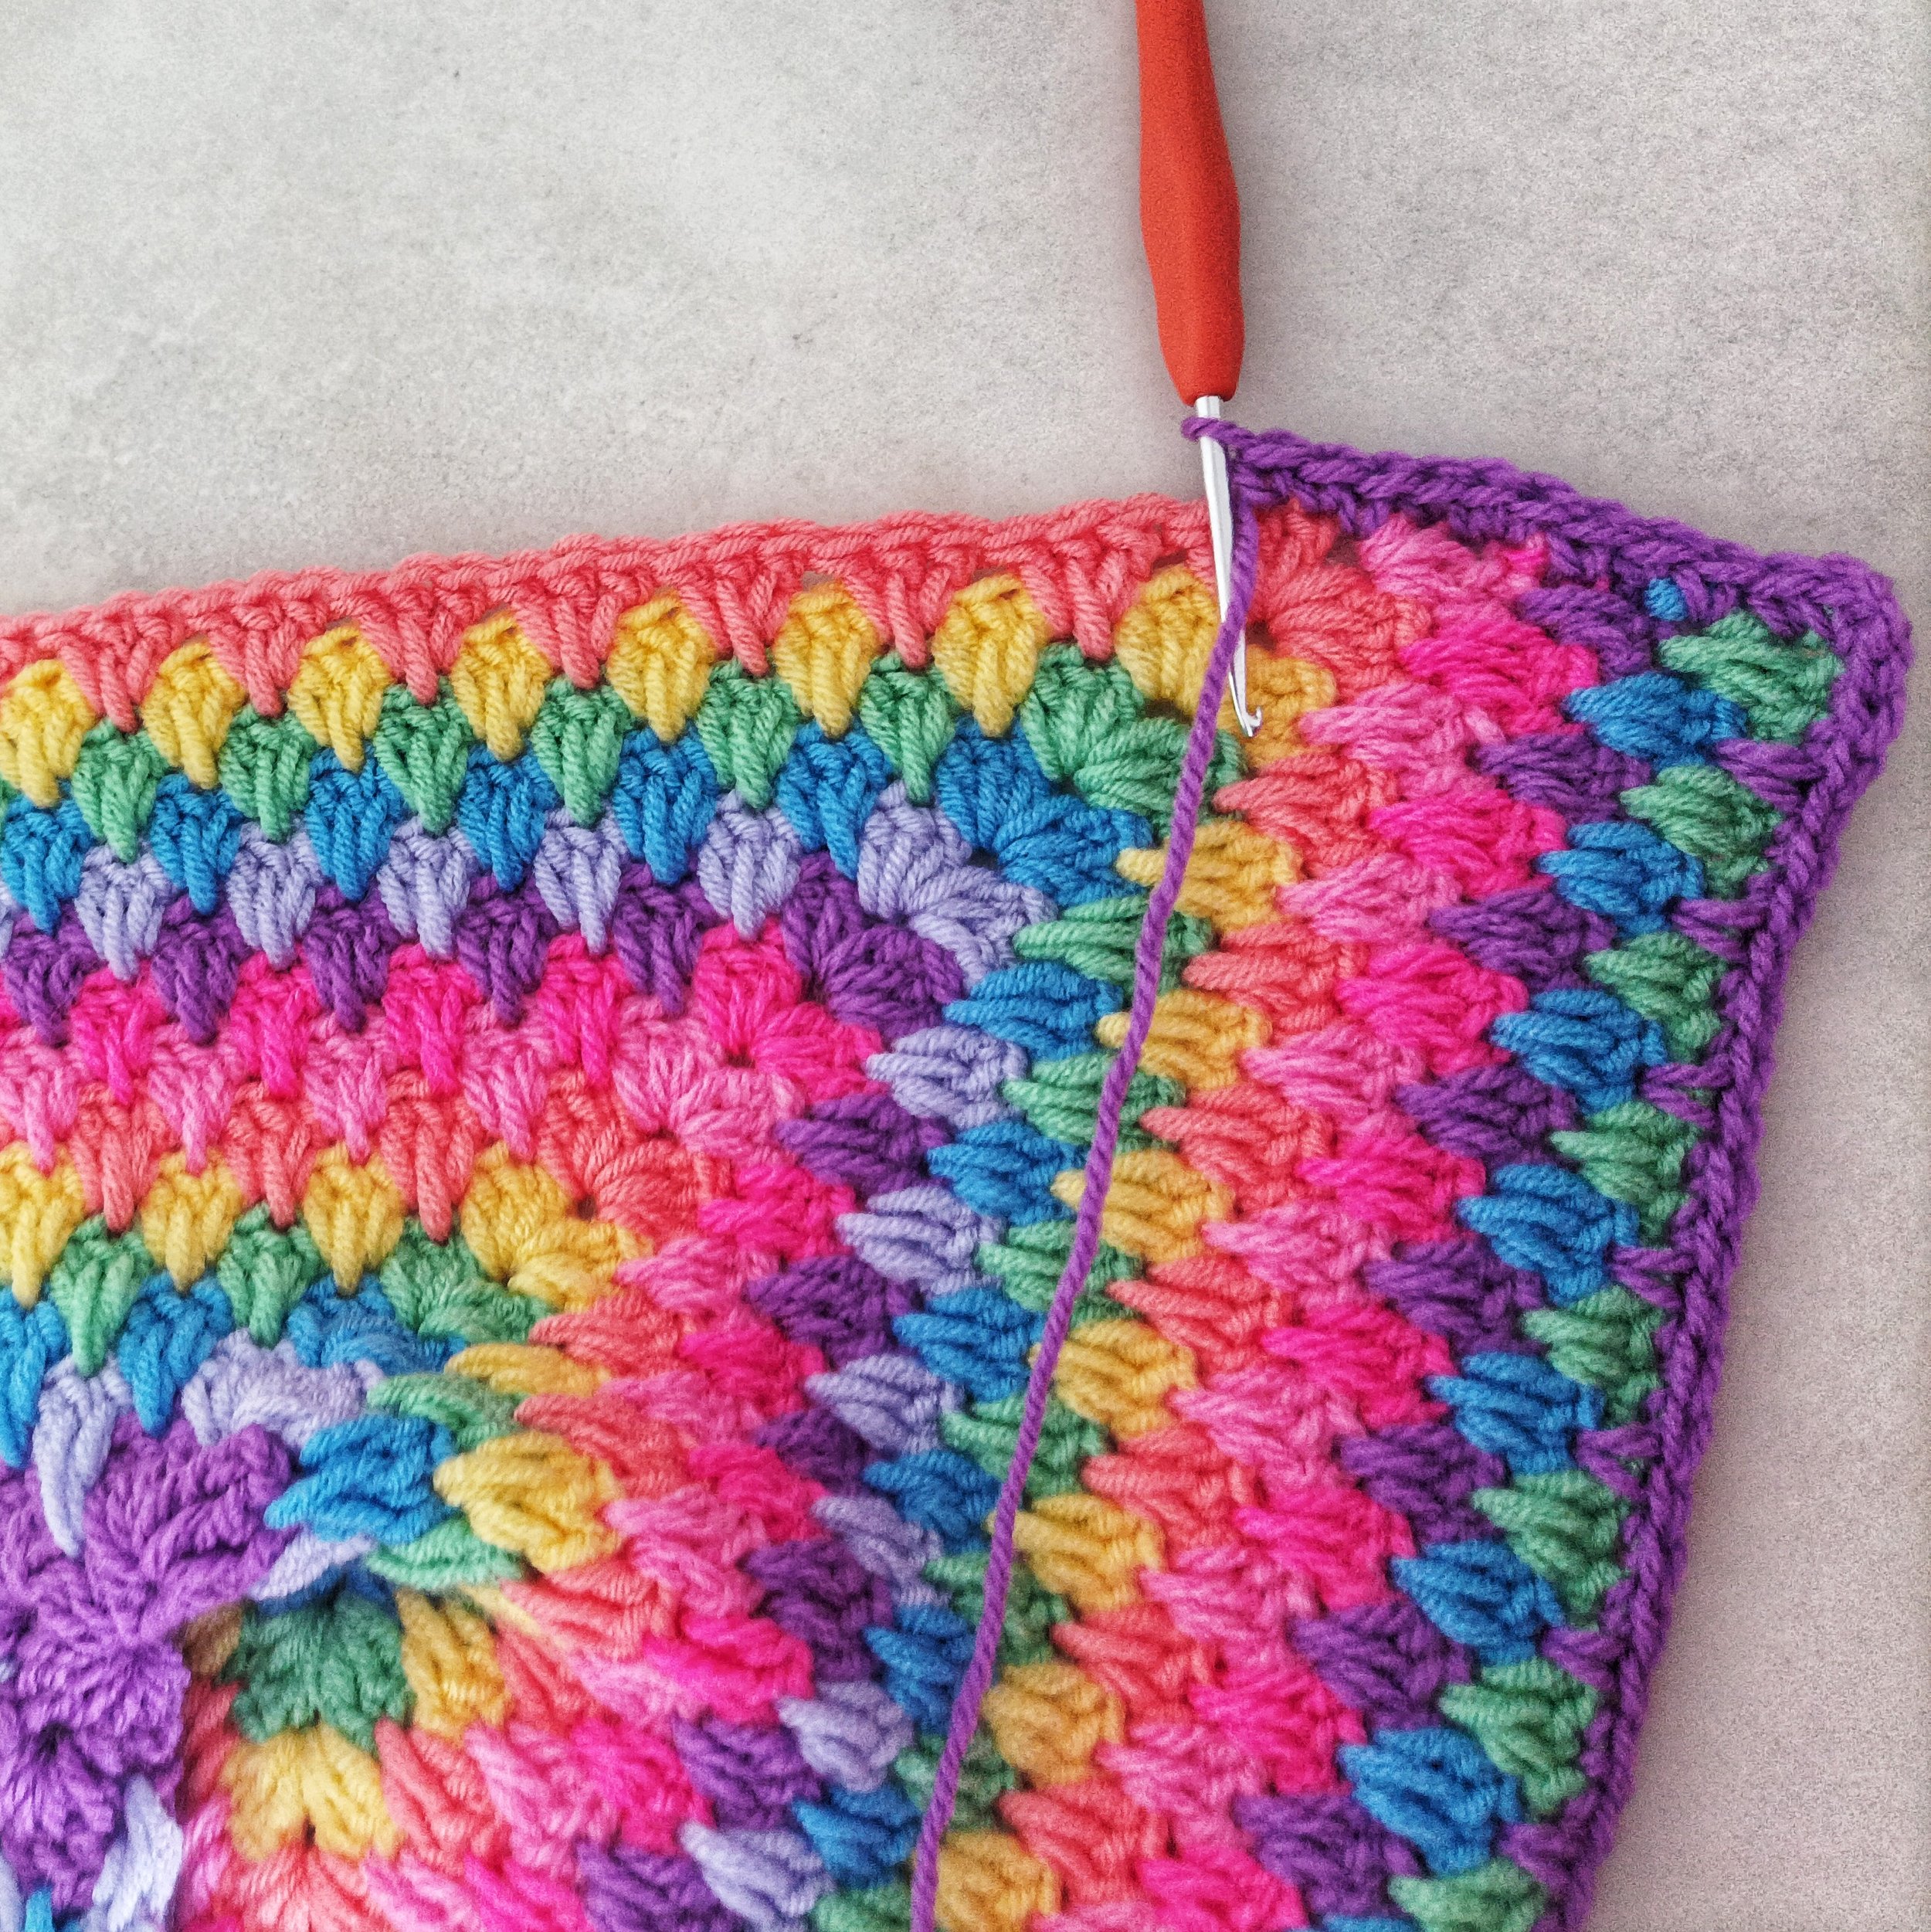
Repeat round 4 until the hexagon measures the required size in the chart above, measure from the centre to the side of the hexagon.
Then continue to seaming the sleeves.
(each side of the hexagon will go up 1 cluster for each round. (6 clusters / 18 stitches per round)
(each round for my hexagon was 0.5”, 1” for two rounds)


Seaming the sleeves
Side 1: sc in the corner space, sc 2, *ssc in the centre of cluster 2 rows below, sc 2* repeat to the corner, sc in the corner space.
Skip side 2
Side 3: sc in the corner space, sc 2, *ssc in the centre of cluster 2 rows below, sc 2* repeat to the corner, sc in the corner space.
Loosely slst side 1 and 3 together using the inner loops. Or you can use a bigger hook to do this.Or you can sew if preferred.


Side, back and bottom
This part is adding one row of granny spike stitch to the front, bottom and back of
both hexagons, three sides will be worked.
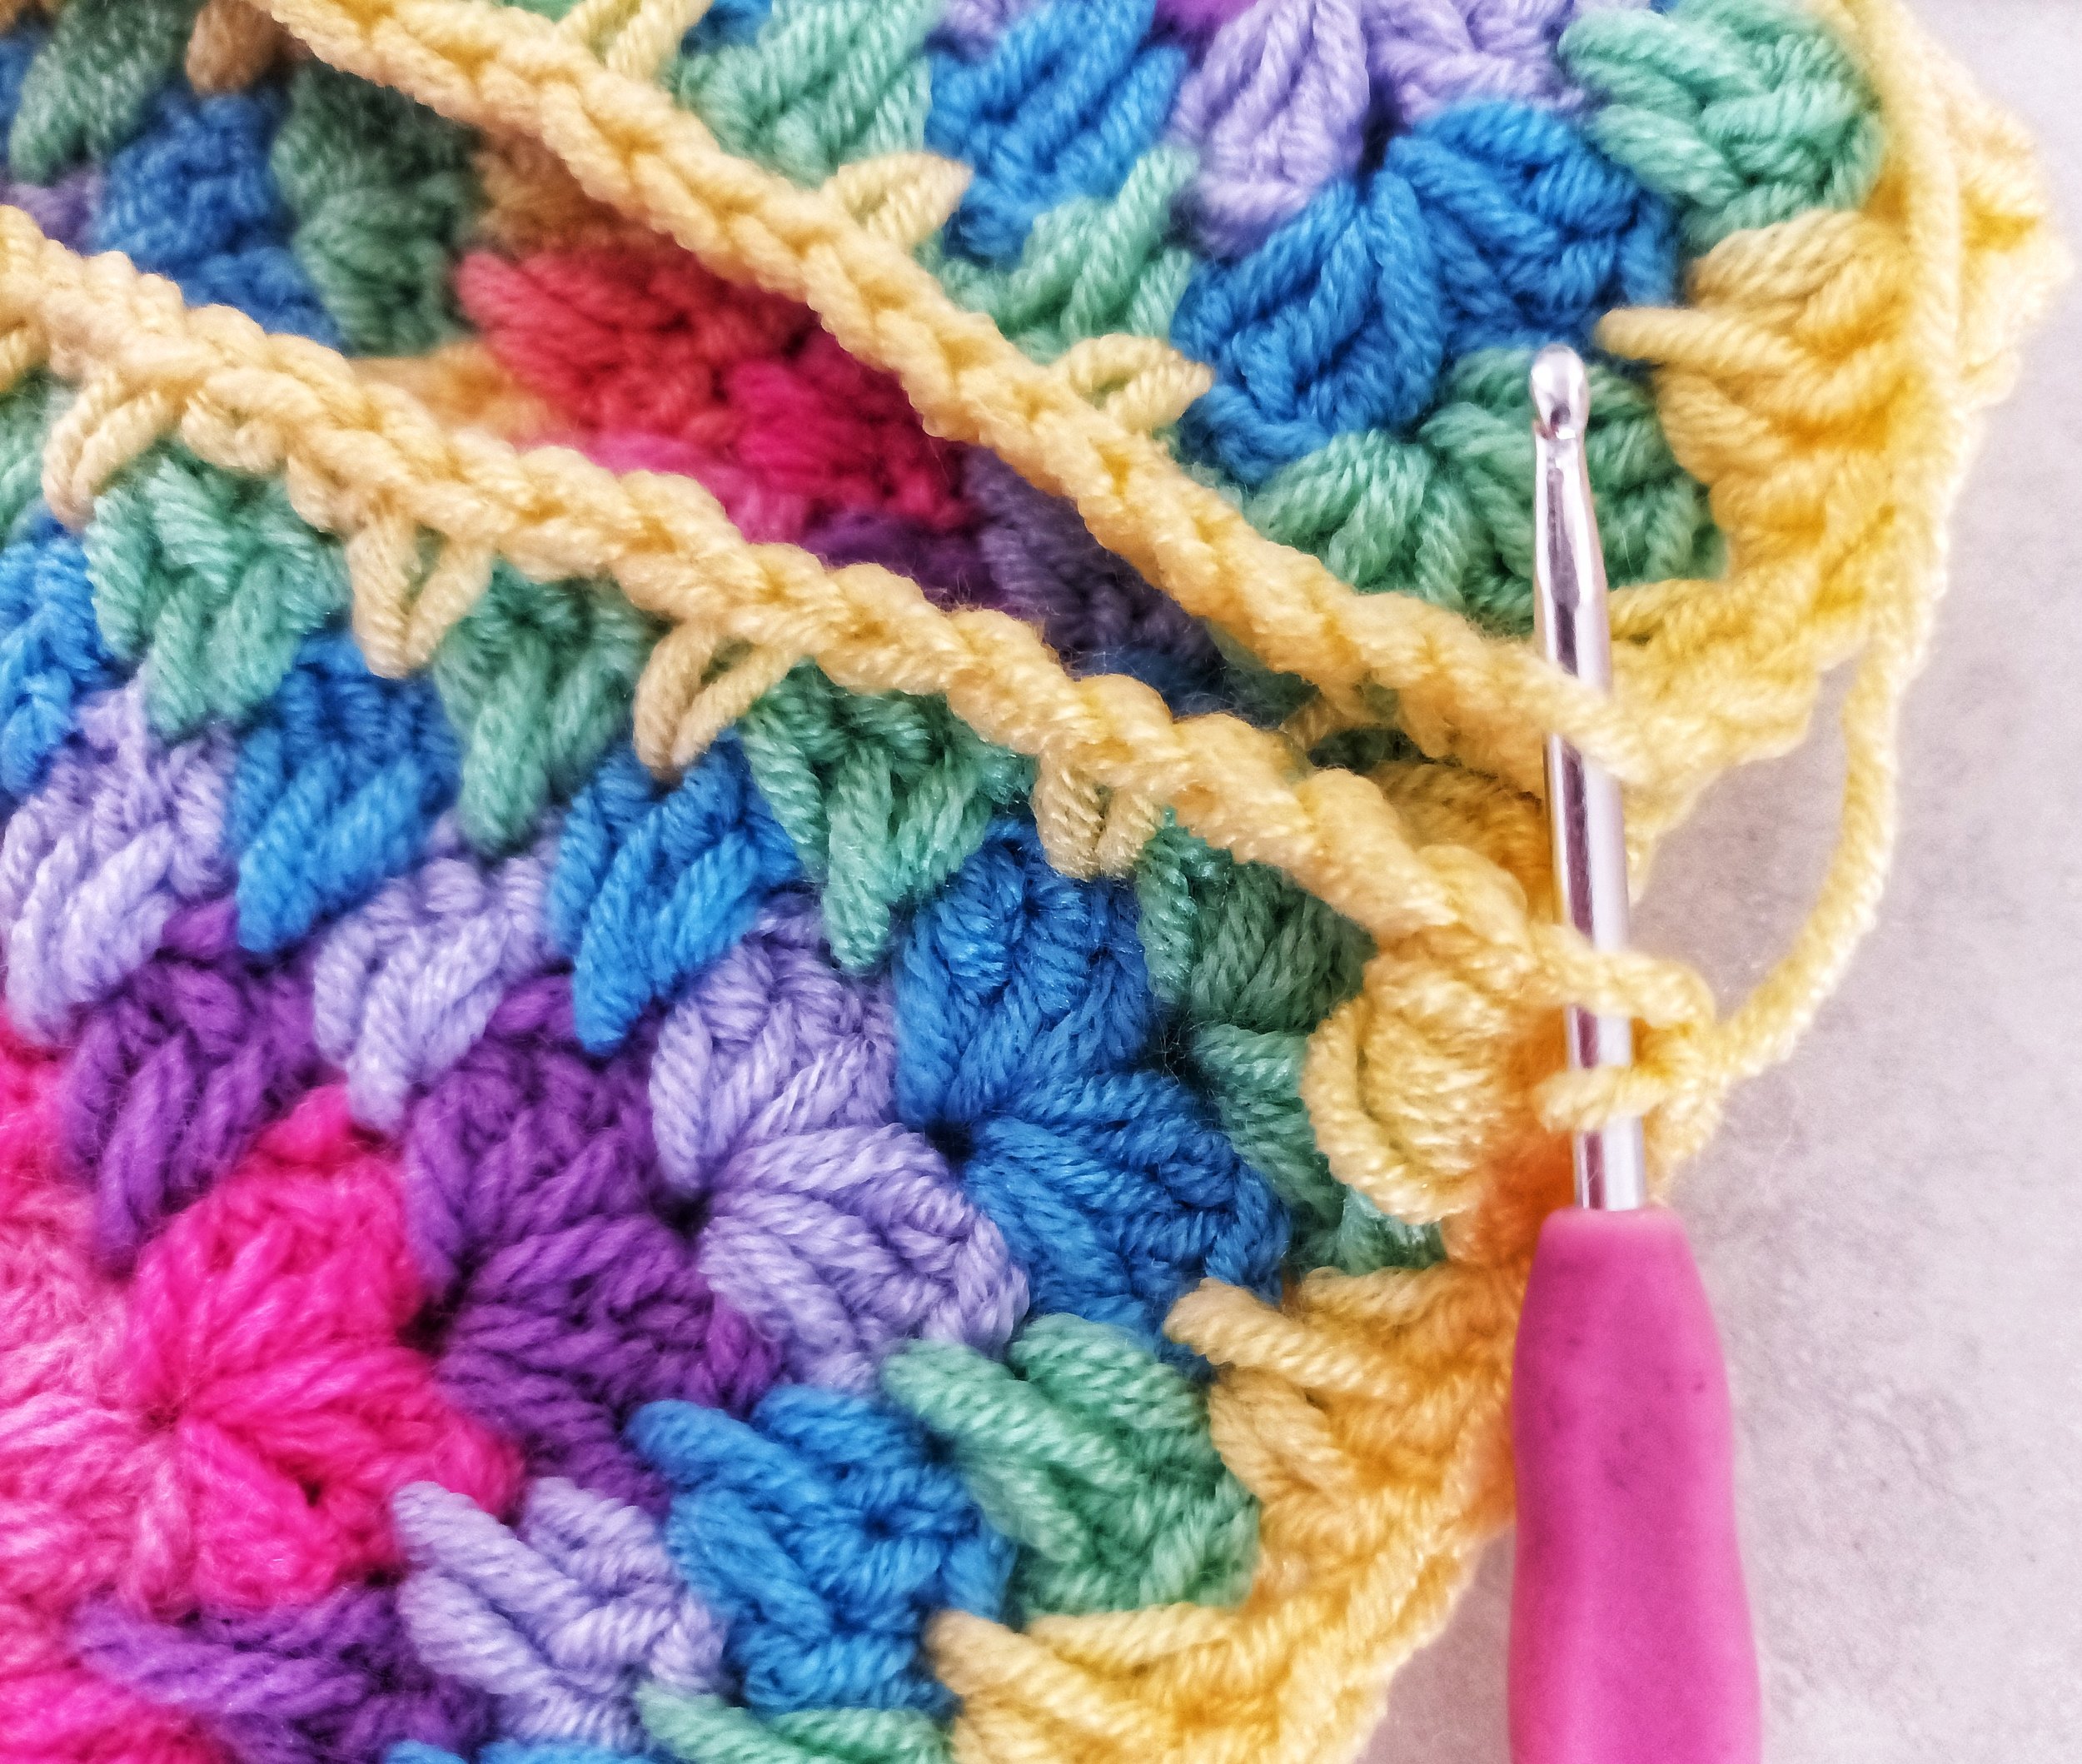
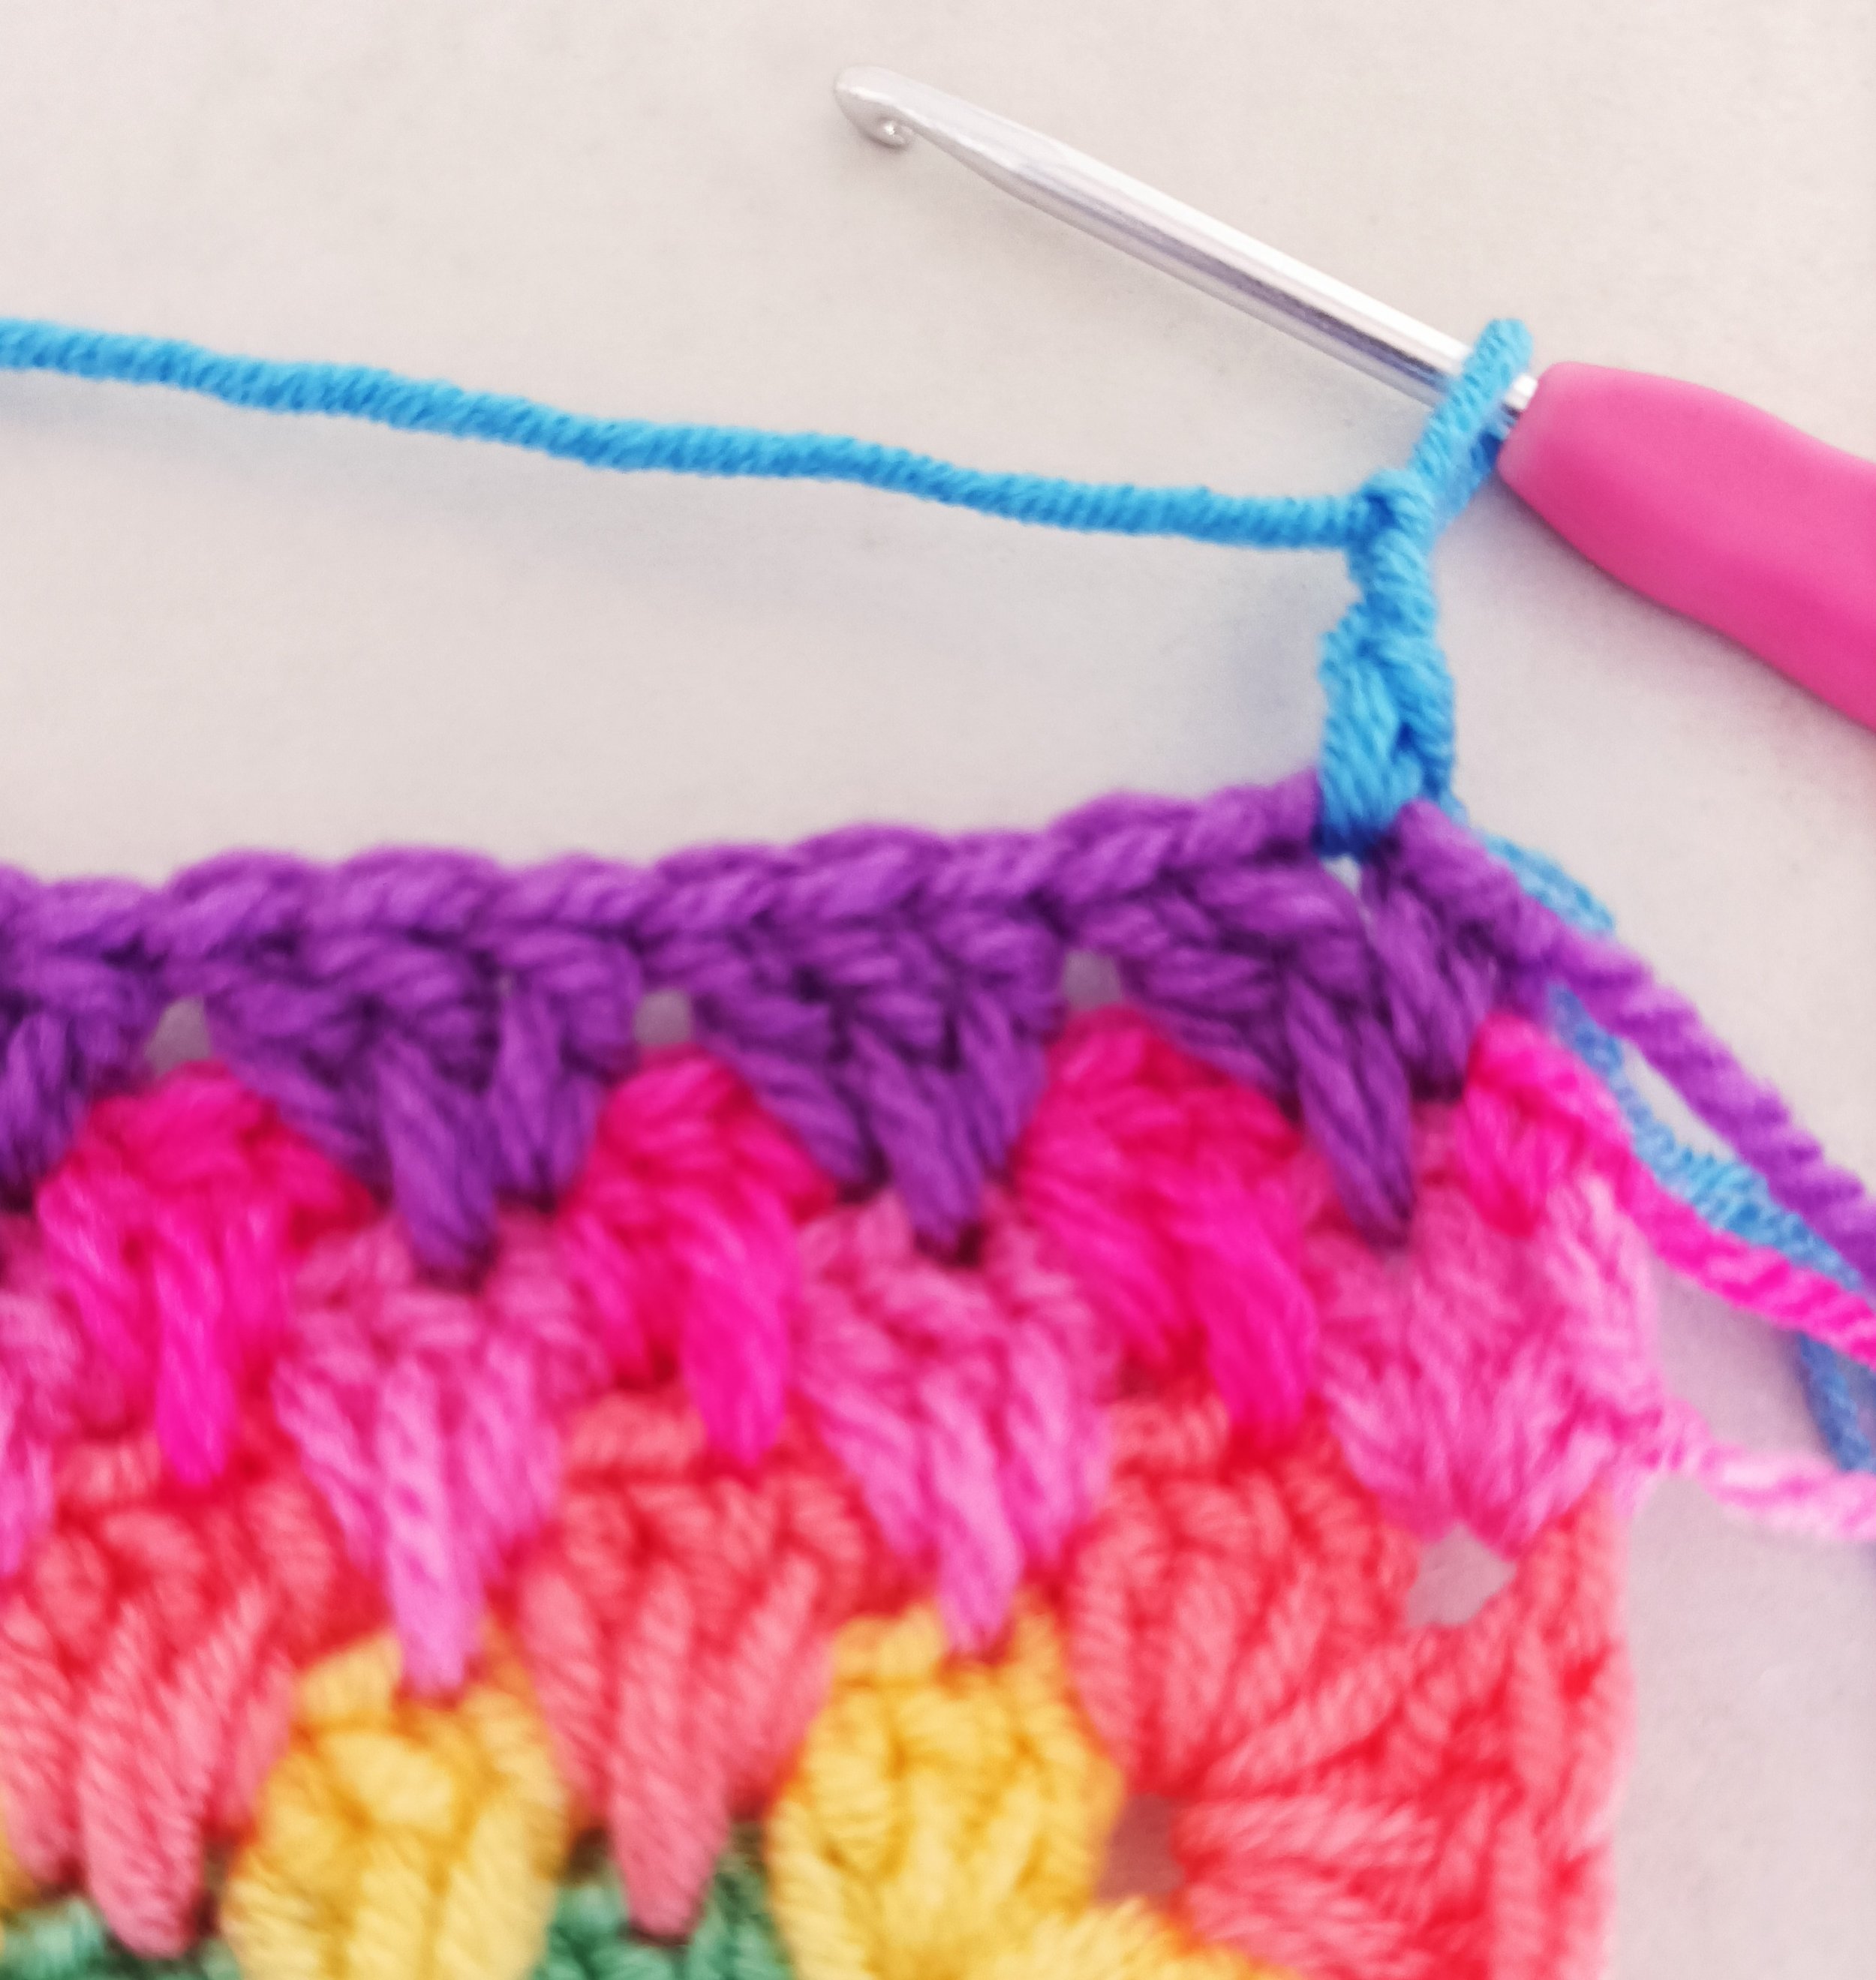
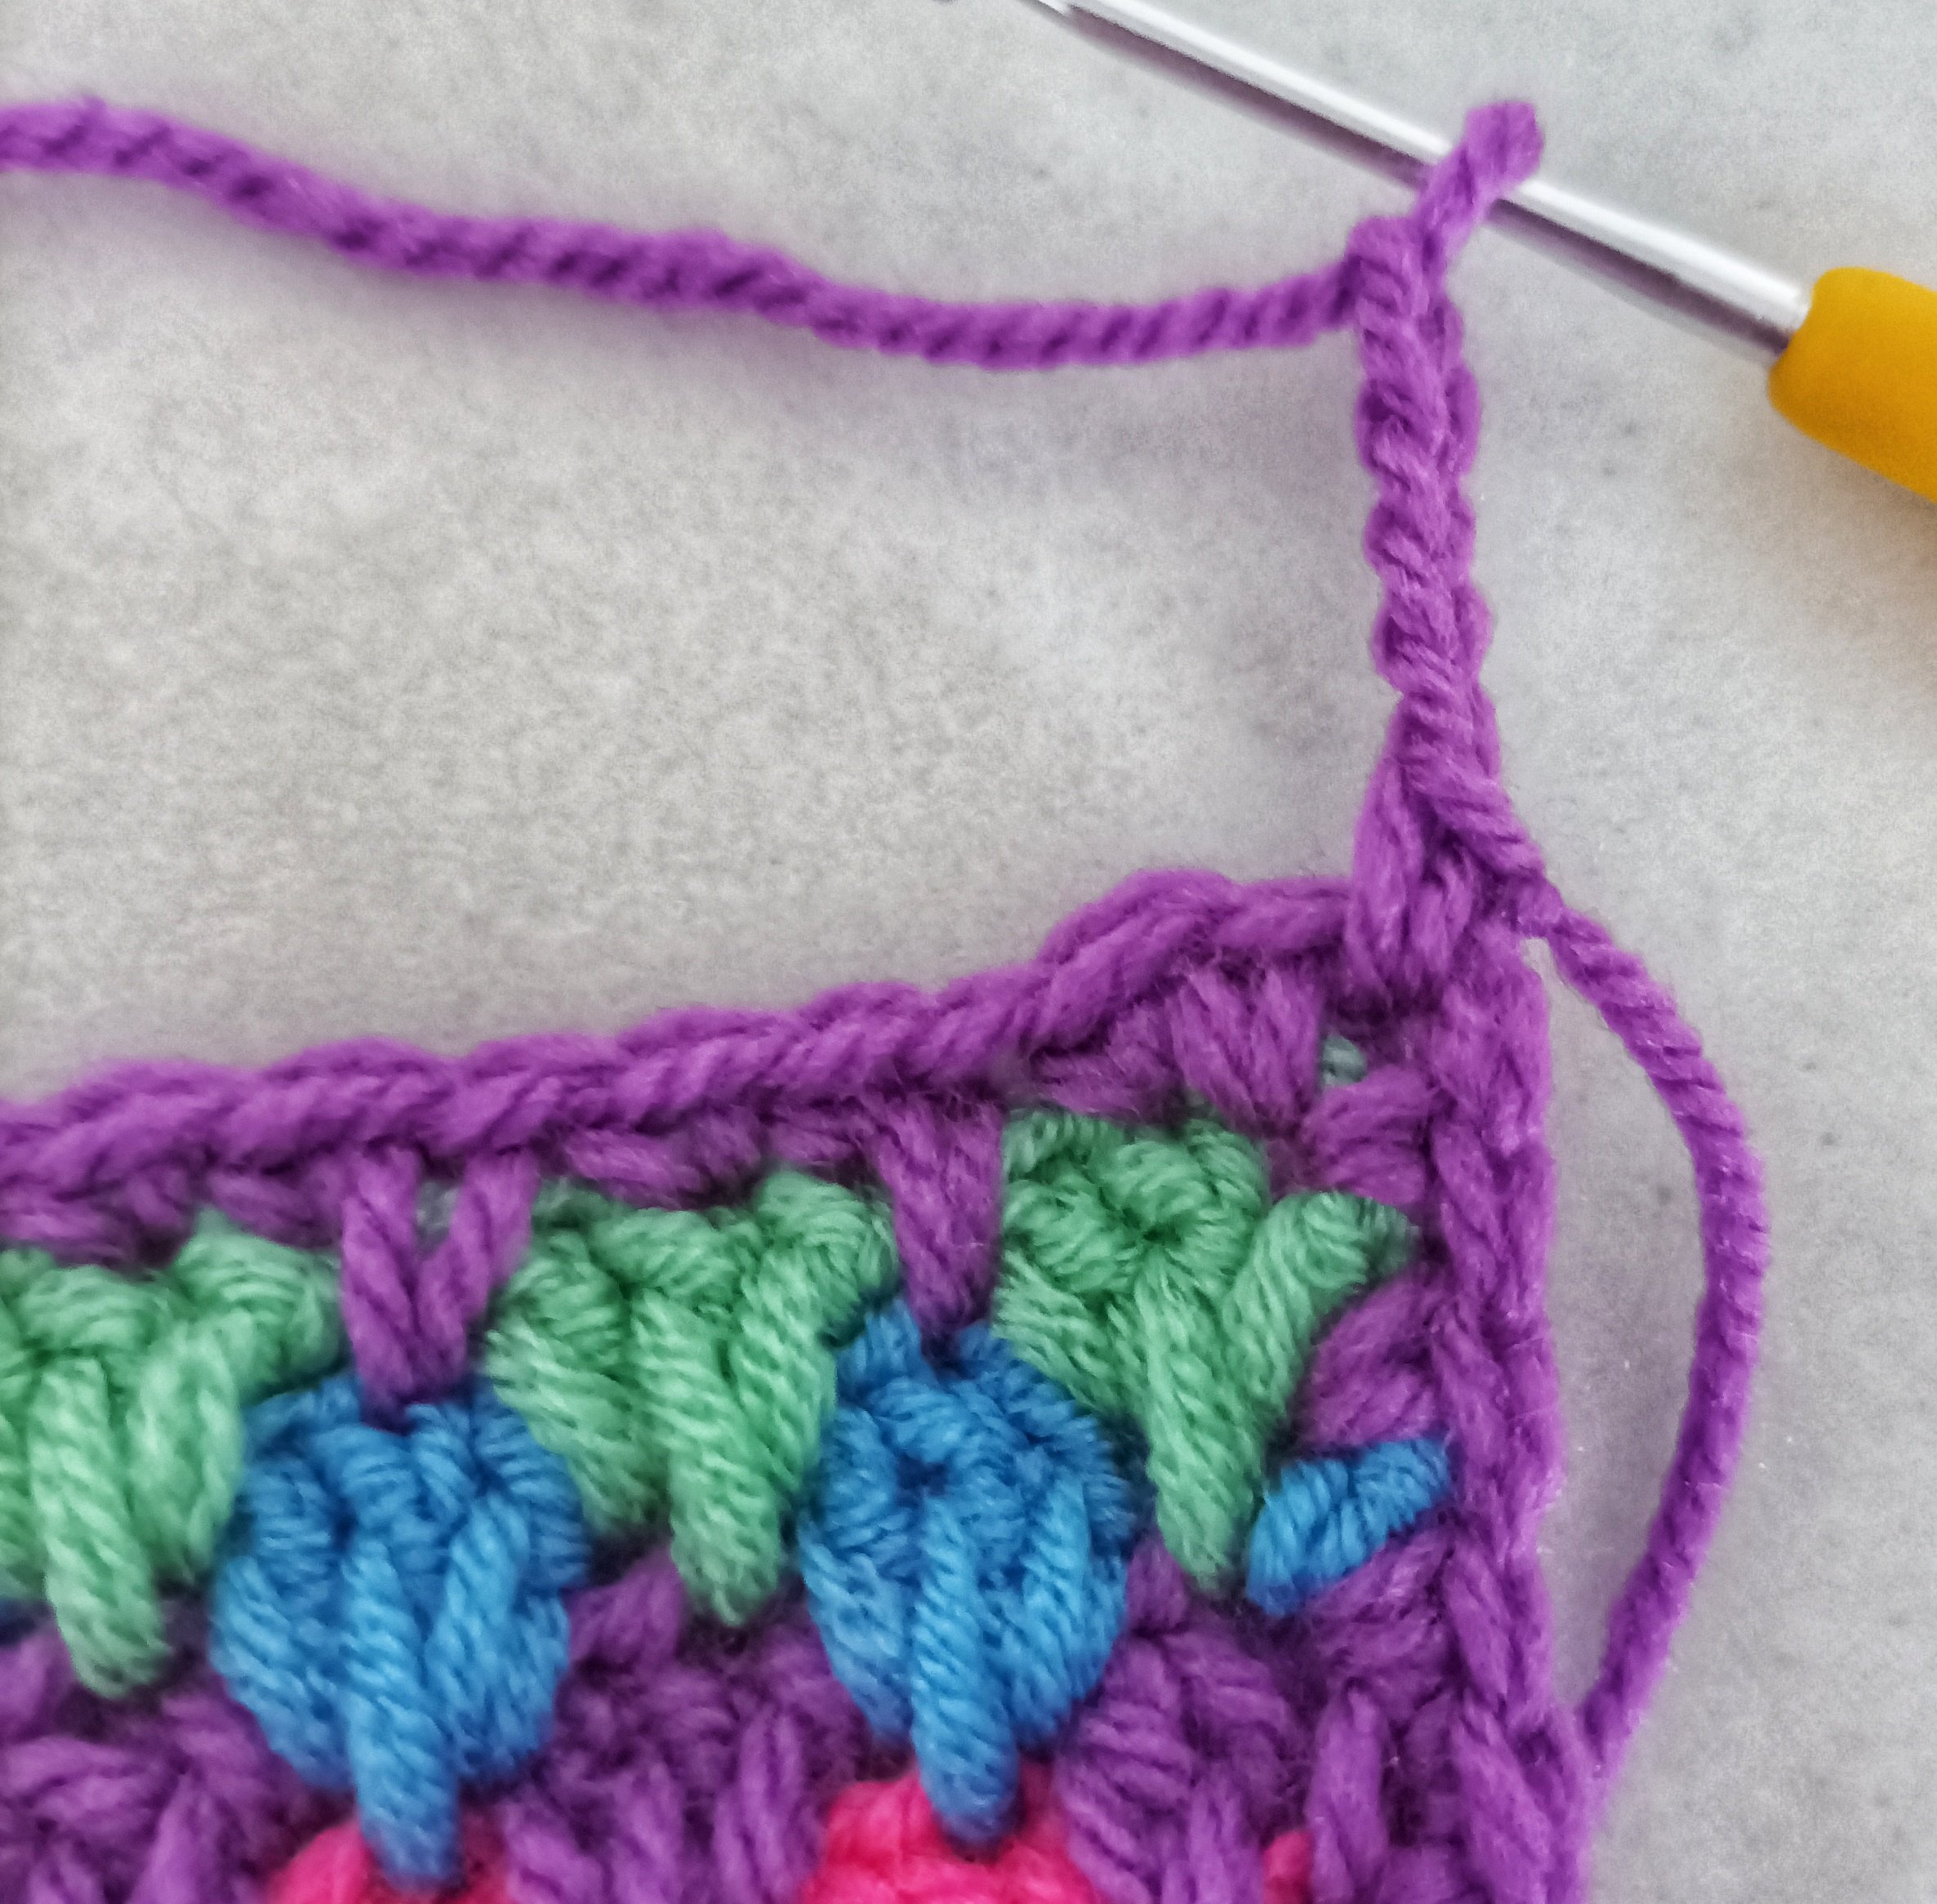
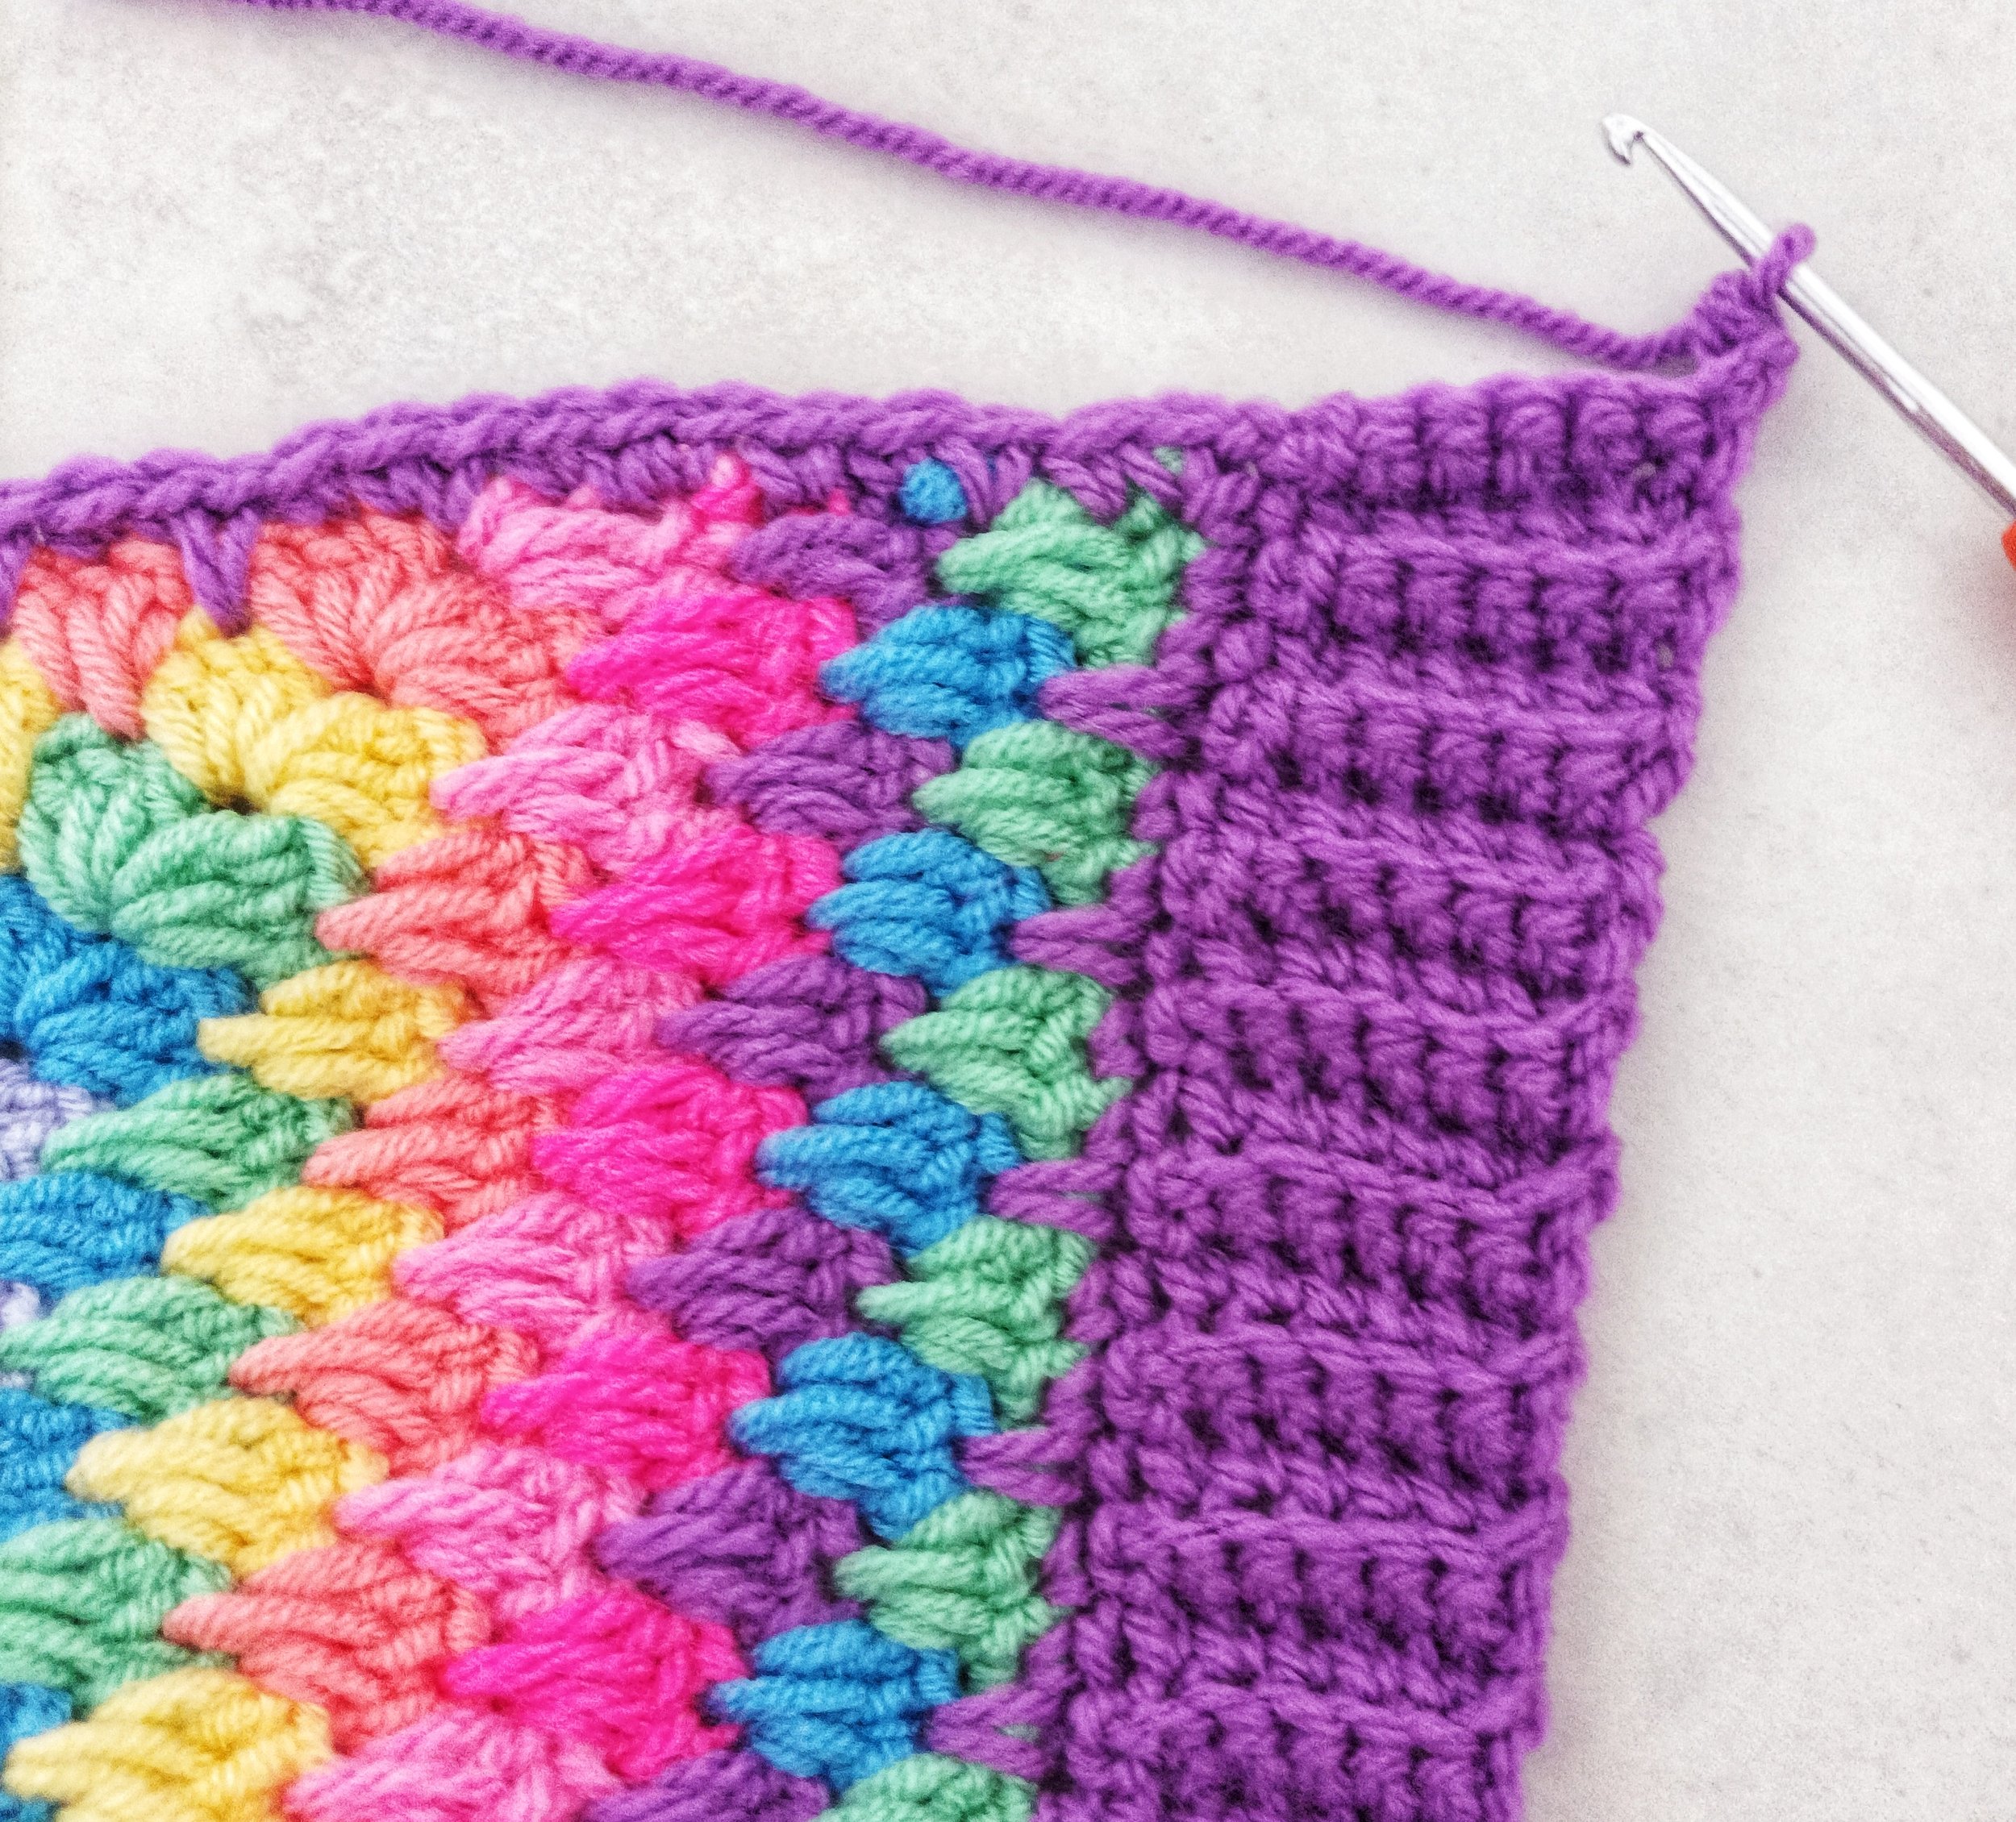
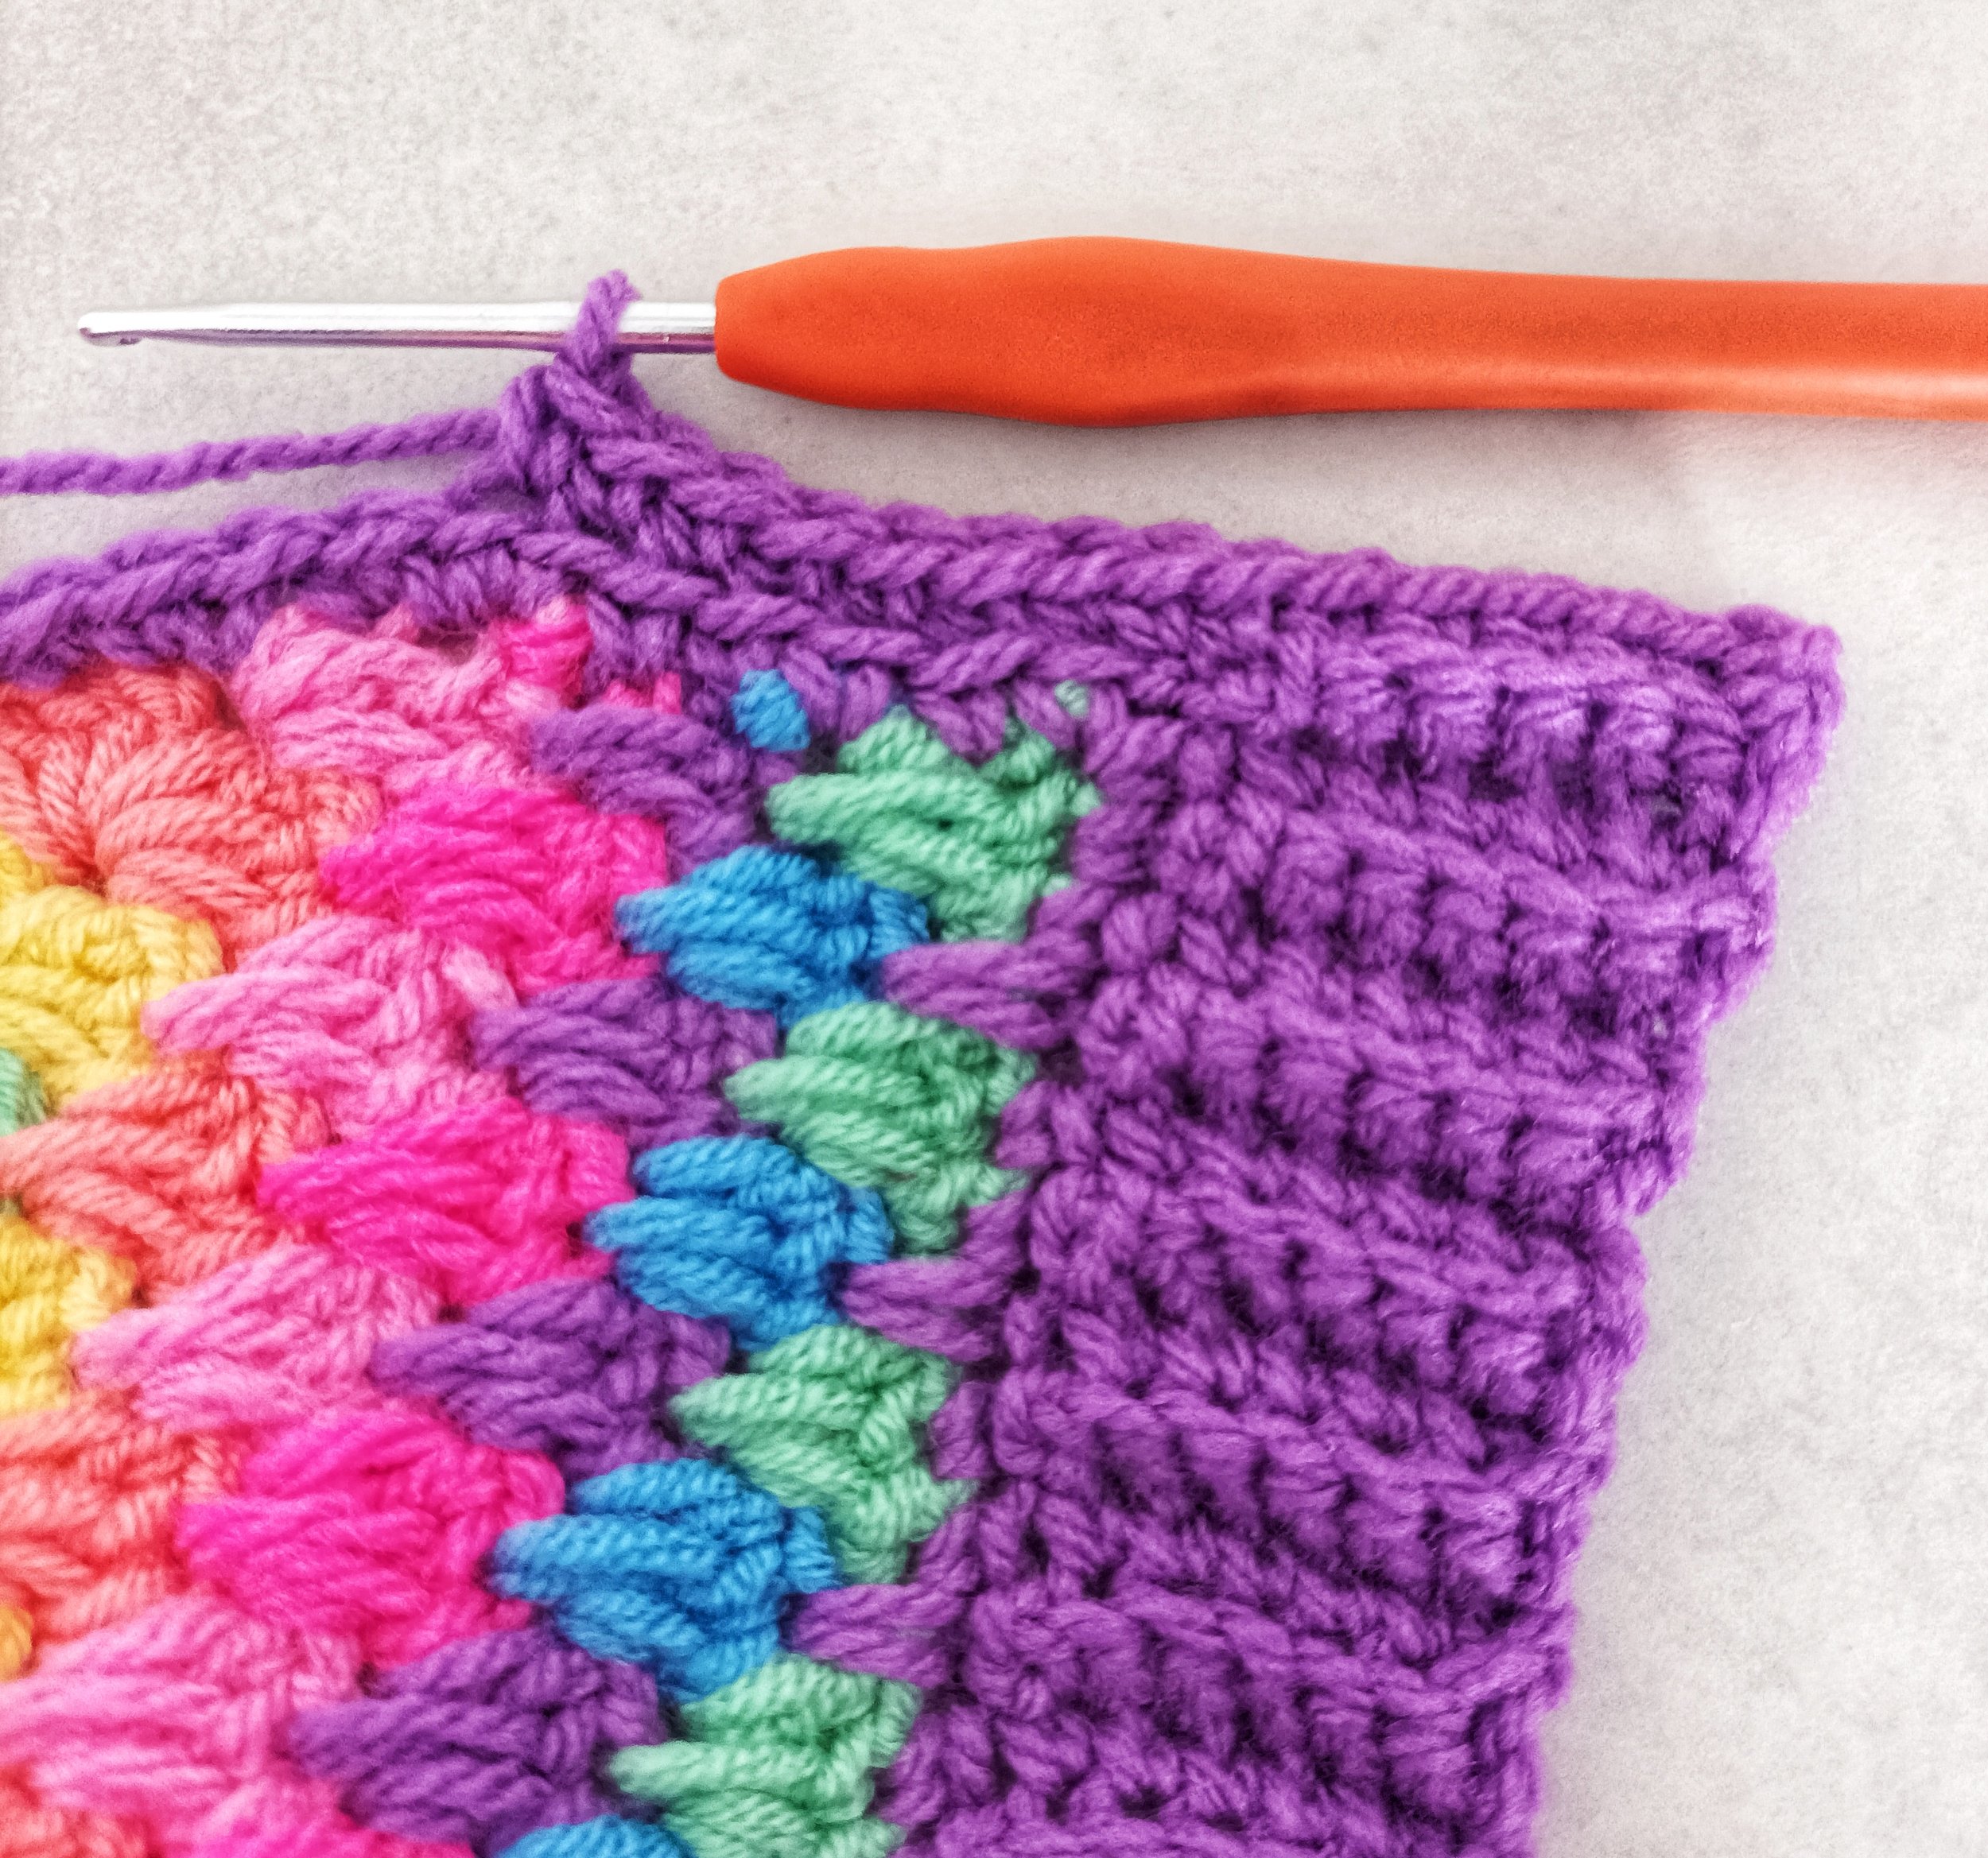
With the right side facing, starting at the top in the ch1 space, ch3, [dc, sdc, dc] between each cluster, [3 dc, ch1, 3 dc], in the ch2 space, [dc, sdc, dc] between each cluster, [3 dc, ch1, 3 dc], in the ch1 space, [dc, sdc, dc] between each cluster, dc the last ch1 space.
Fasten off


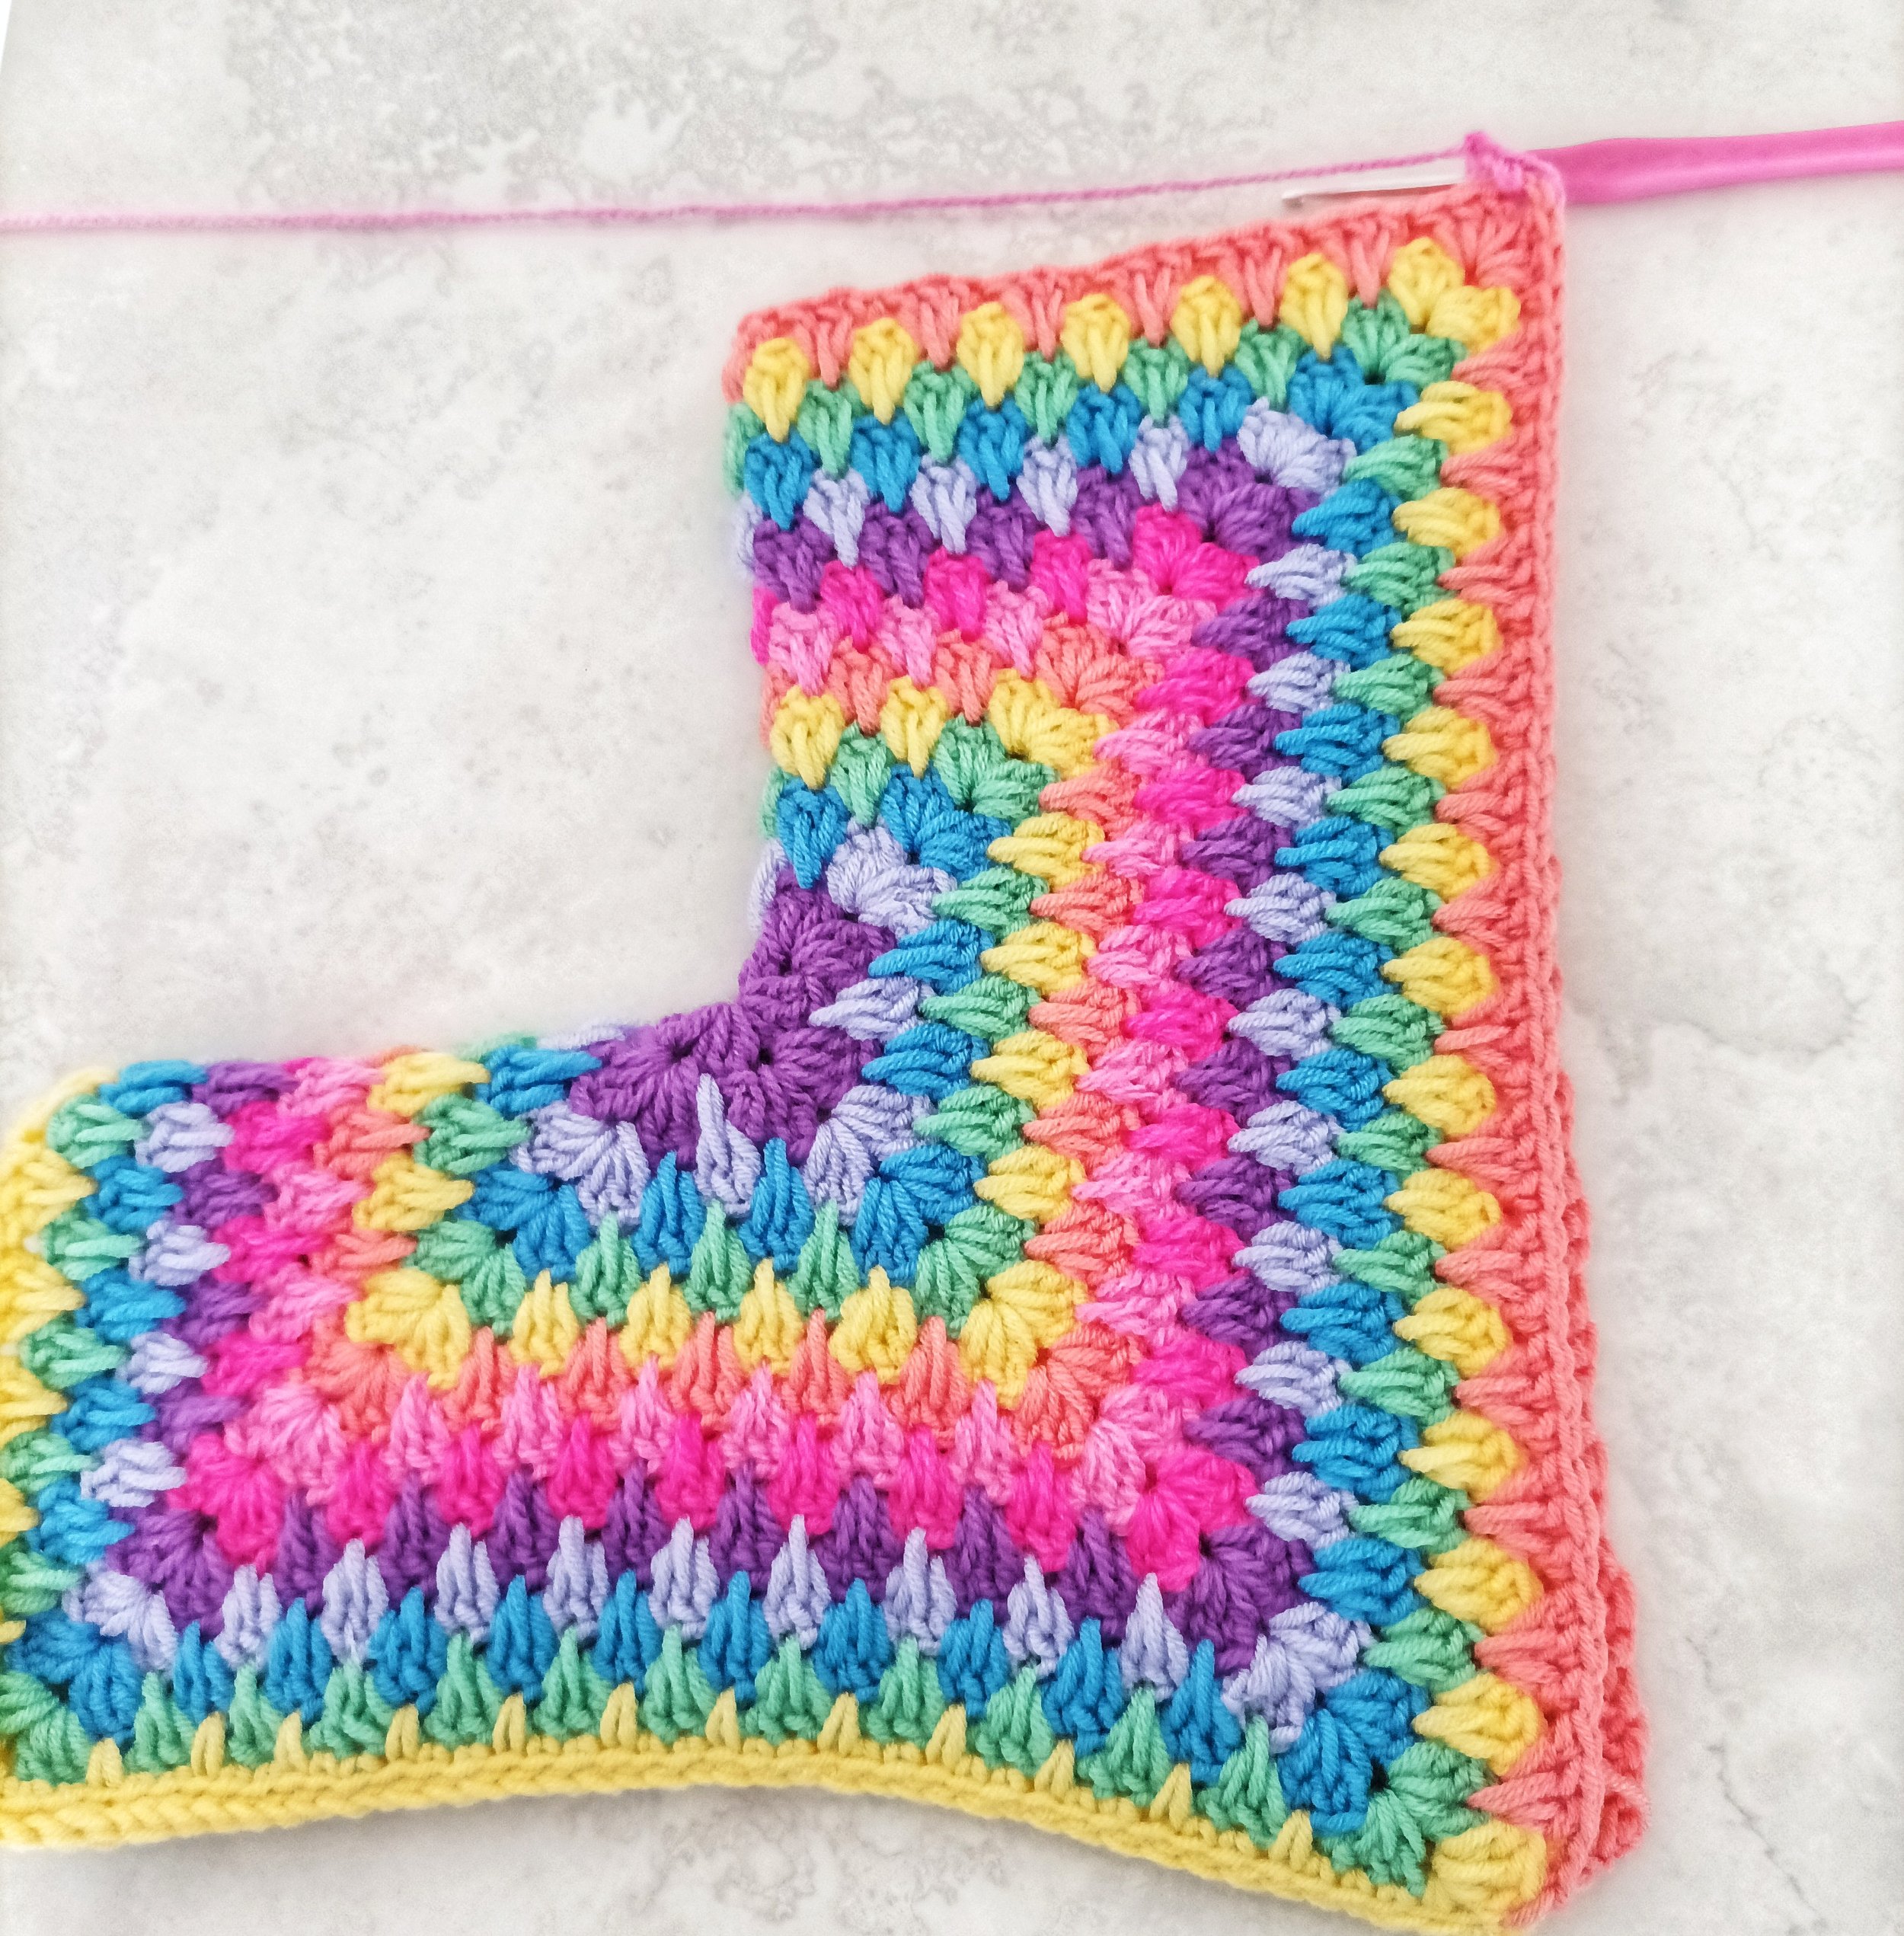
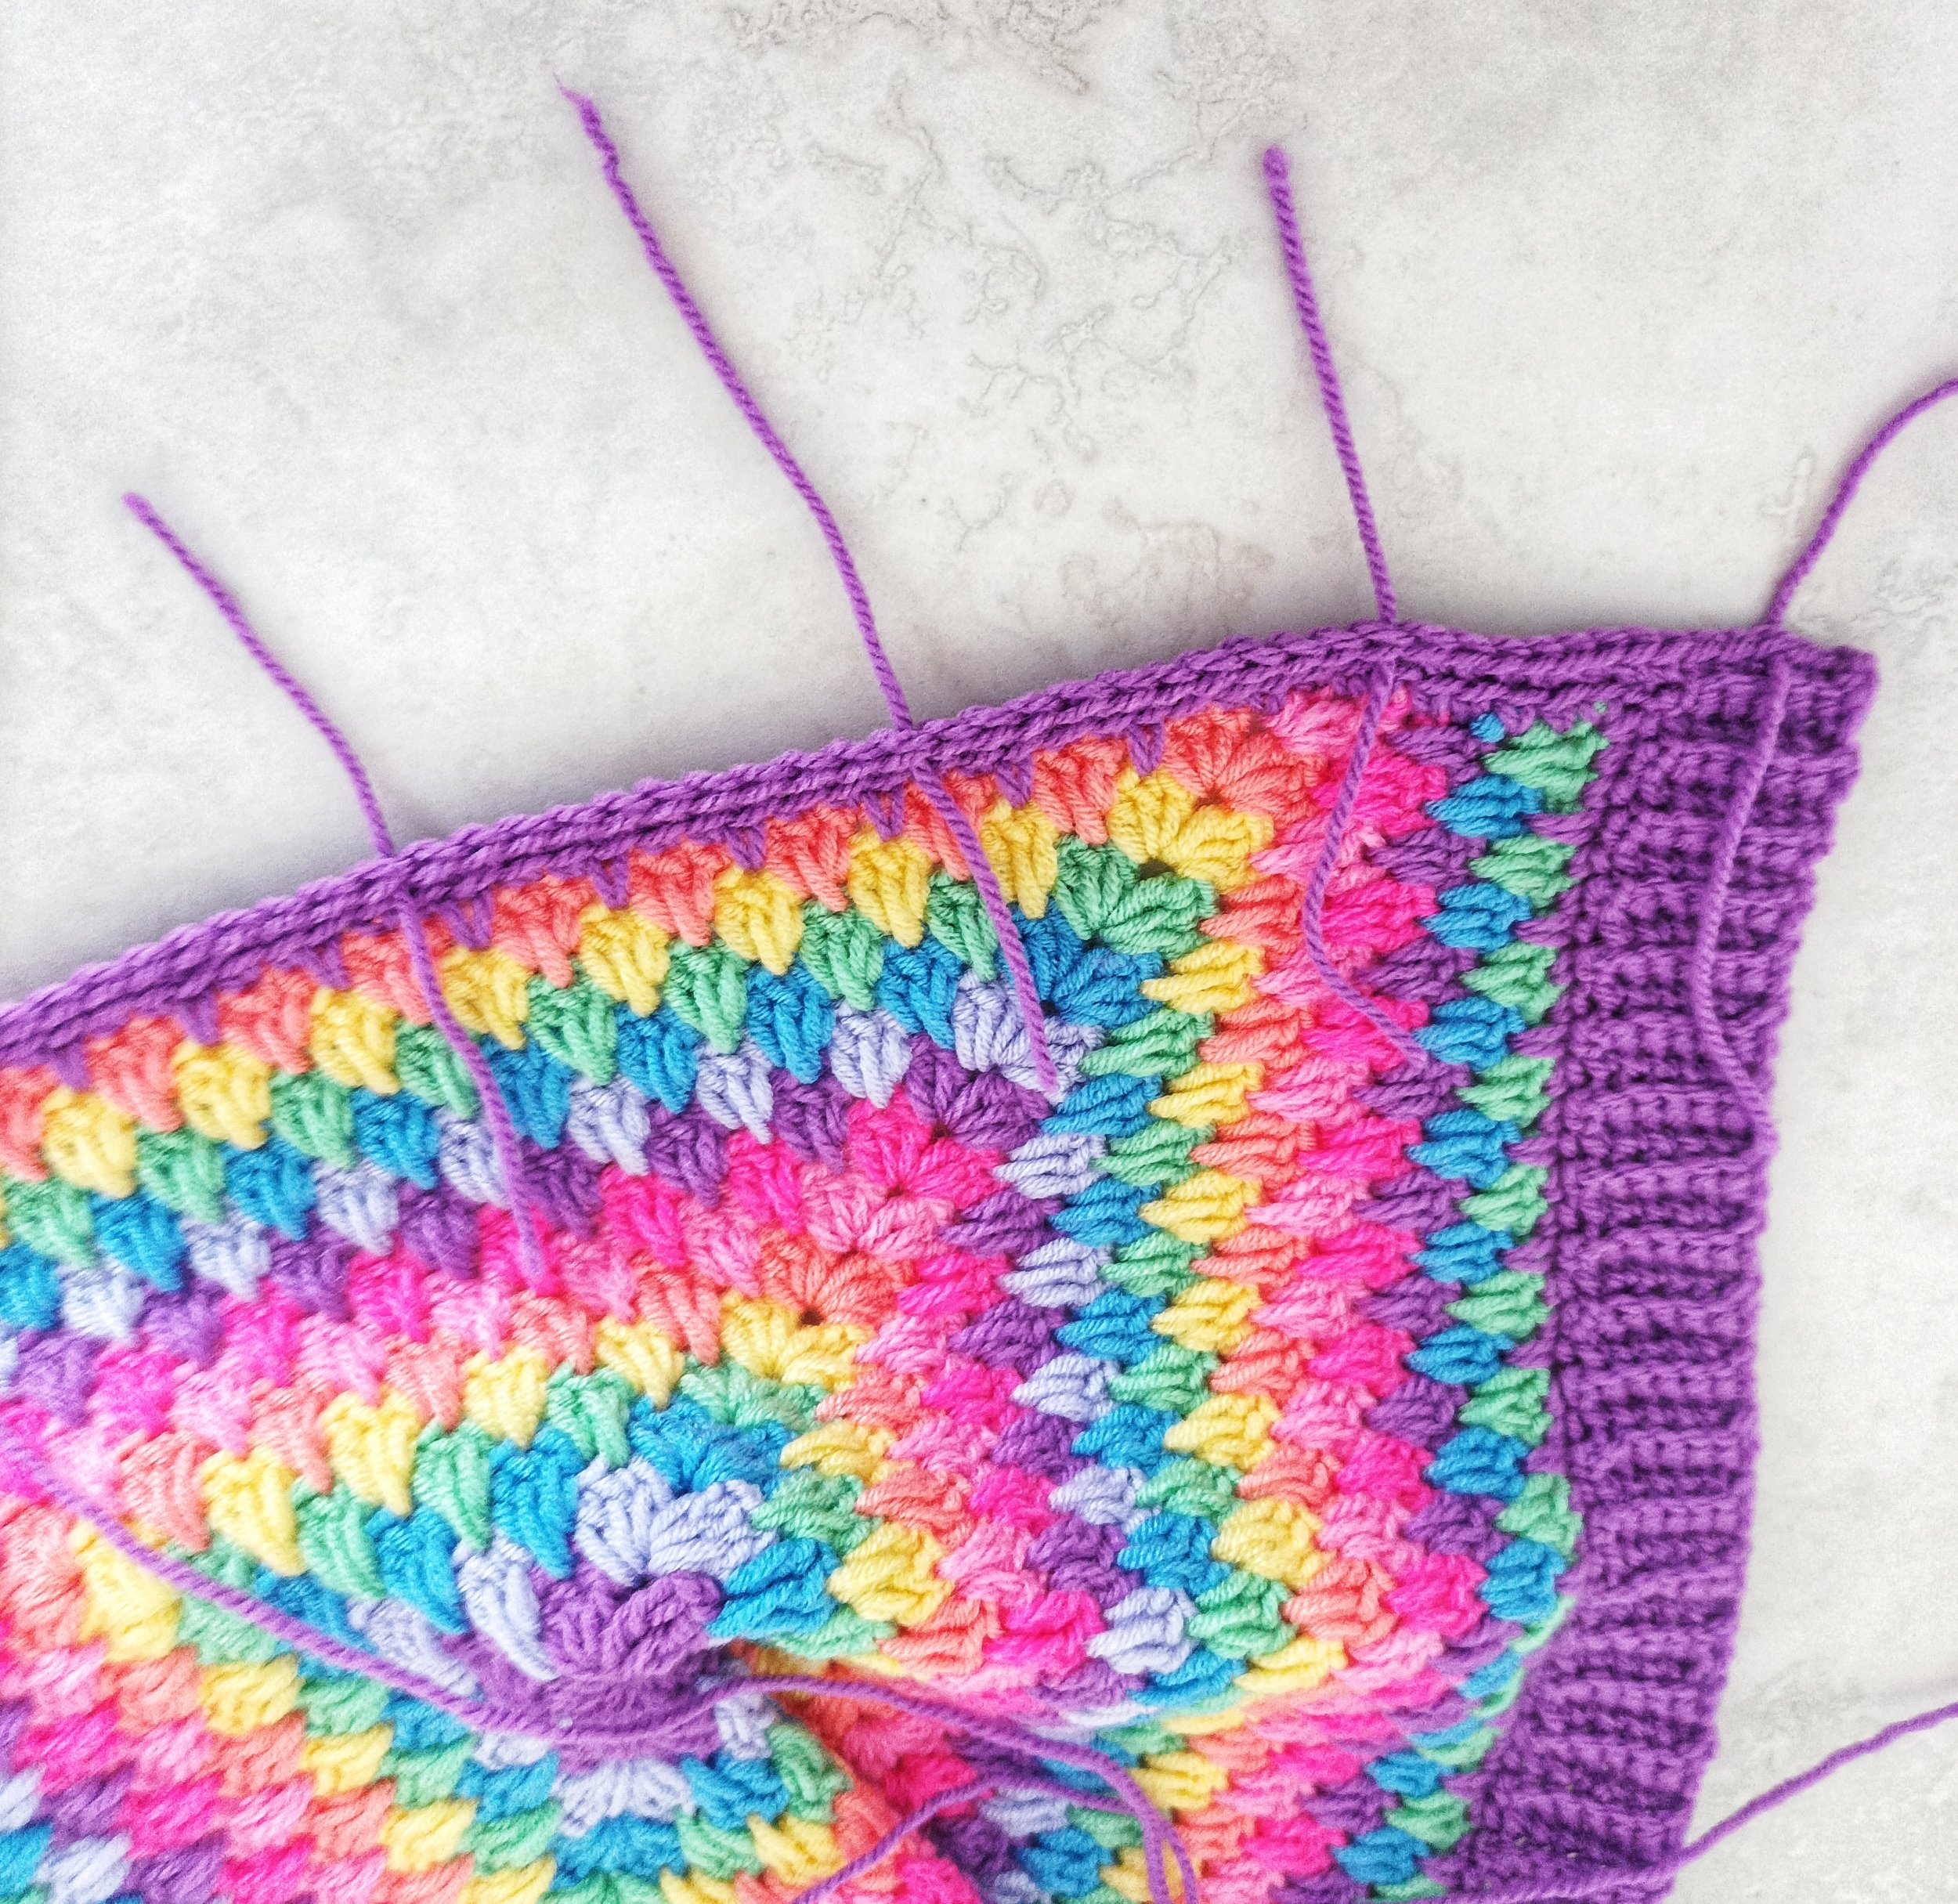
Back infill
This part is adding some rows to the back, it also adds rows to the bottom length (the size chart at the top will tell you how many inches to work this part for the size you are making)
Right side
Start at the top between the dc and cluster
Row 1: Ch3, sdc, dc between ch3 and cluster, [dc, sdc, dc] between each cluster, [3 dc, ch1, 3 dc] in the bottom corner, [dc, sdc, dc] between each cluster, ending with 3 dc in the the ch1 space on the front edge, leaving the last side unworked (this will be the front) Turn
Row 2: ch3, [dc, sdc, dc] between each cluster, [3 dc, ch1, 3 dc] in the corner, [dc, sdc, dc] between each cluster, ending with a dc in the last stitch of cluster on the row below. Turn
Repeat row 1 and 2 to get the required measurement for the back infill (I needed 1” which was 2 rows for the 3-4 years size)
Left side
Starting at the bottom right ch2 space
Row 1: ch3, 2 dc in the same, [dc, sdc, dc] between each cluster, in the corner [3 dc, ch1, 3 dc], [dc, sdc, dc] between each cluster back to the top at the other side. Turn
Row 2: ch3, [dc, sdc, dc] between each cluster to the bottom corner [3 dc, ch1, 3 dc] in the corner, [dc, sdc, dc] between each cluster, ending with a dc, in the last stitch of cluster on the row below at the bottom front. Turn
Repeat rows 1 and 2 the same amount as the first hexagon.


Adding Length to the body
Join yarn in the bottom ch1 corner space (same for both sides)
Row 1: [ch3, 2 dc] in the ch1 space, [dc, sdc, dc] between each cluster, [3 dc] in the ch1 space at the other side. Turn
Row 2: ch3, [dc, sdc, dc] between each cluster, dc at the end of the last cluster. Turn
Row 3: [ch3, sdc, dc] between the dc and cluster, [dc, sdc, dc] between each cluster. Turn
Repeat rows 2 and 3 until you reach the size you want or the length on the size chart on page 2. (The edging will be 1.5”)


Joining at the back
Before joining at the back, a row is worked around each hexagon to prevent gaps
Left side edging
Join yarn at the top front
Ch1, [sc, ssc, sc] between cluster, *sc 2, ssc*, repeat on top of each cluster, 2 sc in the side of each dc row, [sc, ch2, sc] in the bottom corner, *sc 2, ssc* on top of each cluster across the bottom, sc 1, [sc, ch2, sc] in the last, 2 sc in the side of each dc row, *sc 2, ssc* repeat to the top, working sc along the shoulder / back, then slst to the first.
Repeat for the right side edging, starting at the top back.
Then slst the back together using the inner loops, the same as the sleeves. Or sew if preferred .


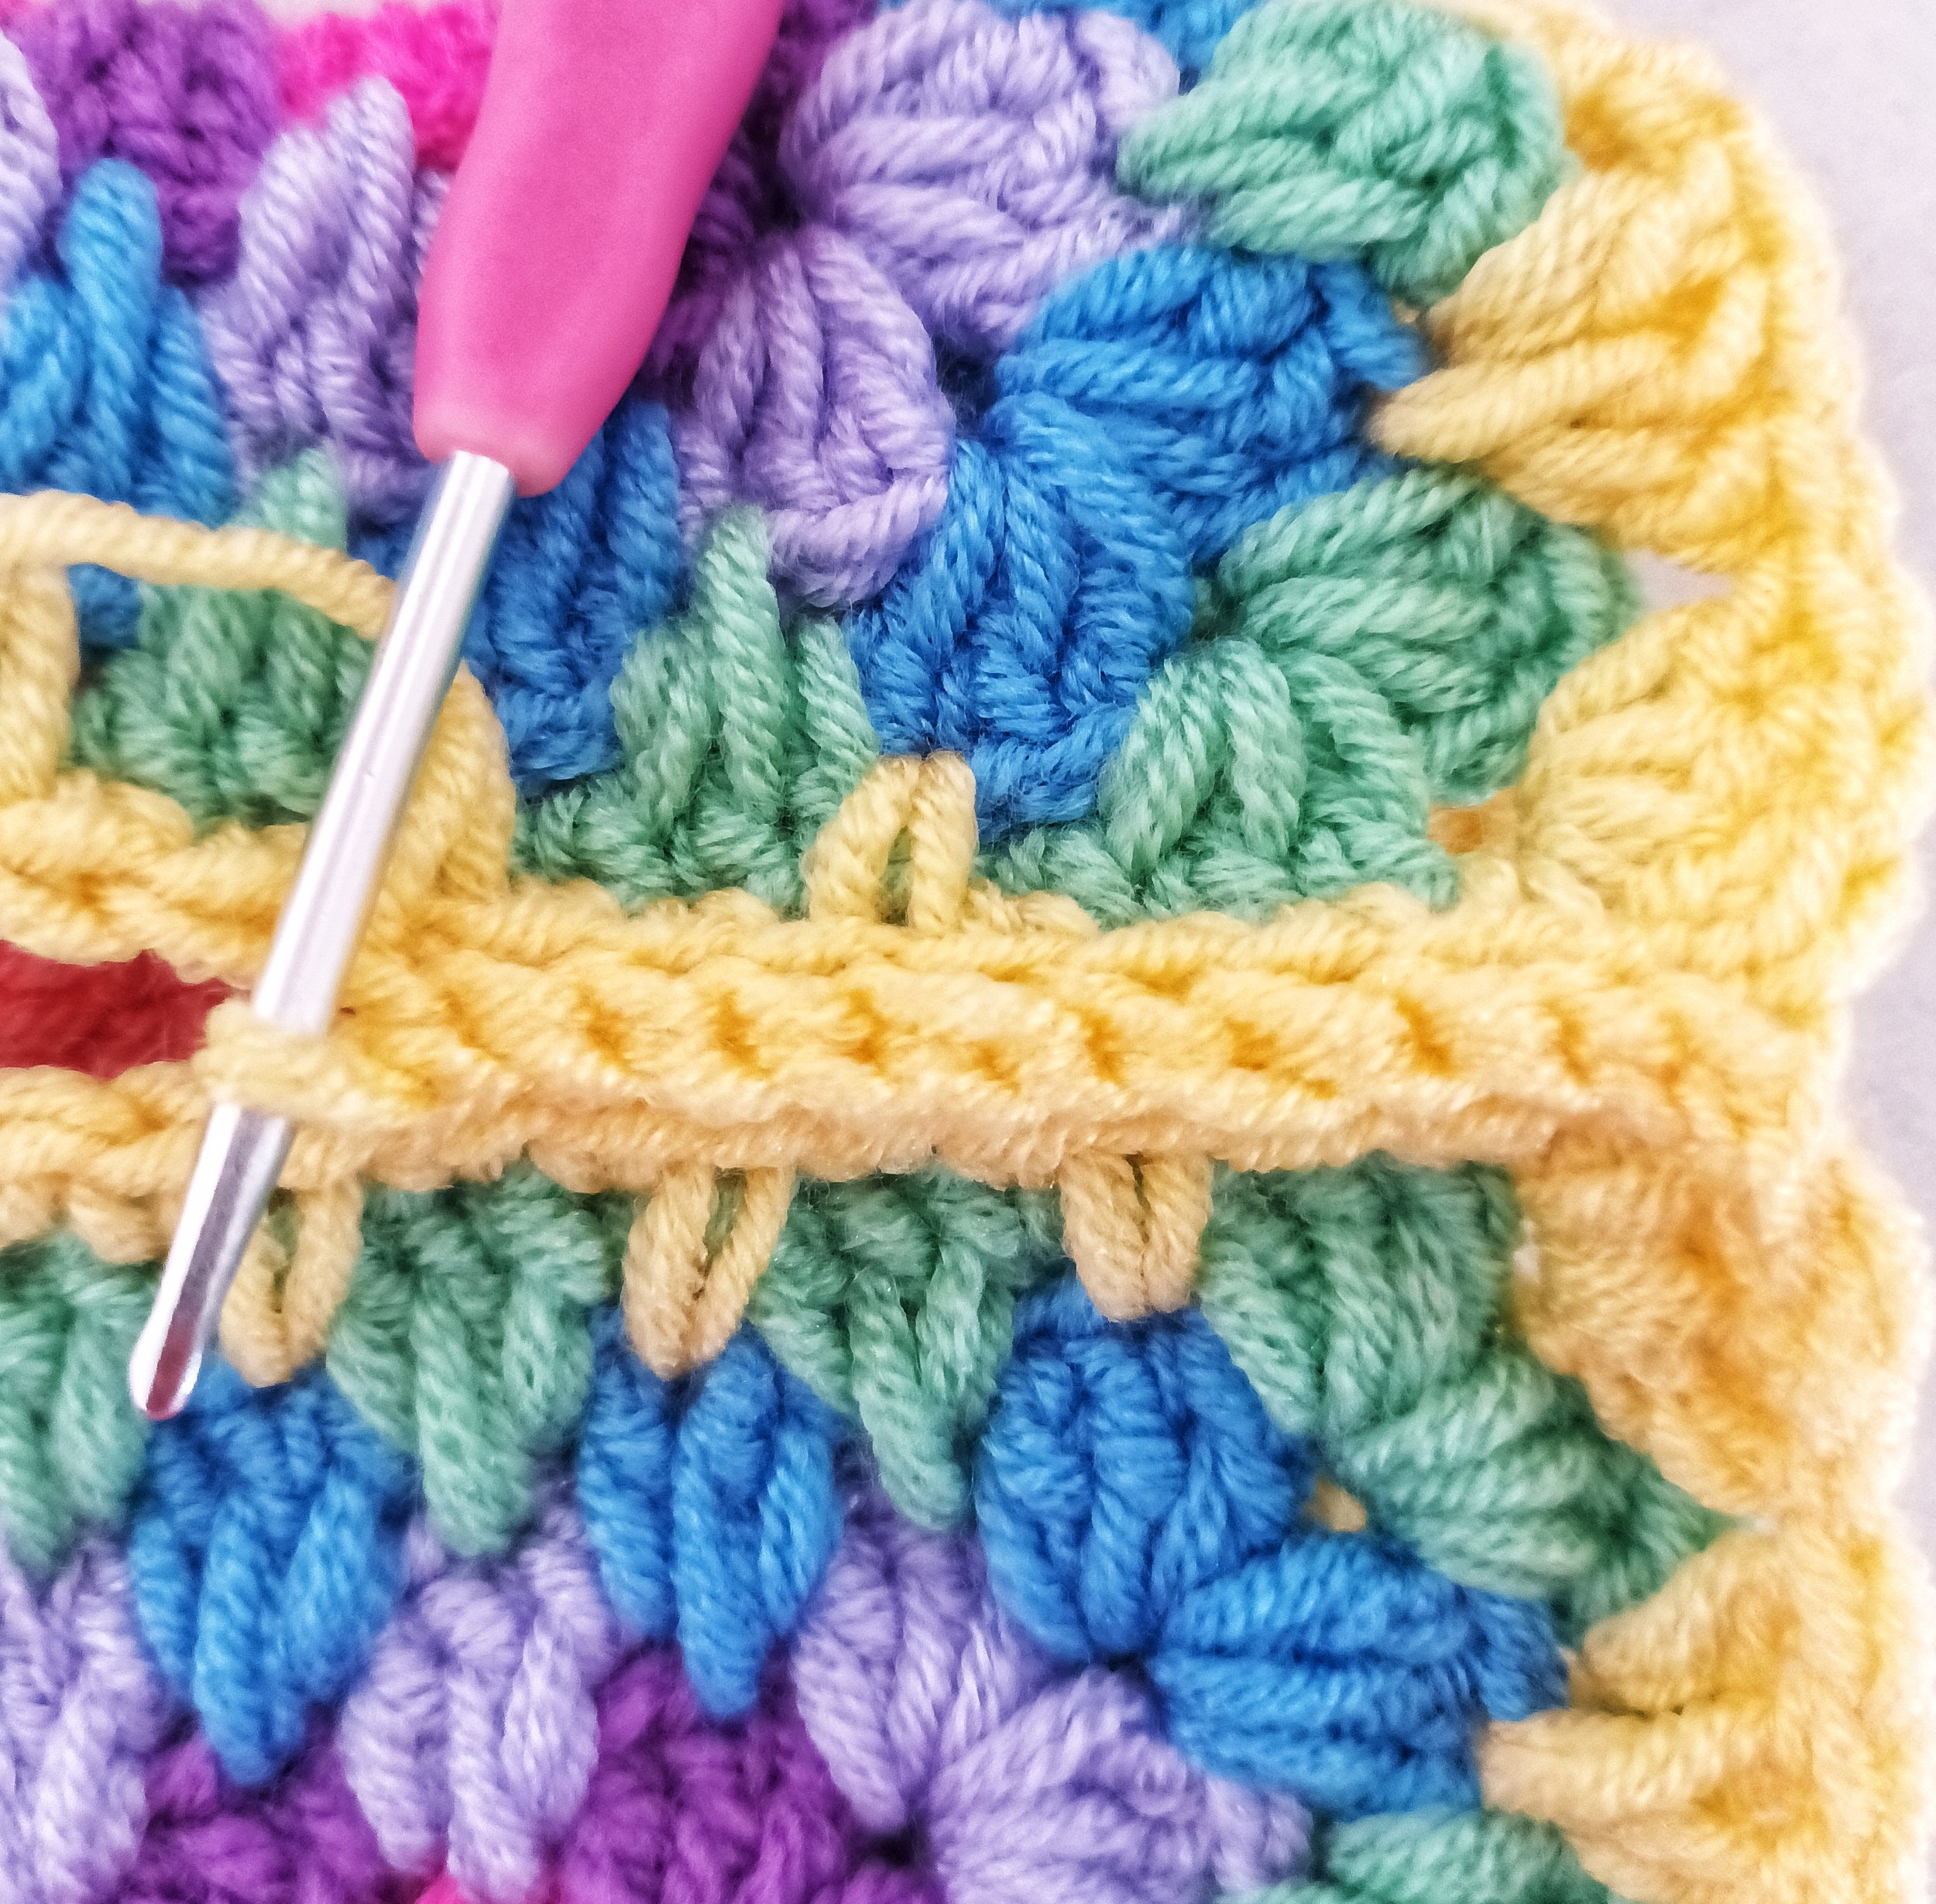
Bottom Edging
With the cardigan opened out and the back facing join yarn to the bottom right.
I used a hook size smaller for the bottom ribbing
Row 1: ch7 (or chain required stitches to get to 1.5”), sc in second ch from hook, sc 5, slst 2 stitches of the bottom edge. (6) Turn
Row 2: (in blo) ch1, sc all. (6) Turn
Row 3: (in blo) ch1, sc 6, slst 2 stitches of the bottom edge. (6) Turn
Repeat rows 2 and 3 until you reach the other side and continue to the button band.
ch6
slst into next stitch
slst again
sc in the blo
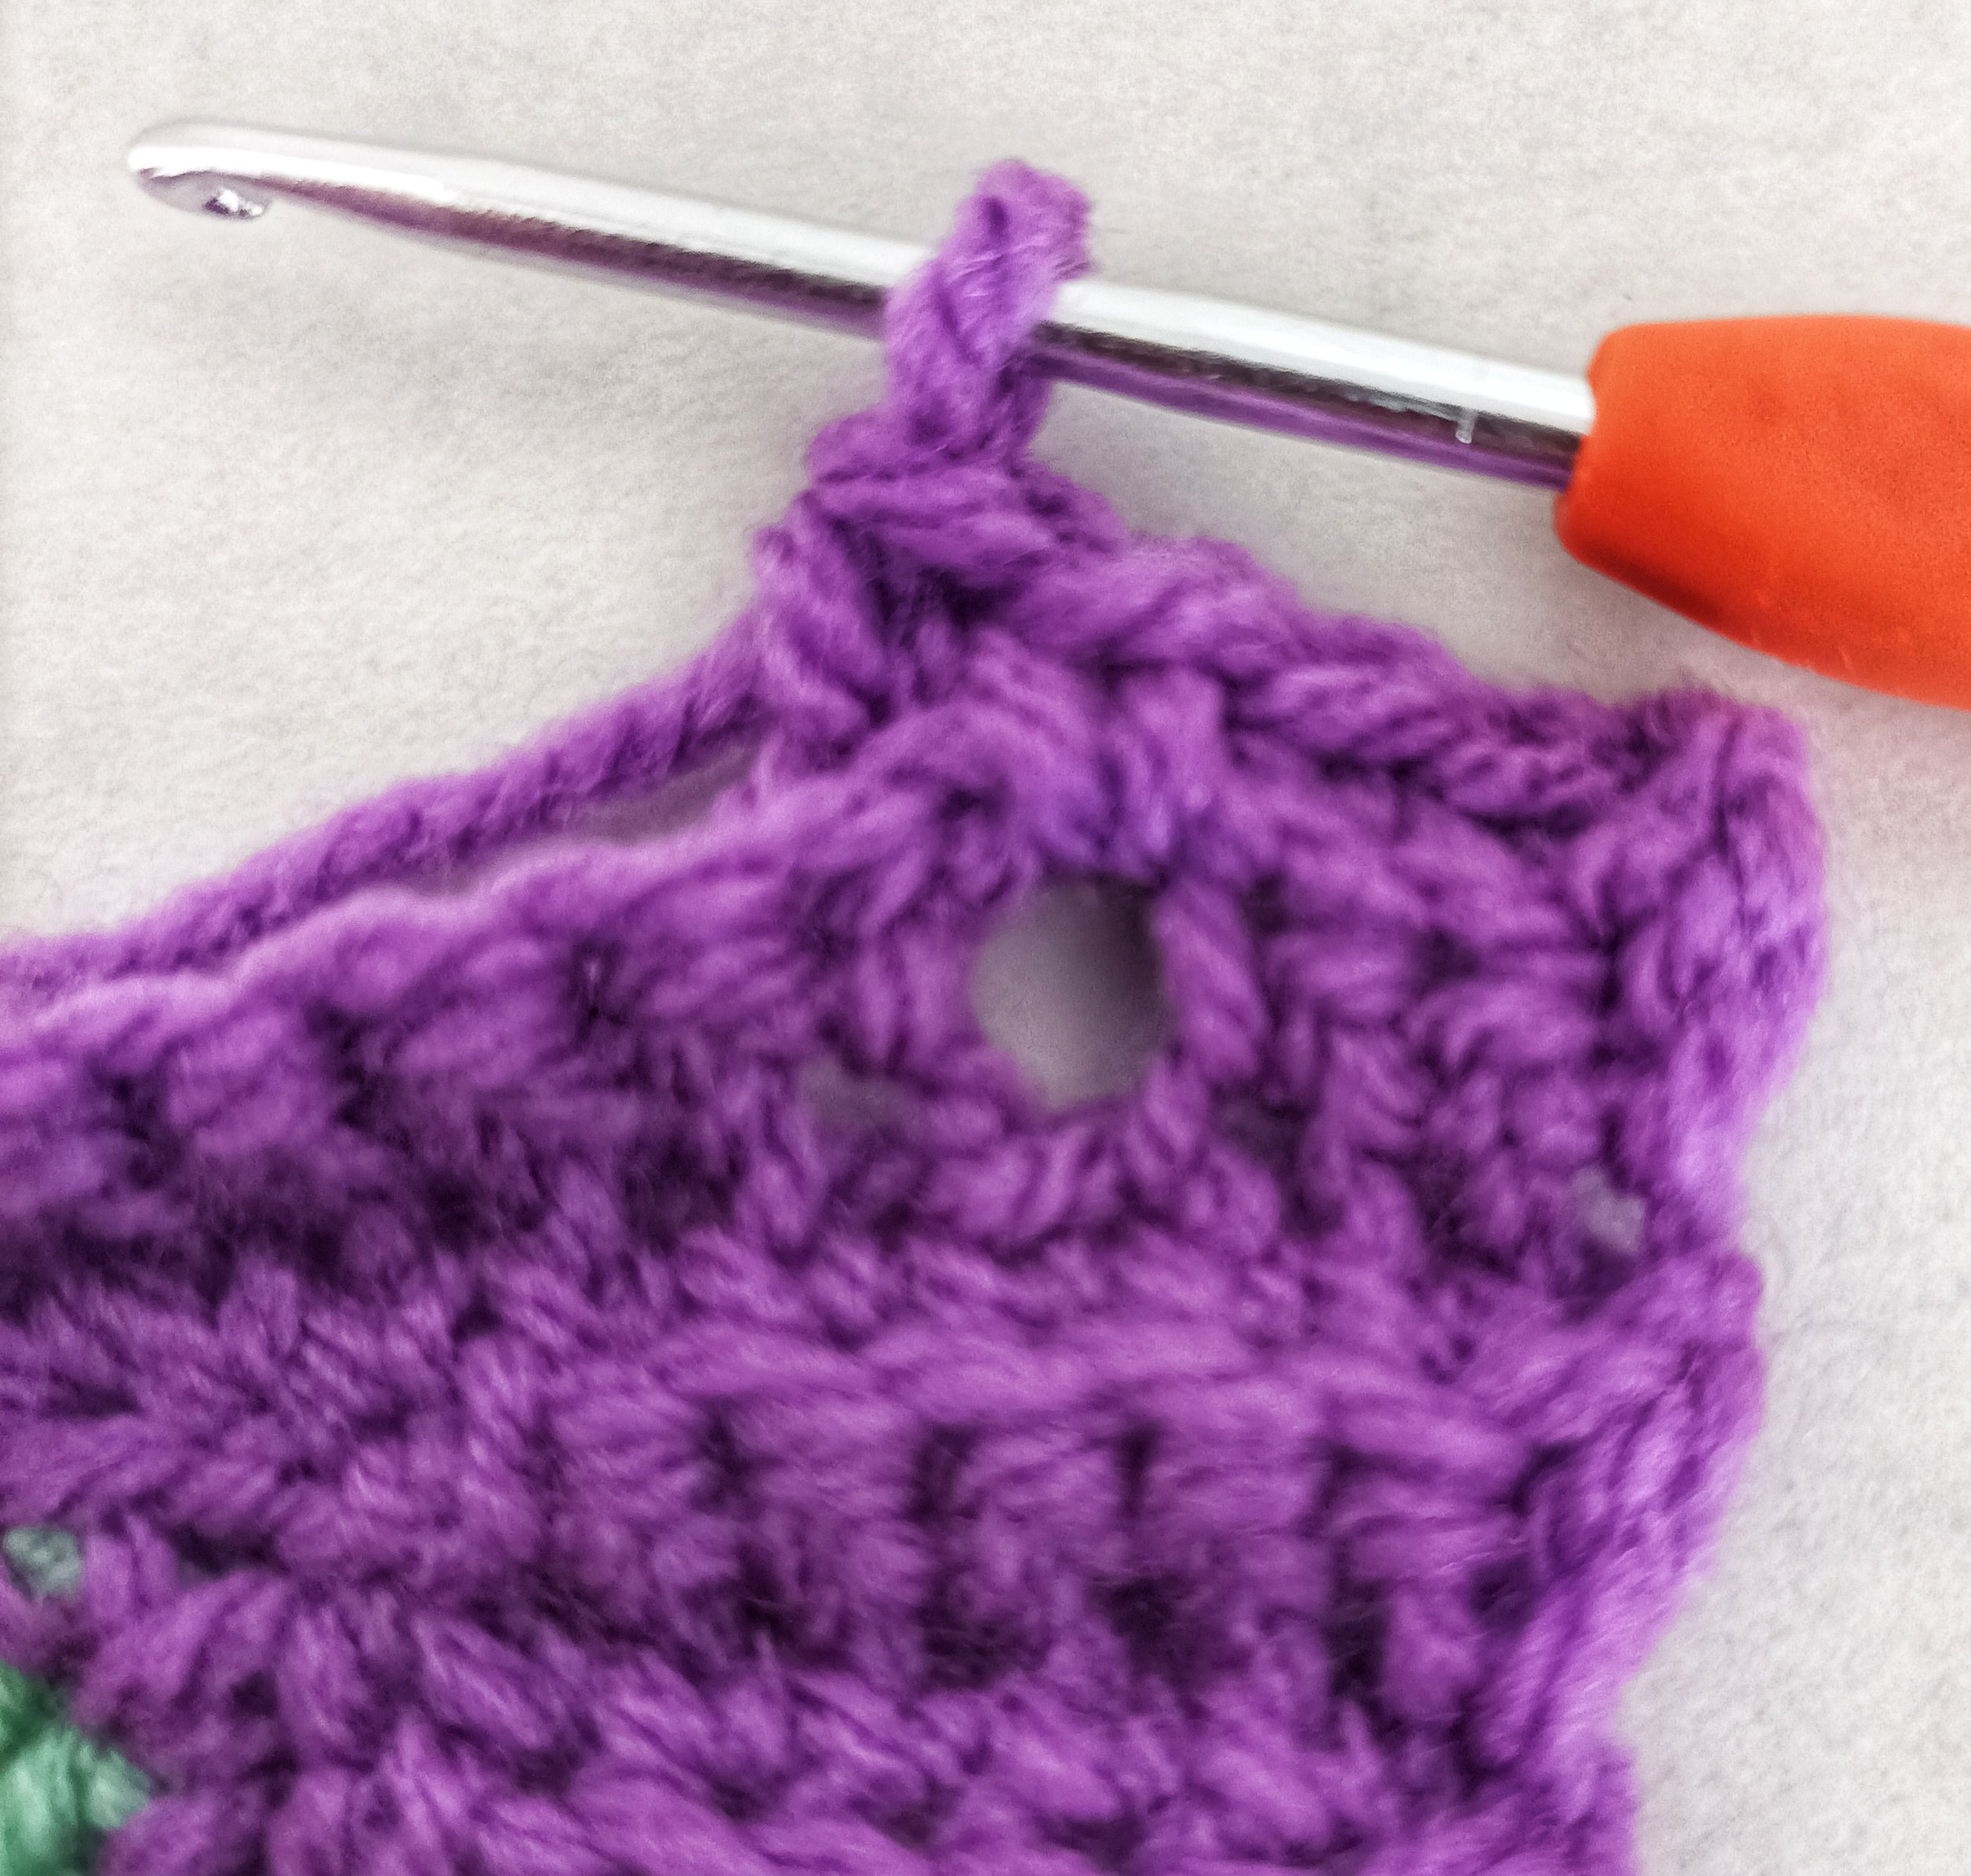
Buttonband
Continuing from the bottom edging
Row 1: (in blo) ch1, sc in the same, sc all around to the other side bottom edge. Turn
Row 2: (in blo) ch1, sc in the same, sc all. Turn (If wanting buttons make the button holes on this row by chaining 1 or 2 depending on the size of buttons you are using and skipping 1 or 2 stitches)
Row 3: (in blo) ch1, sc in the same, sc all. Turn (If you made buttonholes sc in the chains to finish the buttonhole)
Row 4: ch1, slst in the same, slst all.
(These rows can also be done as normal sc without crocheting in the back loops.)
Sleeves
Add length to the sleeves
Round 1: [ch3, sdc, dc] between first cluster, [dc, sdc, dc] between each cluster, at the seam centre do 3 dc, slst to first.
If changing colour join yarn between any cluster, if not changing colour slst to between next cluster to start the next round
Round 2: [ch3, sdc, dc] between first cluster, [dc, sdc, dc] between each cluster, slst to first.
Repeat round 2 until sleeves measures required length in the size chart or your required length.
(These rows can also be done as normal sc without crocheting in the back loops.)
Cuffs
I used a size smaller hook for the cuffs
Starting in the centre of the next cluster, the next row will close the gaps.
Row 1: ch1, sc in the same, ssc in the centre of cluster 2 rows below, *sc 1, ssc in the centre of cluster 2 rows below* repeat to end, slst to first.
Row 2: ch7, sc in second ch from hook, sc 5, slst 2 stitches of the sleeve. (6) Turn
(If you want to decrease the sleeves even more, slst 3 stitches instead of 2)
Row 3: (in blo) ch1, sc all. (6) Turn
Row 4: (in blo) ch1, sc 6, slst 2 stitches of the sleeve. (6) Turn
Repeat rows 3 and 4 until you reach the other side and sew the seam.
I would love to see your makes feel free to share with #cosyhexicardi @babycrochetdesigns on Instagram, Pinterest and Facebook.
Visit my website at www.babycrochetdesigns.com for free patterns and new patterns coming soon.
*COPYRIGHT 2022 This pattern is made for personal use only. You may not copy, share or sell this pattern, but you may make and sell items made from my patterns in moderation but please credit me @BabyCrochetDesigns as the designer many thanks*
join yarn between cluster under the arm
sdc (dc in the centre dc 2 rows below)
3 dc in the seam