
Free Marley & Molly Mouse Amigurumi Crochet Pattern
These cute mice are so sweet and fun to make.
The ad free pattern can be purchased as a PDF download here for £2.50
Written in US terms with abbreviations for UK
sc=single crochet (double crochet in UK)
dc=double crochet (treble crochet UK)
dec=decrease (crochet two stitches together)
inc=increase (crochet two stitches in next stitch)
Blo-back loops only
Materials
Around 50 g of beige dk Yarn and 35 g of contrasting colour.
2 mm hook I use this set from Amazon*
Small amount of black embroidery thread for eyelashes
Nose needs pink yarn to embroider.
10 mm safety eyes or black yarn.
Polyester toy filling.
Needle.
All parts are made going round in a spiral apart from dress and dungarees.
Mouse will measure approx 13 inches tall.
If you want your Mouse slightly bigger you can use Aran / worsted yarn and a 2.5 mm hook or even bigger use chunky and a 3.5 mm.
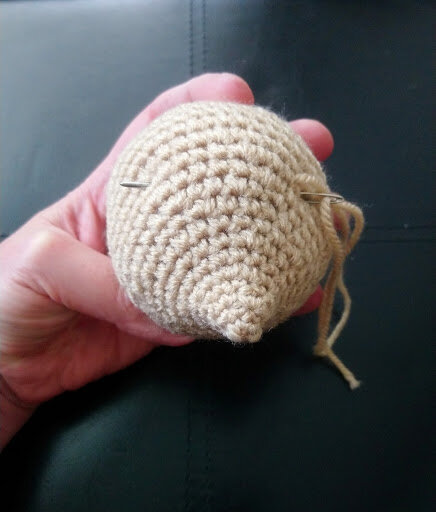
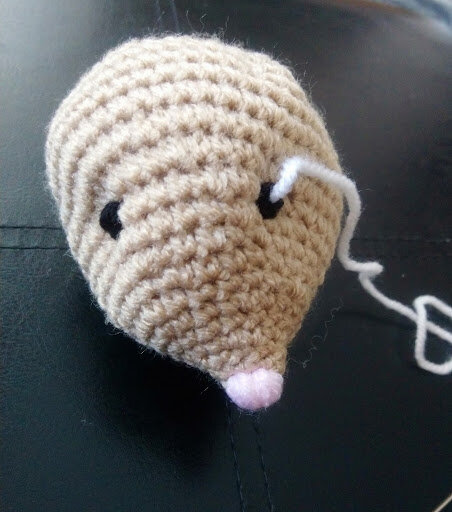
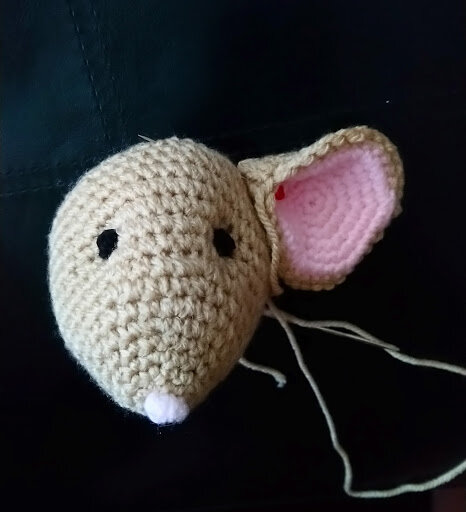
Head
Rnd1 6 sc in magic circle. (6)
Rnd2 sc all. (6)
Rnd3 *inc* x 6. (12)
Rnd4 sc all. (12)
Rnd5 *sc 1, inc* x 6. (18)
Rnd6 sc all. (18)
Rnd7 *sc 2, inc* x 6. (24)
Rnd8 sc all. (24)
Rnd9 *sc 3, inc* x 6. (30)
Rnd10 *sc 4, inc* x 6. (36)
Rnd11 *sc 5, inc* x 6. (42)
If using safety eyes place them between row 11 & 12 and 10 stitches apart, or place a marker for sewing later (see below)
Rnd12 *sc 6, inc* x 6. (48)
Rnd13-17 sc all. (48)
Rnd18 *sc 6, dec* x 6. (42)
Rnd19 *sc 5, dec* x 6. (36)
Rnd20 *sc 4, dec* x 6. (30)
Rnd21 *sc 3, dec* x 6. (24)
Rnd22 *sc 2, dec* x 6. (18)
Rnd23 *sc 1, dec* x 6. (12)
Rnd24 *dec* x 6. (6)
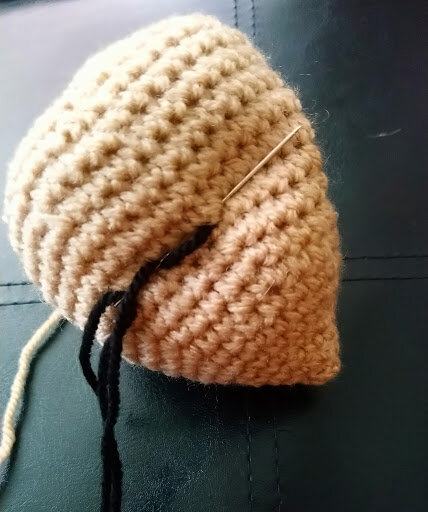
Make sure you stuff as you go and fasten off weave through remaining stitches to close up the opening.
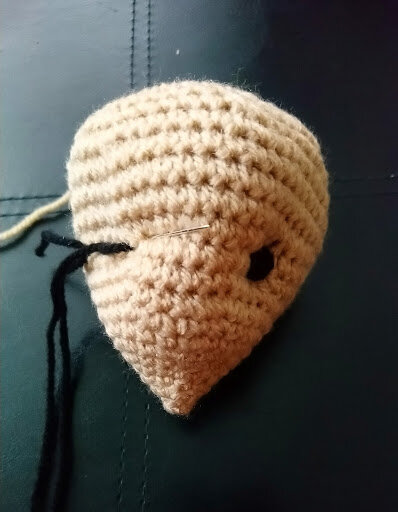
Then if sewing eyes, bring yarn to where eyes are going to be and place a stitch where each eye will be and pull tight so it draws it in then sew in yarn and fasten off.
Then join in black yarn and sew in eyes, use white for a small dot in the middle of the eye and use embroidery thread for eye lashes for the girl.
With pale pink sew a nose.


Arms
Make 2 stuffing as you go
Rnd1 5 sc in magic circle. (5)
Rnd2 *inc* x 5. (10)
Rnd3 sc all. (10)
Rnd4-23 sc all. (10) on round 19 change colour (for boy only) for t-shirt arms.
Fasten off
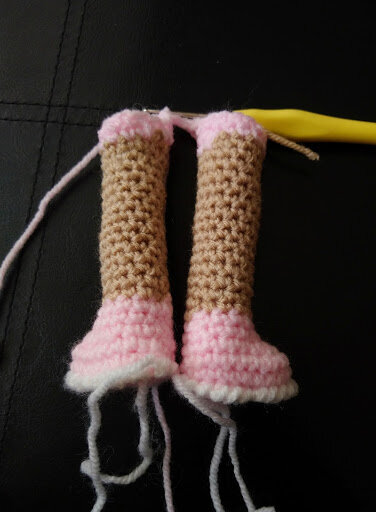
Legs
Make2
Starting with the shoe colour
Row1 ch 7, 3 hdc in third chain from hook, 1 hdc in next 3, 8 hdc in last chain then working along other side, 1 hdc in next 3, 4 hdc in last, slst to first. (22)
Row2 ch1, sc all in back loop only, slst to first. (22)
Row3 ch1, sc all, slst to first (22)
Row4 ch1, sc 5, dec x 6, sc 5. (16)
Row5 ch1, sc 4, dec x 4, sc 4. (12)
Row6 ch1, sc all, slst to first. (12)
For boy Work one more row with a contrasting colour then change to beige on 8th row.
For girl change to beige colour now
Start working in continuous rounds from now on.
Rnd7-22 sc all (12)
Change back to dress colour for girl.
Rnd23 sc all (12)
Rnd24 sc all (leave last 3 stitches unworked for first leg, for second leg work 3 extra stitches) this is to line legs up ready for joining.
Do not fasten off second leg ch2 and continue to body
(Working in the front loops around bottom of shoe, with the sole facing away from you)
For girl shoes, join yarn and crab stitch all the way round.
For boy shoes join yarn and slst all the way round.


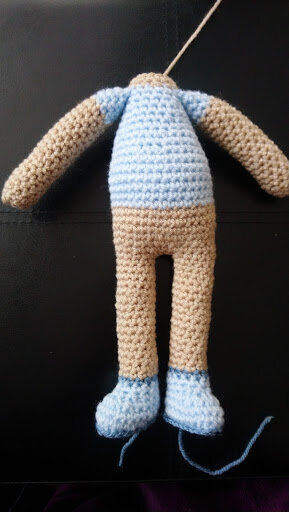
Body
Rnd1 sc around 12 stitches of first leg, sc in each of ch2, sc round 12 stitches of second leg and sc in each of ch2. (28)
Rnd2 sc 6, inc, sc 14, inc, sc 6. (30)
Rnd3 sc 6, inc, sc 7, inc, sc 6, inc, sc 7, inc. (34)
For boy change to t-shirt colour
Rnd4-13 sc all. (34)
Rnd14 *sc 6, dec* x 4, sc 2. (30)
Start stuffing and continue throughout
Rnd15 sc all. (30)
Rnd16 *sc 5, dec* x 4, sc 2. (26)
Rnd17 sc all. (26)
Rnd18 *sc 4, dec* x 4, sc 2. (22)
Rnd19 sc all. (22)
Rnd20 sc 1, *sc 3, dec* x 4, sc 1. (18)
Rnd21 sc all. (18)
(Change to beige for girl only)
Rnd22 sc all. (18)
Attaching arms
Rnd23 Starting at center back, sc 3, sc 5 through arm and body, sc 4, sc 5 through arm and body, sc 1. (18)
Change to beige for boy mouse.
Rnd24 *sc 4, dec* x 3. (15)
Rnd25 sc all. (15)
Fasten off, leaving a long end for sewing the head.

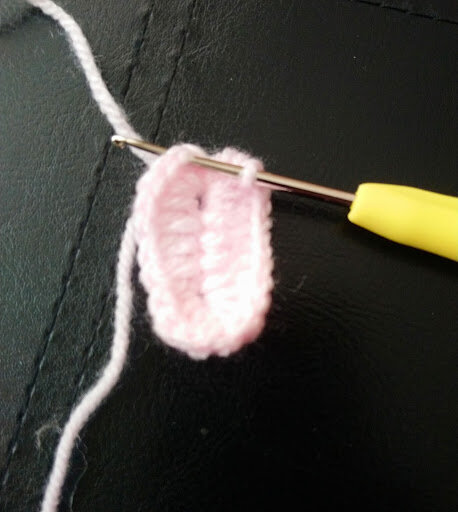
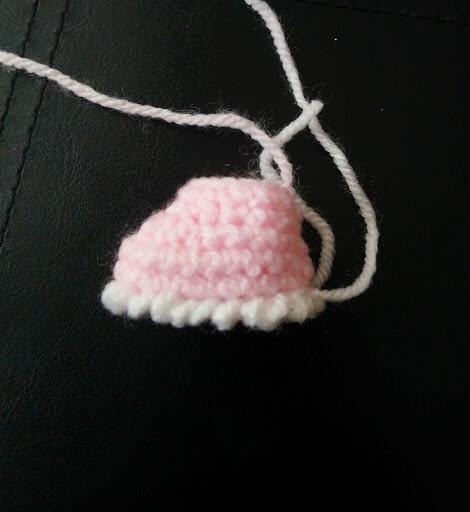
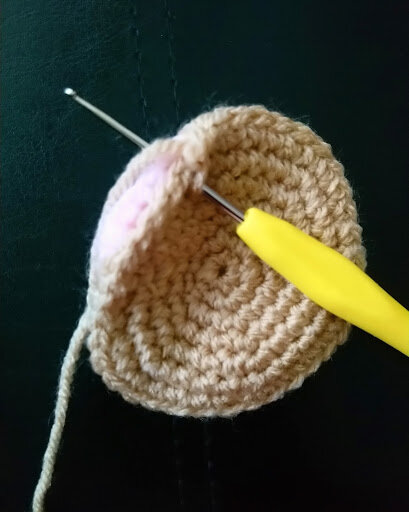
Ears
Make two using pink yarn for inner ears, and two using beige yarn for outer ears
Rnd1 6 sc in a magic circle. (6)
Rnd2 *inc* x 6. (12)
Rnd3 *sc 1, inc* x 6. (18)
Rnd3 *sc 2, inc* x 6. (24)
Rnd4 *sc 3, inc* x 6. (30)
Rnd5 *sc 4, inc* x 6. (36)
Fasten off
Place both pieces together and sc all around.
Fasten off leaving a long end for sewing, fold and sew a couple of stitches to keep in place.
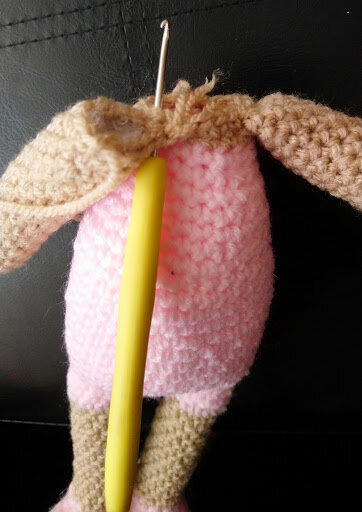
Pin head to body and sew when happy with position.


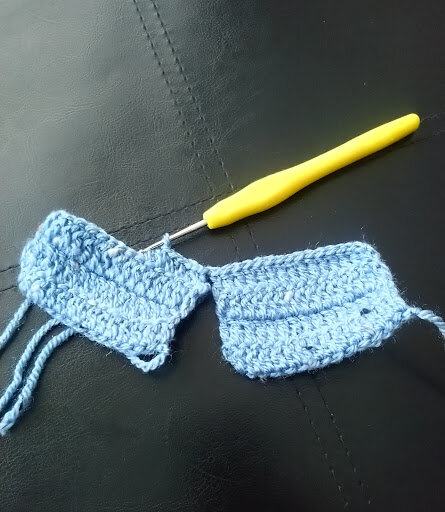
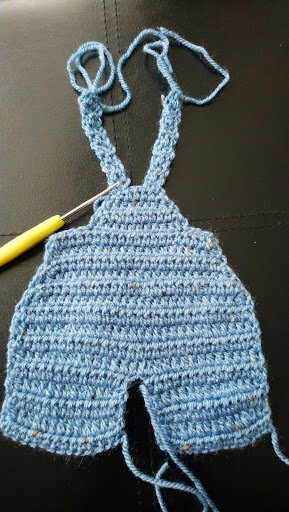
Dungarees
Front and back panel start by making two legs then joining together to start the body.
Ch15
Row1 hdc in 3rd ch from hook and each ch across. (13)
Row2-3 ch1, hdc in same hdc to end. (13)
Join legs
Row4 ch1, hdc in same and across 2nd leg, ch1, hdc across first leg. (26 + ch1) Turn
Row5-8 Ch1, hdc in same and across all including ch1. (27) Turn
Row9 ch1, dec, hdc 23, dec. (25) Turn
Row10 ch1, dec, hdc21, dec. (23) Turn
Row11 ch1, dec, hdc 19, dec. (21) Turn
Row12 ch1, dec, hdc 17, dec. (19) Turn
Row13-14 ch1, hdc in same and next 18. (19) Turn
Row15 ch1, slst to 5th stitch, ch1, hdc in same and next 10 leaving last 4 unworked. (11) Turn
Row16 ch1, dec, hdc 7, dec. (9) Turn
Row17 ch1, dec, hdc 5, dec. (7) Turn
Fasten off now for front panel, continue to row 18 for back panel
Row18 ch1, hdc in same and next 6. (7) Turn
Straps
Row19-29 ch1, hdc in same, hdc 1. (2) Turn
Then repeat rows 19-29 on last 2 stitches for second strap
Place both panels together and stitch down the sides and between the legs, sew in all ends.
Sc around bottom of legs and around the top of dungarees with contrasting colour and sew small buttons at the end of the straps that fit through hdc.
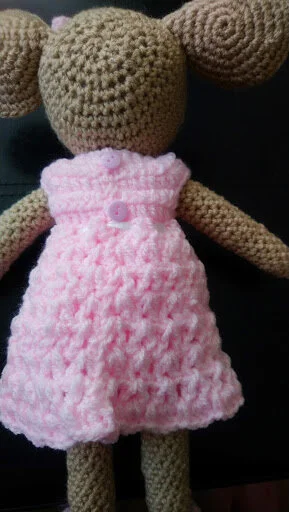
Dress
With 2mm hook ch24
Row1 Ch1, hdc in 3rd ch from hook, 1 hdc in each of next 2ch, 3 hdc in next ch, 1 hdc in each of next 3ch, 3 hdc in next ch, 1 hdc in each of next 6ch, 3 hdc in next ch, 1 hdc in each of next 3ch, 3 hdc in next ch, 1 hdc in each of next 3ch. (30) Turn
Row2 ch1, 1 hdc in base of ch1, 1 hdc in each of next 3, 3 hdc in next, 1 hdc in each of next 5, 3 hdc in next, 1 hdc in each of next 8, 3 hdc in next, 1 hdc in each of next 5, 3 hdc in next, 1 hdc in each of next 4. (38) Turn
Row3 ch1, 1 hdc in base of ch1, 1 hdc in each of next 4, 3 hdc in next, 1 hdc in each of next 7, 3 hdc in next, 1 hdc in each of next 10, 3 hdc in next, 1 hdc in each of next 7, 3 hdc in next, 1 hdc in each of next 5. (46) Turn
Row4 ch1, 1 hdc in base of ch1, 1 hdc in each of next 5, 3 hdc in next, ch2, sk next 9, 3 hdc in next, 1 hdc in each of next 12, 3 hdc in next, ch2, sk next 9, 3 hdc in next, 1 hdc in each of next 6. (36) Turn
Row5 ch1, hdc all including both chain2. (40)
Change to 3.5mm hook
Row6 ch1, (dc, ch1, dc in same), *sk1, (dc, ch1, dc in same)* repeat to end. (20 v)
Row7-12 ch1, *dc, ch1, dc* in each ch1 space.
Row13 ch1, *shell of 3 dc in ch1 space, sc in between v* repeat to last stitch, shell of 3 dc in last.
Fasten off.
Place the dress on the mouse and sew up the back. If you want the dress removable leave the top half unsewn and sew some small buttons then fasten through hdc.
That's it completed. I hope you enjoyed making my pattern!
I would love to see your makes feel free to share @babycrochetdesigns Instagram, Pinterest and Facebook.
*COPYRIGHT 2021 This pattern is made for personal use only. You may not copy, share or sell this pattern, you may make and sell items made from my patterns but please credit me @BabyCrochetDesigns as the designer many thanks*