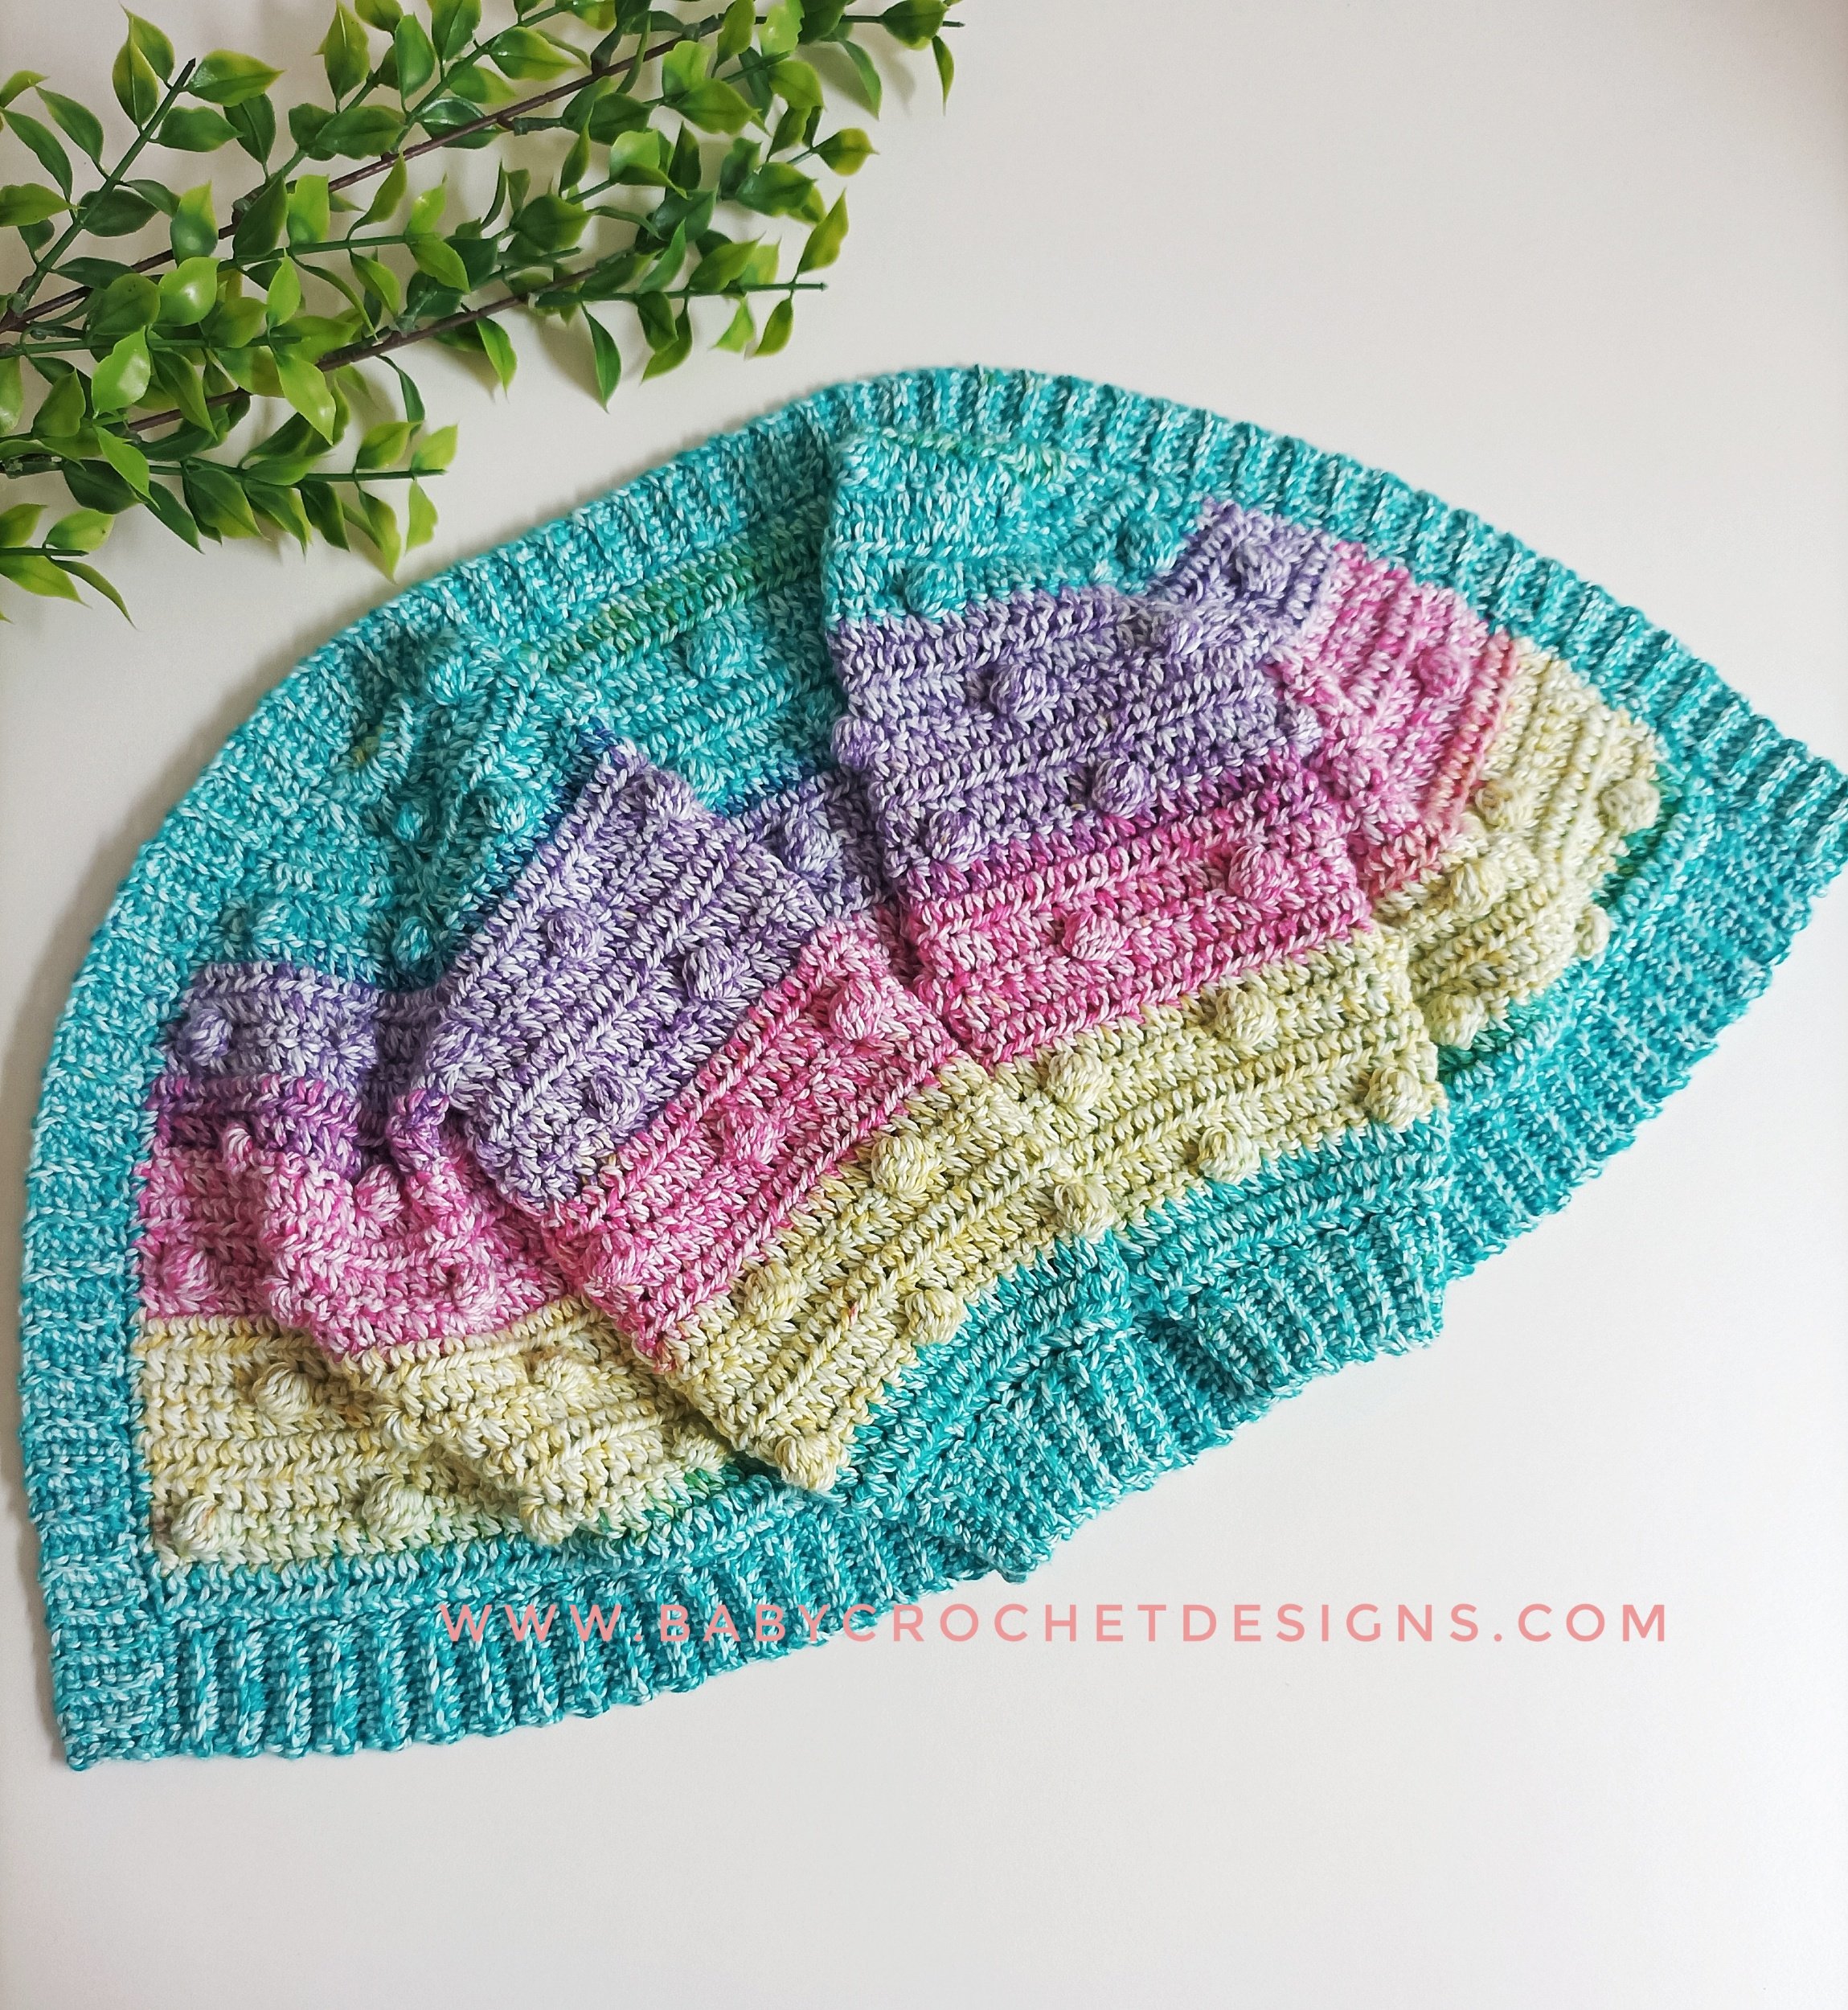

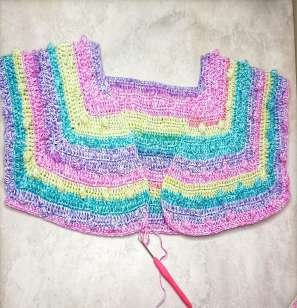
Skyler Cardigan
6-12 Months
This cute bobble cardigan is made from the top down, using a simple half double crochet (half treble crochet UK) stitch and bobble stitch, it is quick and easy to work up.
The premium pattern with sizes preemie to 10 years can be purchased here also adult sizes are coming very soon!
The YouTube tutorial is here part 1 and part 2
Materials
Universal Yarn Cotton Supreme Waves, Shade 903 Gemstones, 100% Cotton dk / weight 3 yarn (210 metres / 230 yards per 100g)
3.5 and 4mm crochet hooks
Written in English US terms with abbreviations for UK terms
sc = single crochet (double crochet in UK)
dc = double crochet (treble crochet UK)
hdc = half double crochet (half treble crochet UK)
slst = slip stitch
ch = chain
blo = back loop only (crochet into the back loop of the stitch)
bs = Bobble stitch (yarn over, insert hook into next stitch, pull up a loop, yarn over and pull through 2 stitches), five times, you should have 6 stitches on hook, yarn over and pull through all 6.
[ ] = these stitches should be completed into one stitch or the ch1
* * = in between should be repeated
Gauge
18 stitches x 8 rows of hdc and 3 rows of sc = 4” using a 4mm crochet hook
Pattern notes
The ch1 at the beginning of each row does not count as a stitch.
Due to the nature of the bobbles the increases may vary to get the right stitch count.
The ch1 corner counts as a stitch.


This is the first stitch to sc or hdc into.
hdc this stitch before the corner.
hdc this stitch after corner
on the bobble rows work this stitch before the ch1 corner
on the bobble rows work sc or bs in the ch1 corner
on the bobble rows work this stitch after the ch1 corner
Ch 41 using a 4mm hook
Row 1: [1 hdc, ch1, 1 hdc] in the third chain from hook, hdc 10, [1 hdc, ch 1, 1 hdc] in the next, hdc 15, [1 hdc, ch1, 1 hdc] in the next, hdc 10, [1 hdc, ch1, 1 hdc] in the next. (47) Turn
Row 2: ch1, [2 hdc] in the first, [2 hdc, ch1, 2 hdc] in the ch1 space, hdc 12, [2 hdc, ch1, 2 hdc] in the ch1 space, hdc 17, [2 hdc, ch1, 2 hdc] in the ch1 space, hdc 12, [2 hdc, ch1, 2 hdc] in the ch1 space, [2 hdc] in the last. (65) Turn
Row 3: ch1, [2 hdc] in the first, hdc 3, [1 hdc, ch1, 1 hdc] in the ch1 space, hdc 16, [2 hdc, ch1, 2 hdc] the ch1 space, hdc 21, [2 hdc, ch1, 2 hdc] in the ch1 space, hdc 16, [1 hdc, ch1, 1 hdc] in the ch1, space, hdc 3, [2 hdc] in the last. (79) Turn
Row 4: ch1, sc 7, *bs, sc 7* repeat to end. (79) Turn
Row 5: ch1, [2 hdc] in the first, hdc 5, [1 hdc, ch1, 1 hdc] in the next, hdc 19, [1 hdc, ch1, 1 hdc] in the next, hdc 25, [1 hdc, ch1, 1 hdc] in the next, hdc 19, [1 hdc, ch1, 1 hdc] in the next, hdc 5, [2 hdc] in the last. (89) Turn
Row 6: ch1, [2 hdc] in the first, hdc 7, [1 hdc, ch1, 1 hdc] in the ch1 space, hdc 21, [1 hdc, ch1, 1 hdc] in the ch1 space, hdc 27, [1 hdc, ch1, 1 hdc] in the ch1 space, hdc 21, [1 hdc, ch1, 1 hdc] in the ch1 space, hdc 7, [2 hdc] in the last. (99) Turn
Row 7: ch1, [2 hdc] in the first, hdc 9, [1 hdc, ch1, 1 hdc] in the ch space, hdc 23, [1 hdc, ch1, 2 hdc] in the ch1 space, hdc 29, [2 hdc, ch1, 1 hdc] in the ch1 space, hdc 23, [1 hdc, ch1, 1 hdc] in the ch1 space, hdc 9, [2 hdc] in the last. (111) Turn
Row 8: ch1, sc 3, bs, *sc 7, bs* repeat to last 3, sc in the last 3 stitches. (111) Turn
Row 9: ch1, [2 hdc] in the first, hdc 11, [1 hdc, ch1, 1 hdc] in the next, hdc 25, [1 hdc, ch1, 1 hdc] in the next, hdc 33, [1 hdc, ch1, 1 hdc] in the next, hdc 25, [1 hdc, ch1, 1 hdc] in the next, hdc 11, [2 hdc] in the last. (121) Turn
Row 10: ch1, [2 hdc] in the first, hdc 13, [1 hdc, ch1, 1 hdc] in the ch1 space, hdc 27, [1 hdc, ch1, 1 hdc] in the ch1 space, hdc 35, [1 hdc, ch1. 1 hdc] in the next, hdc 27, [1 hdc, ch1, 1 hdc] in the ch1 space, hdc 13, [2 hdc] in the last. (131) Turn
Row 11: ch1, [2 hdc] in the first, hdc 15, [2 hdc, ch 1, 1 hdc] in the ch1 space, hdc 29, [1 hdc, ch1, 1 hdc] in the ch1 space, hdc 37, [1 hdc, ch1, 1 hdc] in the ch 1 space, hdc 29, [1 hdc, ch1, 2 hdc] in the ch1 space, hdc 15, [2 hdc] in the last. (143) Turn
Row 12: ch1, sc 3, bs, *sc 7, bs* x 2, sc 6, bs, *sc 7, bs* x 2, sc 12, bs, *sc 7, bs* x 4, sc 11, bs, *bs, sc 7* x 5, sc 3. (143) Turn
Divide for armholes
Row 13: ch1, hdc 19, [2 hdc] in the next, skip 31, [3 hdc] in the next, hdc 39, [3 hdc] in the next, skip 31, [2 hdc] in the next, hdc 19. (87) Turn
Row 14-15: ch1, hdc to end. (87) Turn
Row 16: ch1, sc 7, *bs, sc 7* repeat to end. (87) Turn
Row 17-19: ch1, hdc to end. (87) Turn
Row 20: ch1, sc 3, bs, *sc 7, bs *repeat to last 3 stitches, sc 3. (87) Turn
Row 21-23: ch1, hdc in the same, hdc to end. (87) Turn
Repeat row 16 to 23 until work measures 10 inches from the shoulder, ending with a wrong side row
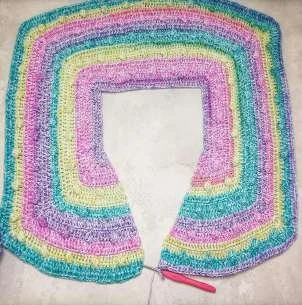
Bottom edging
Continuing from the bottom of the cardigan using a 3.5mm hook
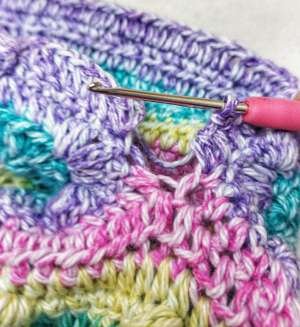
Row 1: ch1, sc along the bottom of the cardigan, sc up the front edge around the collar and back down the other edge to the bottom, slst to the first. (I found 6 sc per three rows of hdc and 1 row of sc worked out just right)
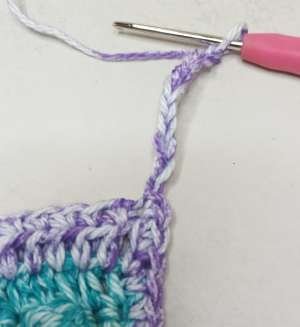
Row 2: ch8, sc in the second chain from hook, sc in the next 6, join to the next stitch at the bottom of the cardigan with a slst, then work one more slst into the next stitch. (2 slsts in total for joining) (7) Turn
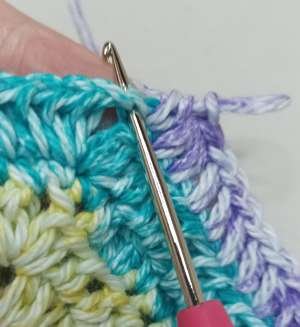
Row 3: ch1, sc all in blo. (7) Turn
Row 4: (in blo) ch1, sc all back to the edge of the cardigan, join to the next stitch of the bottom of the cardigan using a slst, then work one more slst into the next stitch. (2 slsts in total for joining) (7) Turn
Repeat rows 3 and 4 until you reach the other side, then continue to the side edging.


Side edging
Continuing from the bottom edging
(If you want to add buttons, mark out where you would like the buttonholes to be.
At the markers sc 2, ch2, skip 1, sc 2, then continue with row 3, doing 1 sc in the ch2 where the skipped stitch was.
(I used 20mm buttons so did a ch2, but still only skipped 1 to get the buttonhole a bit bigger, then on the next row I did just 1 sc into the ch2.)
Row 1: ch6, sc in the second chain from hook, sc in the next 4, join to the next stitch at the edge of the cardigan with a slst, then work one more slst into the next stitch. (2 slsts in total for joining) (5) Turn
Row 2: ch1, sc all in blo. (5) Turn
Row 3: (in blo) ch1, sc all back to the edge of the cardigan, join to the next stitch of the edge of the cardigan using a slst, then work one more slst into the next stitch. (2 slsts in total for joining) (5) Turn
Repeat rows 2 and 3 until you reach the other side.
Fasten off.


Starting sleeves, start the sleeves by joining yarn in the first worked stitch under the arm and following the pattern, under the arm add extra stitches to get the right count for the size you are making, (this prevents a gap under the arm and gets the right count for the pattern)
On the arms you may need to line the bobbles up differently to how it's written depending where you start the first stitch.
Because I used self-striping yarn on the sleeves, I used half of each colour on the ball for each sleeve, so that the stripes were more equal to match the body, but this created more ends to sew though!
The sleeves can be decreased gradually if you prefer, try to do this under the arm and be aware there will be less stitches between the first bobble of the row and make a note of what you did, so that when you do the second sleeve you can do the same.
Sleeves
Join yarn to the first unworked stitch under the arm.
Row 1-3: ch1, hdc 40, slst to first. (40) Turn
Row 4: ch1, sc 2, bs, *sc 7, bs* repeat to last 5 stitches, sc 5, slst to first. (40) Turn
Row 5-7: ch1, hdc to end, slst to first. (40) Turn
Row 8: ch1, sc 5, bs, *sc 7, bs* repeat to last 2, sc in the last 2 stitches, slst to first. (40) Turn
Repeat row 1-8 until the sleeve measures 10.5 inches from the shoulder, then continue to the cuffs.
Cuffs
Row 1: ch1, *sc 1, dec* x 12, sc 4, slst to first. (28) continue to the cuff ribbing on page 8.
Cuff Ribbing
Using a 3.5mm hook
Row 1: ch8, sc in the second chain from hook, sc in the next 8, join to the next stitch at the edge of the cuff with a slst, then work one more slst into the next stitch. (2 slsts in total for joining) (7) Turn
Row 2: ch1, sc all in blo. (7) Turn
Row 3: (in blo) ch1, sc all back to the edge of the cuff, join to the next stitch of the edge of the cuff using a slst, then work one more slst into the next stitch. (2 slsts in total for joining) (7) Turn
Repeat rows 2 and 3 until you reach the other side, then fasten off and sew the seam.
I would love to see your makes feel free to share #skylercardigan @babycrochetdesigns Instagram, Pinterest and Facebook.
COPYRIGHT 2023 This pattern is made for personal use only. You may not copy, share or sell this pattern, you may make and sell items made from my patterns but please credit me in any listings @BabyCrochetDesigns as the designer many thanks*