
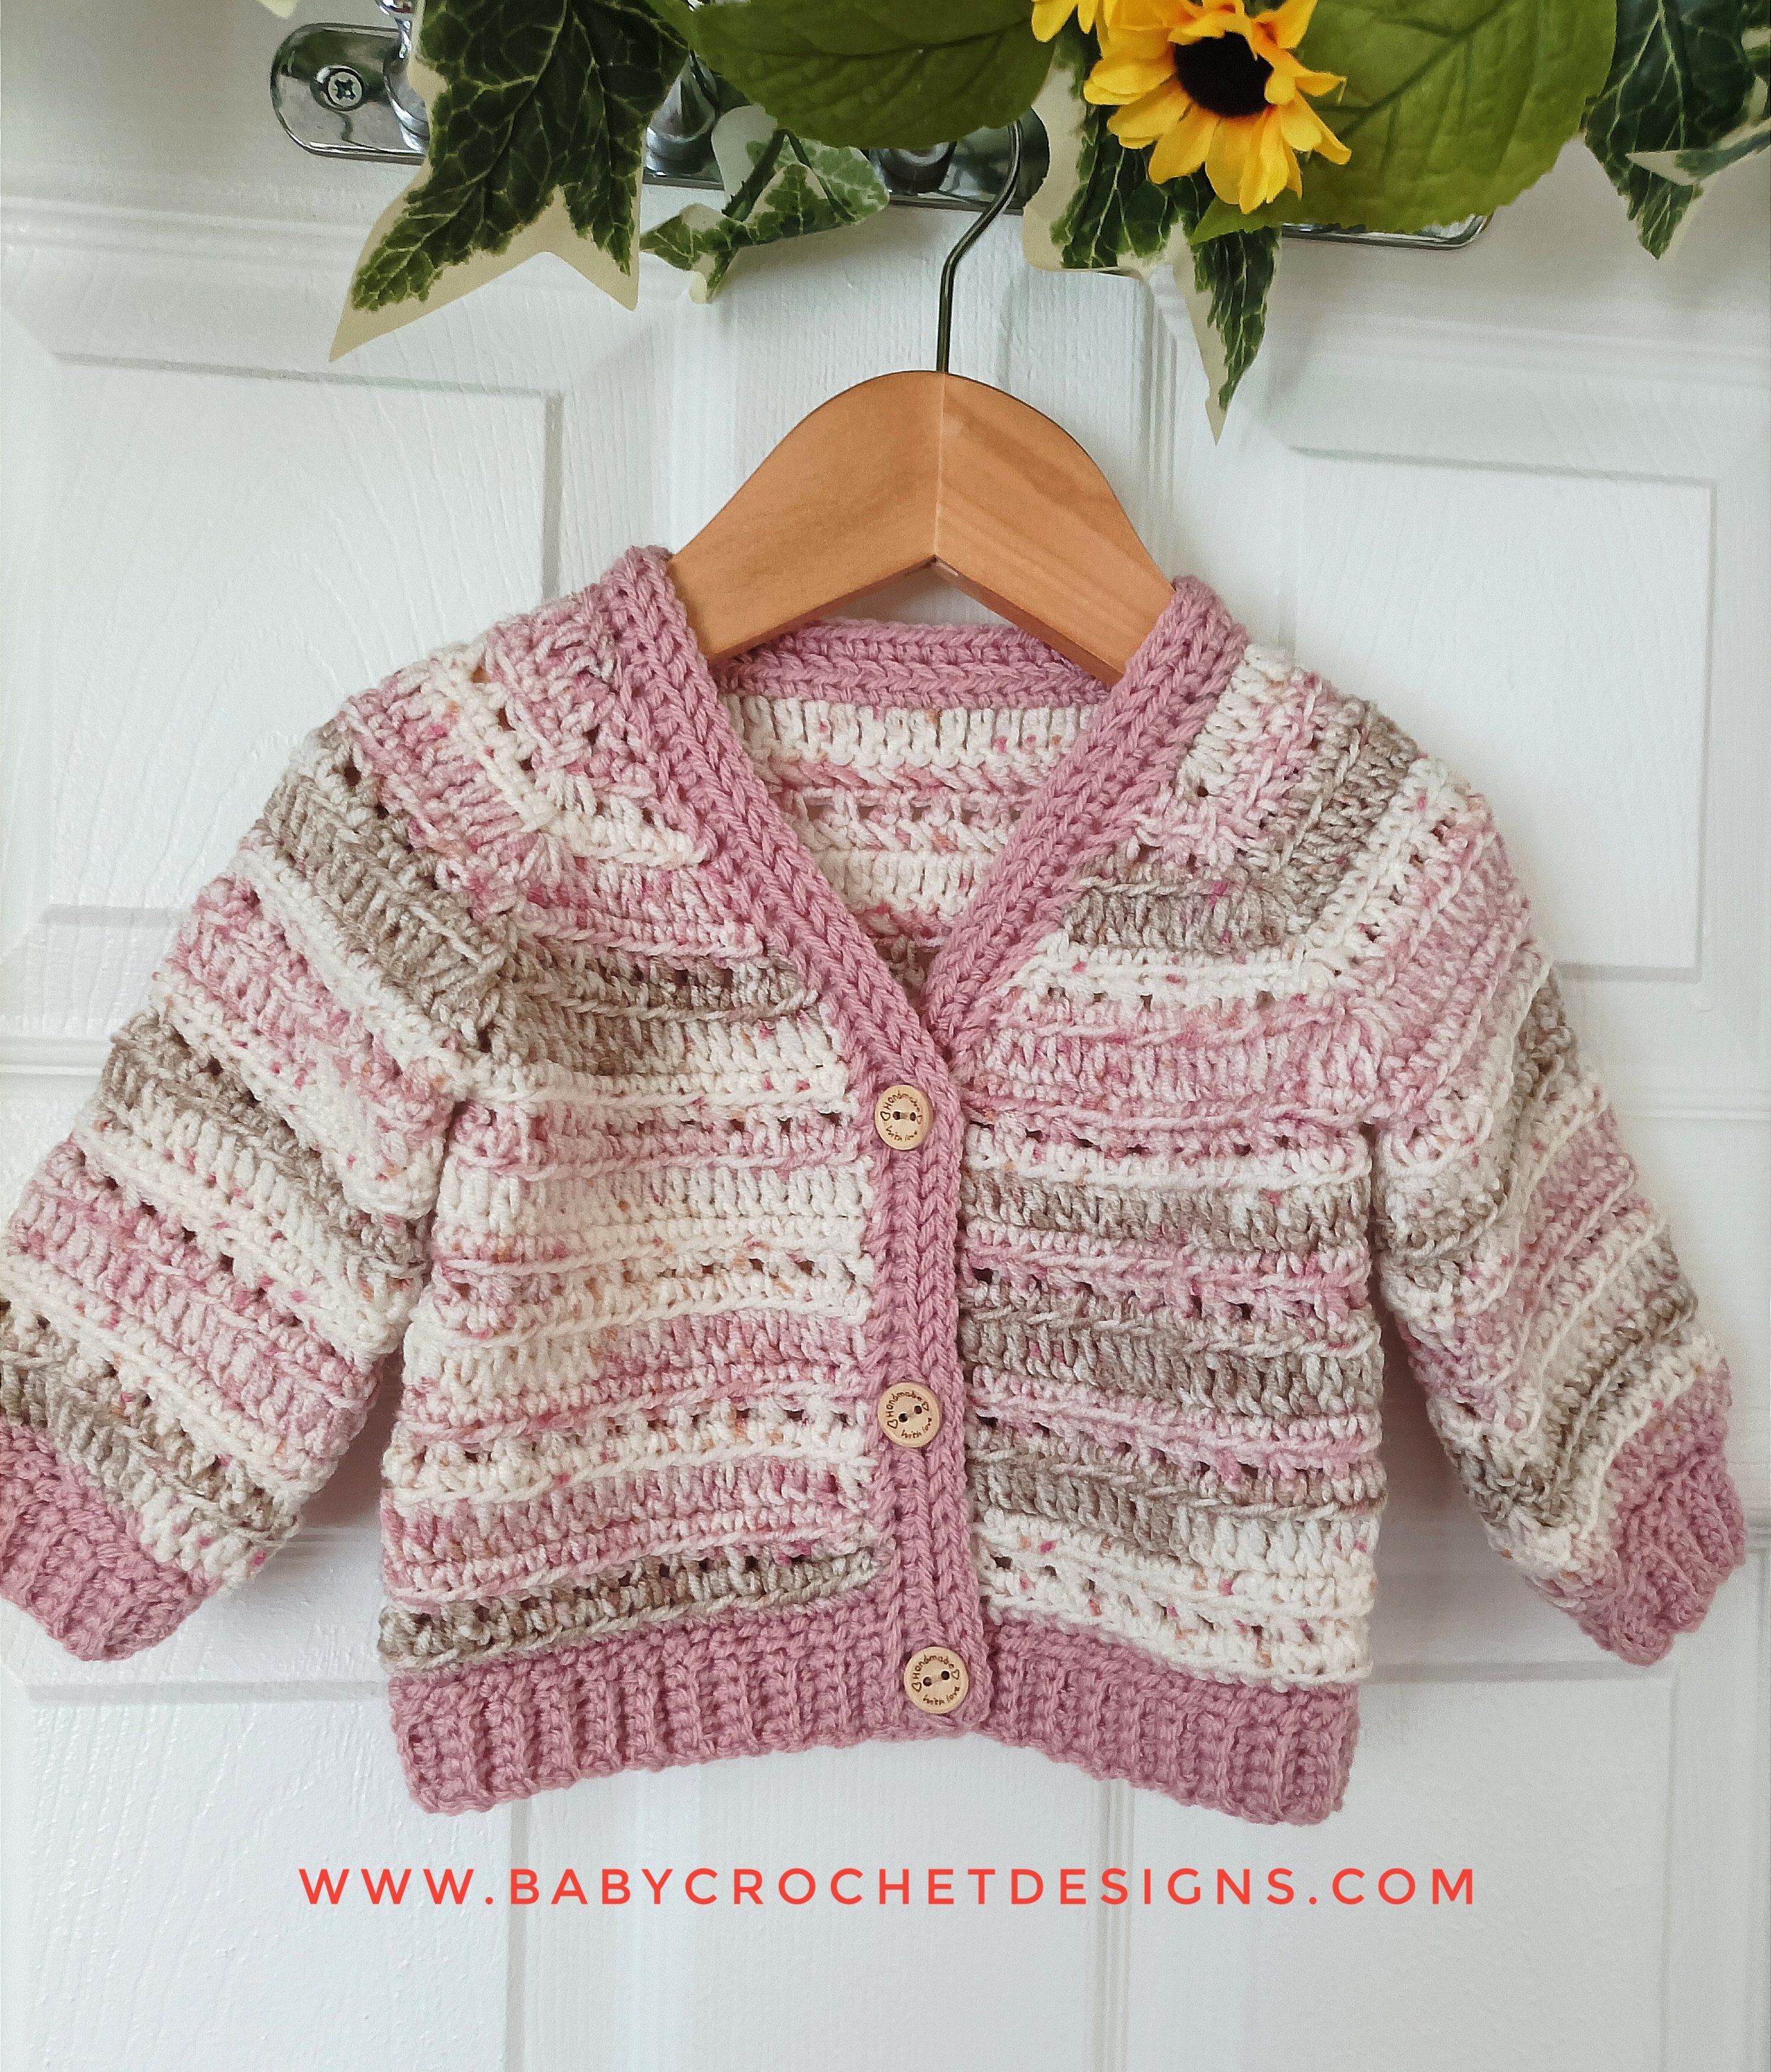
Preemie Cosy Cottage Cardigan
This cute little cardigan is quick and simple to make. It is made from the top down using a mixture of simple stitches, then adding a rib edging around the body and sleeves and a button band.
The cardigan can also be purchased as a PDF with plenty of photos in sizes Newborn to 10 Years here there is also an Adult version!
Materials
dk / weight 3 yarn I used Stylecraft Bambino Prints you will need around 200 metres
3.5 and 4mm hook
2-3 x 15mm buttons
Written in English US terms with abbreviations for UK terms
sc = single crochet (double crochet in UK)
hdc = half double crochet (half treble crochet UK)
dc = double crochet (treble crochet UK)
hsc = herringbone single crochet (herringbone double crochet UK) insert hook into the left vertical strand of previous stitch, then insert hook into the next stitch and pull up a loop, yarn over pull through all 3 loops on hook youtube
ch = chain
slst = slip stitch
blo = back loop only (crochet in the back loop)
** = repeat between
[ ] = in the same stitch
sc2tog = sc 2 stitches together (double crochet 2 stitches together)
Gauge
With 4mm hook
9 dc x 4 rows = 2” x 2”
Finished measurements
Chest 12-14”
Shoulder to hem 7”
Shoulder to cuff 7”
Pattern notes
Row 1 is the right side facing.
It may be helpful to place stitch markers in the ch1 spaces on the first row to mark the corner increases. If you struggle with the hsc at the corners, you could try a normal sc instead.
The ch1 at the beginning of a row does not count as a stitch.
The ch1/2 on the corners counts as one stitch.
Important: On the row after the ch2 eyelets place 1 hsc in the ch2 space and 1 hsc in each sc.
Cardigan
Ch40 using a 4mm hook
Row 1: [dc, ch1, 2 dc] in 4th ch from hook, dc 9, [2 dc, ch1, 2 dc] in the next, dc 15, [2 dc, ch1, 2 dc] in the next, dc 9, [2 dc, ch1, 2 dc] in the last. (53) Turn
Row 2: ch1, [hdc, hsc] in the first, hsc, [hsc, ch2, hsc] in the ch1 space, hsc 13, [hsc, ch2, hsc] in the ch1 space, hsc 19, [hsc, ch2, hsc] in the ch1 space, hsc 13, [hsc, ch2, hsc] in the ch1 space, hsc, [hsc, hdc] in the last. (61) Turn
Row 3: ch1, sc, ch2, skip 1, sc, ch2, skip 1, [sc, ch2, sc] in the ch2 space, ch2, *skip 1, sc, ch2* x 7, skip 1, [sc, ch2, sc] in the ch2 space, ch2, *skip 1, sc, ch2* x 10, skip 1, [sc, ch2, sc] in the ch2 space, ch2, *skip 1, sc, ch2* x 7, skip 1, [sc, ch2, sc] in the ch2 space, *ch2, skip 1, sc* x 2. Turn
Row 4: ch1, [hdc, hsc] in the first, hsc 4, [sc, ch2, sc] in the ch2 space, hsc 17, [sc, ch2, sc] in the ch2 space, hsc 23, [sc, ch2, sc] in the ch2 space, hsc 17, [sc, ch2, sc] in the ch2 space, hsc 4, [hsc, hdc] in the last. (81) Turn
Row 5: ch1, [2 dc] in the first, dc 6, [2 dc, ch1, 2 dc] in the ch2 space, dc 19, [2 dc, ch1, 2 dc] in the ch2 space, dc 25, [2 dc, ch1, 2 dc] in the ch2 space, dc 19, [2 dc, ch1, 2 dc] in the ch2 space, dc 6, [2 dc] in the last. (99) Turn
Row 6: ch1, hdc 1, hsc 9, [2 hsc, ch2, hsc] in the ch1 space, hsc 23, [hsc, ch2, hsc] in the ch1 space, hsc 29, [hsc, ch2, hsc] in the ch1 space, hsc 23, [hsc, ch2, 2 hsc] in the ch1 space, hsc 9, hdc 1. (109) Turn
Row 7: ch1, *sc, ch2, skip 1* x 6, [sc, ch2, sc] in the ch2 space, ch2, *skip 1, sc, ch2* x 12, skip 1, [sc, ch2, sc] in the ch2 space, ch2, *skip 1, sc, ch2* x 15, skip 1, [sc, ch2, sc] in the ch2 space, ch2, *skip 1, sc, ch2* x 12, skip 1, [sc, ch1, sc] in the ch2 space, *ch2, skip 1, sc* x 6. Turn
Row 8: (Divide for armholes) ch1, hdc 1, hsc 12 [2 hsc] in the ch2 space, skip 27, [hsc] in the ch2 space, hsc 33, [hsc] in the ch2 space, skip 27, [2 hsc] in the ch2 space, hsc 12, hdc 1. (65) Turn
Row 9: ch1, dc all. (65) Turn
Row 10: ch1, hdc 1, hsc 63, hdc 1. (65) Turn
Row 11: ch1, sc, *ch2, skip 1, sc* repeat to end. Turn
Row 12: ch1, hdc 1, hsc 63, hdc 1. (65) Turn
Repeat rows 9 to 12 until work measures 6” from shoulder. Continue to the bottom edging.
Bottom edging
Using a 3.5mm hook join yarn with the right side facing to the bottom right
Row 1: ch6, sc in 2nd ch from hook, sc 4, join to the next stitch of the edge of cardigan using a slst then work one more slst into the next stitch. (2 slsts in total for joining) (5) Turn
Row 2: ch1, sc 1, sc 4 in blo. (5) Turn
Row 3: ch1, sc 4 in blo, sc 1, join to the next stitch of the edge of cardigan using a slst then work one more slst into the next stitch. (2 slsts in total for joining) (5) Turn
Repeat Rows 2-3 until you get to the other side of the cardigan.
Buttonband
Continuing from bottom ribbing using a 3.5mm hook
Row 1: ch1, hdc in the first, hsc all around to the bottom of the other side. Turn
Mark out the button holes.
Row 2: ch1, hdc in the first, hsc all around to the bottom of the other side (ch1, skip 1 where the markers are). Turn
Row 3: ch1, hdc in the first, hsc all around to the bottom of the other side (including a hsc in the ch1) .
Fasten off and sew ends. Sew buttons to match the button holes.
Sleeves
With the right side facing join yarn using a 4mm hook
Round 1: ch1, hdc 1, hsc 29, slst to first. (30) Turn
Round 2: ch2, dc 30, slst to first. (30) Turn
Round 3: ch1, hdc 1, hsc 29, slst to first. (30) Turn
Round 4: ch1, *sc, ch2, skip 1* repeat to end, slst to first. (30) Turn
Repeat rounds 1-4 until sleeve measures 6” from shoulder
Cuffs
Row 1: ch1, *sc 1, sc2tog* x 10, slst to the first. (20) Continue to cuff ribbing.
Cuff ribbing
Change to a 3.5mm hook
ch6
Row 1: sc in 2nd ch from hook, sc 4, join to the next stitch of the edge of sleeve using a slst then work one more slst into the next stitch. (2 slsts in total for joining) (5) Turn
Row 2: ch1, sc 1, sc 4 in blo. (5) Turn
Row 3: ch1, sc 4 in blo, sc 1, join to the next stitch of the edge of sleeve using a slst then work one more slst into the next stitch. (2 slsts in total for joining) (5) Turn
Repeat rows 2 and 3 until you get all the way round, fasten off with a long end and sew the seam.
I would love to see your makes feel free to share #cosycottagecardi @babycrochetdesigns Instagram, Pinterest and Facebook.
*COPYRIGHT © 2023 This pattern is made for personal use only. My patterns may not be used in tutorials. You may not copy, share or sell this pattern, you may make and sell items made from my patterns in moderation but please be kind and credit me in any photos or listings @BabyCrochetDesigns as the designer many thanks*